
I’ve gotten a lot of questions over the years about how to wire up the front position lights and turn signals when converting a USDM chassis to a kouki front bumper. For whatever reason the topic has come up a few times in the last week, so I thought it might be a good idea to take some quick photos of my setup and post some details.
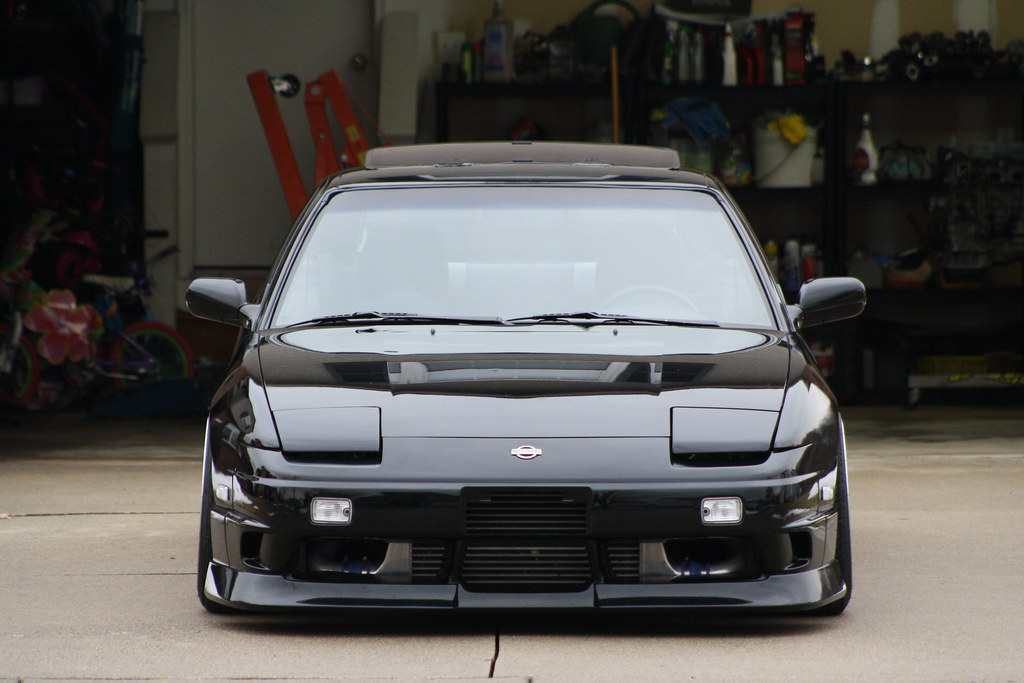 My current lighting setup- aftermarket clear side markers and aftermarket
dual function position lamps.
As you know, the chuki front turn signal has a set of three wires running to it on the chassis harness. One wire is a common ground, one is the power wire for the turn signal, and one is the power wire for the running light. This is the harness you will use to tap into for your kouki 180SX front lights. If you need to determine which is which, hook up a volt meter to one of the power wires and the ground wire. Have someone turn on the turn signal and then the running lights to see which causes the wire to have power. Then you will know which is which.
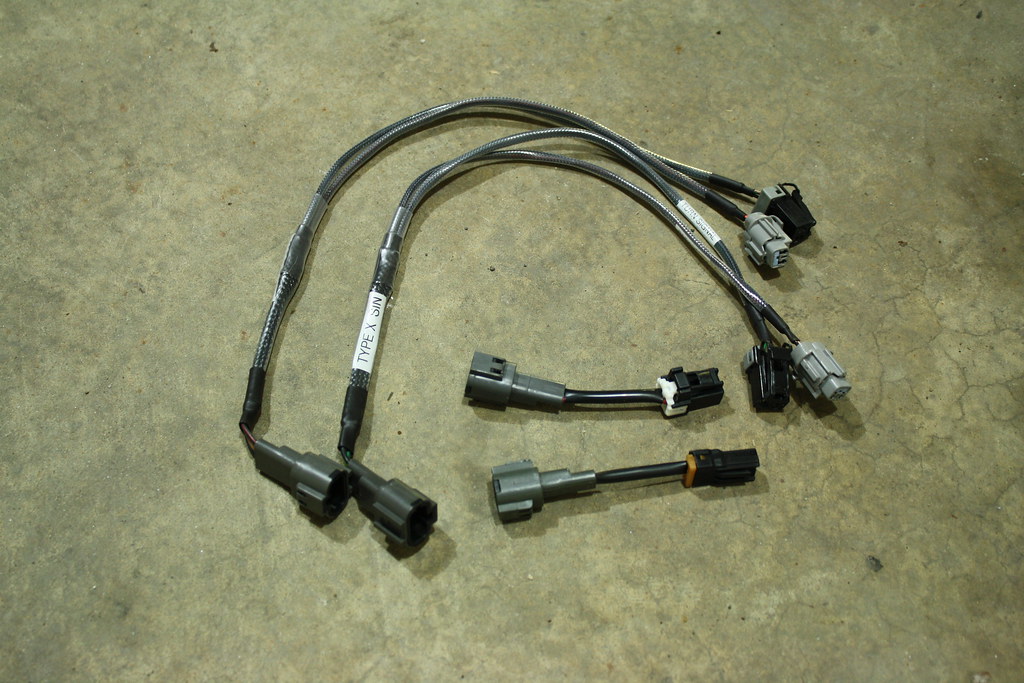 This adapter harness makes the conversion a breeze. It’s also available for Silvia front ends and kouki 180SX tail lights. Good stuff!
Back when I first converted to kouki 180SX aero in 2009, I had to come up with a hodge-podge solution to wiring the lights up. Fortunately there was a vendor on Zilvia (username driftkeni) that sells USDM to JDM wiring harness adapters that work really well. However, I have heard from many people that he’s no longer selling them and the eBay store is now gone. What was included with the kit was essentially four harnesses- the two shorter ones are to adapt the USDM side marker plugs into the JDM plugs- those are pretty straightforward. There is now a user on Instagram selling a similar kit- his username is @keyd.performance. Might be worth looking into if you’re looking for a similar product to the one pictured above now that the Zilvia vendor has sort of gone MIA. (Info updated December 2020.)
The aftermarket clear kouki style side markers (the lights located on your front fenders) do not include the necessary bulb sockets with them and the USDM socket design is different- so they won’t fit. If you want to track down the necessary JDM bulb sockets for your side markers, the part numbers are 26244-47F00 and 26244-47F10. Another solution would be to purchase a pair of OEM amber kouki 180SX side markers and use the bulb sockets from those with your aftermarket clear side markers, depending on which look you prefer. Buying both sets will give you everything you need to install them and also afford you with an option to change things up later on should you change your mind.
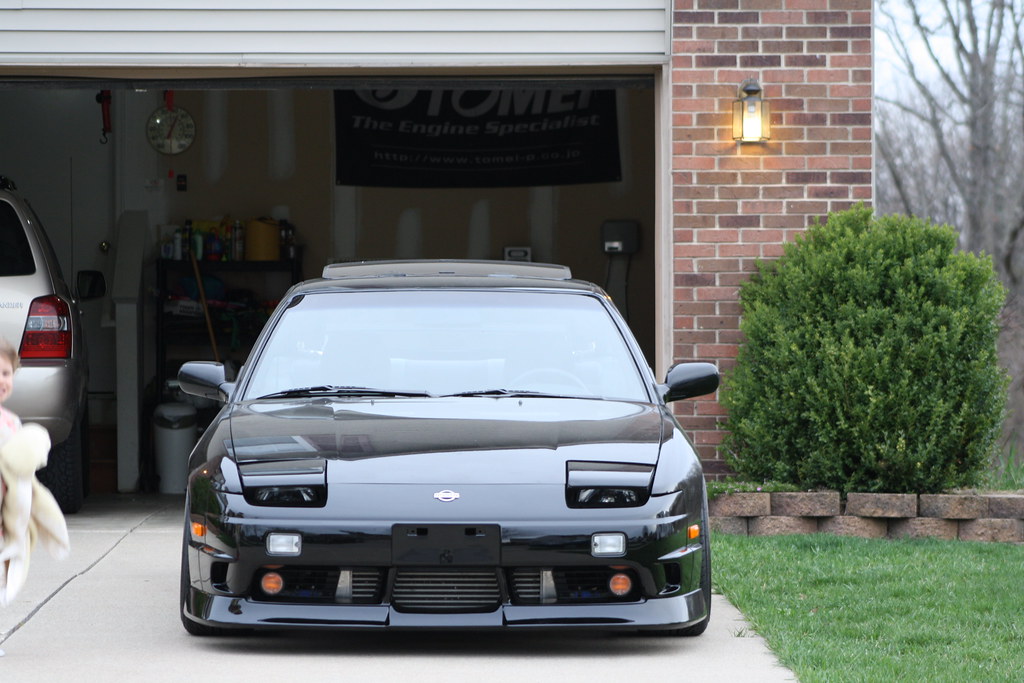 My car when I was running all OEM Nissan front lighting.
The other two adapter harnesses included with this kit are what you will use to wire up your position lamps (the clear running lights on the kouki 180SX front bumper) and your turn signals (the circular amber lights at the bottom of the kouki 180SX bumper.) If you are using all OEM lighting, these harness are a bolt-on affair- simply plug them in to the lighting plugs on your chassis harness and then into the bulb sockets that were included with your OEM kouki 180SX light.
 Here’s the back side of an OEM kouki 180SX position lamp. The required bulb socket and bulb are included. The Zilvia conversion harness plugs directly into this socket.
 This socket is also a direct fit for the running light portion of the aftermarket dual function position lamps, so it is a handy thing to have. The part number for this socket is
26240-70F00 and should actually be available stateside.
 This is the back of a kouki 180SX turn signal. Again, the bulb and socket are included with the factory units and the eBay adapter plugs directly into this socket.
 A larger 921 bulb is used for the turn signals. You will not utilize this socket for aftermarket dual position lamps- instead you will use the small socket and pigtail that are included with the aftermarket lamps. This one won’t fit the hole that’s provided.
Now here is where things get a little more complicated. It’s a popular option in Japan for people to swap out their factory kouki lighting for a set of clear side markers and “dual function” position lamps. This allows your position lamp to not only function as a running light, but also as a turn signal. The OEM amber lower kouki turn signals are then removed from the bumper for a cleaner look. This is the setup I currently have on my car. I’ve run it both ways over the years, but I think the all clear setup works well with the plate cutout. Eventually I plan to swap to a full OEM setup I have in storage, but this likely won’t happen until I paint the car.

 Here is the back of the aftermarket dual position lamp. One housing accommodates the OEM position lamp socket for the running light (with Zilvia adapter harness plugged in on the left side) and a second additional bulb socket holds an aftermarket socket and pigtail for the turn signal. These two wires are spliced into the turn signal provision on the eBay adapter harness.
If you look at the back side of my dual function position lamps, there are two bulb sockets instead of one like on the OEM Nissan position lamps. One of these bulb socket holes is for the OEM Nissan position lamp bulb socket- your running light. An additional hole and bulb socket with pigtail are included with the dual function lamps- this is your turn signal. If you purchased the eBay conversion harness I mentioned above, the power and ground wires for this harness will need to be tapped into the turn signal wiring portion of the adapter harness.
 The smaller 194 bulb (bottom) for the running light compared to the larger 921 bulb (top) for the turn signal.
I noticed that when using the dual position lamps with the running lights on that you couldn’t clear see my turn signal flashing. You essentially have two bulbs of the same size competing with each other, and when one is lit up it’s difficult to tell there is another one flashing. My solution to this was to run a small 194 bulb for the running light portion of the position lamp (the same bulb the factory uses) and run a larger 921 bulb for the turn signal portion (again, the same bulb Nissan uses from the factory. This means that the smaller bulb is lit up as your running light, but then the larger and brighter bulb blinks when you use your turn signal- making it much easier for other motorists to tell when you intend to turn. I use standard halogen bulbs instead of the supplied LEDs just to avoid the whole “fast blink” issue- and because I personally think it feels a bit more period correct. You may need to mess with resistors if you intend to run LEDs, but I am not positive about that.
One other thing to note is that just about all of the aftermarket dual function position lamps out there are the same. Circuit Sports, D-MAX, Gent5, etc. are all produced by Junyan, so they’re identical. No reason to spend more for the name on this one as they literally all come from the same place and are then re-branded. I don’t typically agree with this way of thinking and always spring to support the genuine manufacturers, but having owned a few sets I can say they truly are the exact same. The OEM lighting is much higher quality, but it’s a necessary sacrifice to achieve the proper look and functionality.
So there you have it! I hope you find this information helpful. I know there are bulbs and sockets out there that can function as both a running light and also blink as a turn signal. I have thought for years that there must be a wiring solution to allow one bulb to do both, but I have never seen one presented. If you know of an easy way to do this or a better solution than what I have explained here, feel free to drop me a line!
Thank you for bearing with me over the last couple weeks. Life has been very crazy with lots of things being thrown my way and I haven’t been able to devote the time I would like to to the blog, but I am hoping to get back into the swing of producing content now that the weather is beginning to improve. Thanks for reading and have a great weekend!
Damon

Fantastic write-up man. THANK YOU for providing part numbers!!!
Glad you found it useful!