
One key difference between the USDM S13 chassis from those in other parts of the world is the addition of automatic seatbelts. All US bound 240SX got the power seatbelt treatment, which is sort of a cool novelty in some ways- but not 25+ years later when the electronic components begin to fail. While it is a neat gadget that captures the time period when these cars were released, I sort of felt they were just a hassle to deal with and another item that could fail in the future.
The solution? Get a hold of a complete manual seatbelt conversion from a Canadian 240SX, European 200SX, or a 180SX from Japan. This was one of the first interior modifications I made to both of my S13s, with my hatch getting the manual belt treatment shortly after I bought it in 2008. Naturally, when I began building the coupe and converting the interior from brown to black, I chose to take the same route.

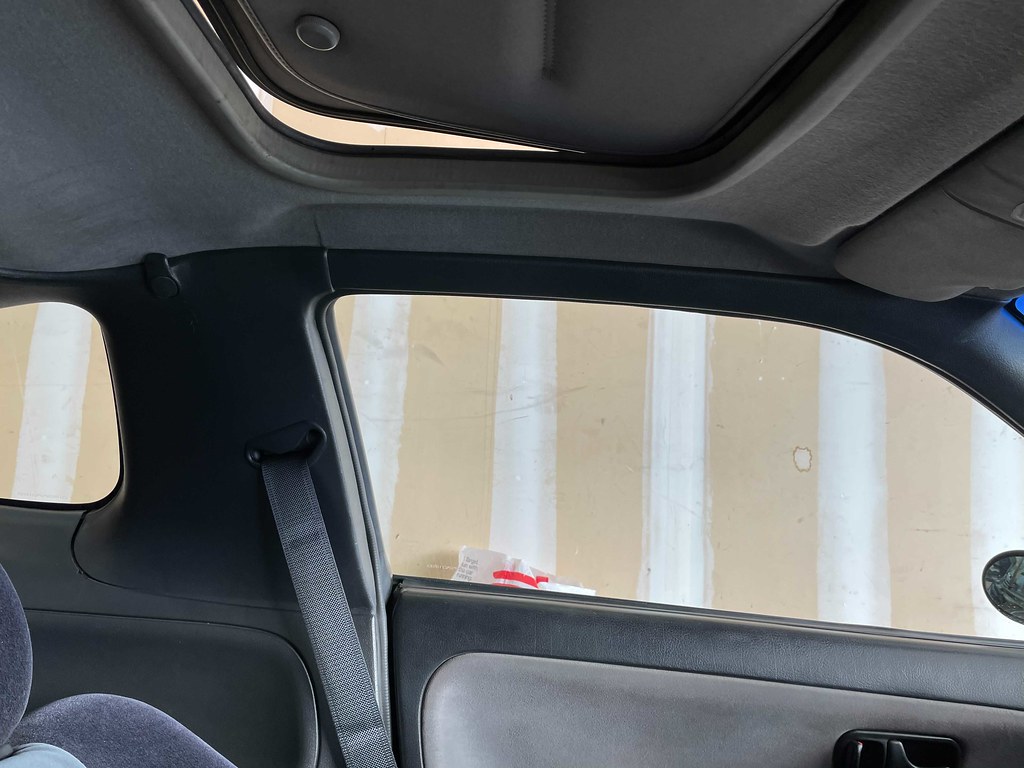
So- what’s needed to successfully convert your US S13 from electric/automatic to manual/traditional seatbelts? If you want to do it properly, you’ll need to source a pair of seatbelts, A and B pillar plastics, and a new headliner. The headliner is a detail that is often overlooked as they can sometimes be pretty difficult to source. I initially completed the conversion in my hatch without the headliner and found that there’s roughly a 2″ gap between the USDM headliner and the top of the A pillar plastics. This is due to the fact that the design of the USDM A and B pillar plastics have a space along the panels to allow room for the power seatbelt receiver to slide along the pillars on its track. Fortunately my friend Joe was able to get a hold of a Canadian S13 headliner for me and bring it over when he bought my Koguchi Power hood a few years back. This meant I was able to purchase it for next to nothing since the parts are cheap there and I didn’t have to pay for shipping.


There’s one key difference to note between the Canadian and JDM A pillar plastics. The 180SX and Silvia include a grab handle on the pillar for passengers to enter and exit the vehicle (or to grab onto during a mountain pass I guess.) While this is a pretty cool feature and I tend to always lean towards wanting whatever items from the Japanese cars I can get my hands on, it’s sort of an annoyance for 240SX owners since it is located on the driver’s side of our cars.

When I initially sourced a Silvia seatbelt conversion, I was only able to get a hold of the Japanese A pillar panels with this handle as I couldn’t find a Canadian pair like those in my hatch. The biggest headache is the fact that most people do not include the metal bracket that is required to properly connect the handle to the chassis. I was finally able to track one down on Ebay to complete my setup.
As luck would have it, Stew from Western Canada was able to find a pair of Canadian B pillar panels from a local S13 part out and was willing to ship them to me. I received them around Christmas time and ended up replacing my JDM panels with the Canadian version. Both of my cars now have the smooth, clean A pillar panels now completing the conversion. One convenient detail to note is that the A pillar plastics between the S13 coupe and fastback are identical and interchangeable, which makes sourcing them a lot easier. Canada is definitely the place to go for a set of manual belt A pillar plastics.
You’ll also notice that S13 Silvia seatbelts are a bit different than the 180SX version. They include a plastic arm to help guide the seatbelt over your shoulder. I’m not sure why there’s this distinction between the two, but from my experience Silvia seatbelts are much harder to find these days. After searching on Yahoo! Auctions for what felt like ages, I finally found a clean and functional set.

As for the B pillar plastics, those are different between the Silvia and 180SX for obvious reasons- the design of the rear quarter glass. I ended up finding the plastics for my coupe from a Silvia part out on YAJ and enlisted the help of Jesse Streeter to help bring them to the states. The shipping wasn’t exactly cheap, but the panels themselves were fairly inexpensive which helped keep the cost fairly reasonable.

The final component needed for the coupe was the headliner. After striking out with trying to find one for a coupe without a sunroof in Canada, I finally bit the bullet and purchased one from a Silvia on YAJ. Though it cost about $18 USD, the overall price rose significantly when I had it shipped over. I used the Get JPN container service to bring the headliner from Japan to California, then had it shipped via Greyhound Package Express to Michigan. It was a long and costly process, but it allowed me to complete the interior of my coupe. Once again, it’s worth noting that headliners are different between the coupe and fastback, and also differ if you have a sunroof or not.

The cost of this conversion has gone up significantly over the last few years. I’ve seen a couple conversions without the headliner sell for upwards of $800 USD. I was fortunate to snag both of my setups for far less, but it’s one thing to think about when considering going this route. For many years, US S13 owners simply installed S14 seatbelts and trimmed their US panels to work. This is a more affordable route to go if your auto belts have stopped working and you need a solution. A set of A/B pillar plastics and the belts themselves used to go for around $150-200 which was much more reasonable, but as is the case with most things S13 these days, the parts have gotten somewhat difficult to come by.
Anyway, there you have it! I hope you find this information useful. The complete seatbelt conversion is something that most will overlook and simply take for granted, but it’s a cool addition to any US S13.
I’ve got some parts arriving for the hatch today and plan to spend some time in the garage this weekend. I should have some more info to share soon! Have an excellent weekend.
Damon
