
Well, I decided after last week’s post that it was time to dive into replacing my entire chassis harness on my hatch. I was a little hesitant to tear into it this late into the offseason, but with all of the other “OEM-inspired” things I was taking on during the winter months it seemed like the right thing to do. I was greeted by a surprise 3″ of snow this morning which was a good reminder that we still have a ways to go before nice weather arrives- not to mention the terrible condition that Michigan’s roads are in right now.


The first order of business was stripping the interior. At this point in my life I have lost track of how many times I have removed the complete interior of my S13s, so it almost feels like second nature. I spent a few hours in the garage last Saturday night, and before I knew it I had the entire interior – dash and all – out of the car. I always breathe a sigh of relief any time I successfully remove my defrost vents from the dash.


I took a bit of time to clean up the donor harness as it was of course covered in years of dust. A lot of the electrical tape on the harness had began to lose adhesion and fall off, so I also spent some time wrapping a few sections of it. Once that was taken care of, I began removing my existing body harness from the car. Most of the back half of the interior harness is still in pretty good shape with the exception of the wiring that runs through the hatch itself. I cut that back in 2008 or so when I bought the car and replaced the rusty hatch that came on the car. My tail light harness had also been cut up when I wired kouki tails around that same time. It’ll be nice to have fresh wiring in place going forward.

A while back I sourced a complete rear wiper assembly and harness from someone parting out their S13. Once I finish replacing the chassis harness and confirm it all works properly, I’ll likely go ahead and reinstall it. This isn’t something I ever thought I would want to have on my car again from a looks standpoint, but I kind of dig it in my old age. It would be great to have a functional rear wiper again. More details on that project to follow.
Replacing everything from the driver’s seat back was surprisingly easy and pain-free. All of the plugs and wiring matched up which was a big relief. I elected to remove my battery from the trunk area and will be putting it back in the engine bay again like I did on my coupe. It has always annoyed me to have the battery in the trunk so this should be a welcome change. I should be just about ready to install the back half of the interior now, but I am thinking about replacing my rear speakers and finally getting a working radio in this car. I’ve said it many times and never done it over the years- maybe it will finally happen this time?!

This is the point where things started to get scary. I ended up removing the dash bar and all of the chassis wiring that I had stashed behind the dash when I did my wire tuck ten years ago. I had routed it a bit wonky when I did the tuck, so some things had to be cut out completely. It’s always a scary feeling chopping into the wiring harness of a functioning car.
With everything on the interior ripped out, I had to remove the front fenders and bumper to access the rest of the chassis wiring. Since most of my harness and the fuse boxes were tucked behind the dash, I didn’t have much wiring running through the fenders- the headlight motors and plugs for the front lighting were just about the only items.

I stepped back and looked at what I had done to my car. The entire interior was removed as well as most of the front end. All of my chassis wiring lay on the garage floor in a tangled chopped up mess. I only paused at this moment for about five minutes, but I definitely started to panic. Was this the end? Would I part out the car and move on for good? After my miniature panic attack, I started routing and plugging in the new donor harness along the dashboard area. About an hour later, I had almost everything plugged in and in place- what a relief. It took a bit of trial and error, but I eventually found a match for each plug. I was worried the donor car may not have had all of the same options as my car, but from what I can see so far everything seems to be in order.


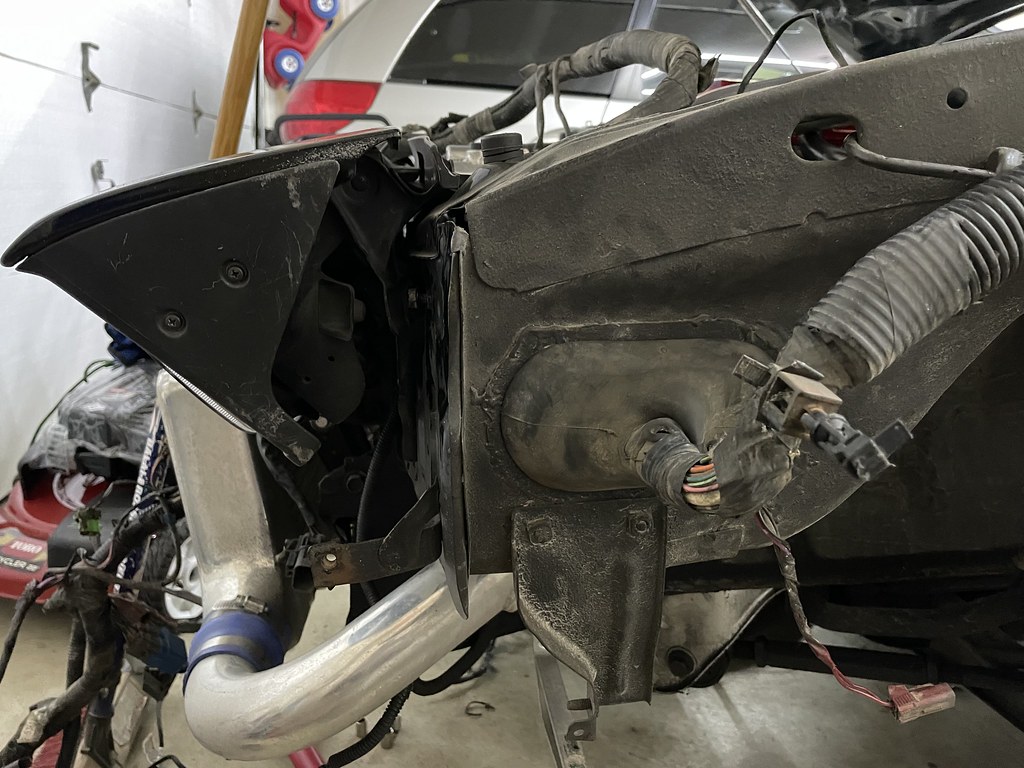
After connecting the engine bay portion of the chassis harness to the large white connector behind the dash, it was time to begin undoing all of the areas my friend Mike welded closed for me back in 2012 when I shaved the engine bay. I removed my faux AC box from behind the dash to see where the holes for the AC system used to reside. In order to run AC in the car like I hope to, I would have to recreate all of those same holes in the chassis. I decided to start with the drain tube for the evaporator. I used a hole saw bit, a dremel, and a file to recreate the hole. After messing with it for a while, I was able to reinstall the rubber drain tube that I saved from a parts car. Fortunately it fits well and you shouldn’t be able to tell I ever messed with it when glancing at the engine bay.


I then moved on to the pass through for the chassis harness up at the front of the car. You guessed it- I welded those shut too when I shaved and repainted the bay. I want the chassis harness to route the way it did from the factory, so I had to recreate the factory holes once again in order to achieve this. I made a template and started hacking into my beautiful engine bay. After working on it for quite a while, I was able to pass the fuse boxes through and install the rubber grommet in the hole I recreated. It’s not as beautiful of a cutout as it was from the factory, but again- with the grommet installed you can’t tell I ever messed with it.


So that’s where things stand with the chassis harness replacement at the moment. I still need to drill two new holes for the evaporator lines in the firewall, as well as a new hole for the engine harness to pass through. I also need to recreate the large cutout on the passenger side of the engine bay. It’s a fairly noisy process and I am always afraid I am keeping the girls awake, so I hope to sneak into the garage during the day this weekend to try to make more progress while they are awake.

This is definitely a daunting process, but I am very pleased with the progress I have made so far. I am hoping to devote three nights a week to working on it so that I can have it in good shape by the end of April. I am notorious for missing deadlines that I set for myself, but it certainly helps with motivation to have these goals in mind. With any luck I will be nearly finished with the wiring by my next update and can move on to putting the car back together.
Thanks as always to everyone that stops by to check this out- it means a lot every time! I hope everyone has a great weekend.
Damon

Call me an old man, but I’ve always loved rear wipers. And every time I get a Sedan, I miss them. Can’t beat that functionallity! I wish 90s Sedans came with rear wipers, as they did in Japan!
Another great read. Thank you!
Definitely true! I hope I can get it working. It would definitely be a nice thing to have. Thank you as always for the comment!
The one thing I have enjoyed (and very glad you discuss on these blogs) is you showcasing the things you regret doing 10-13 years ago. Being a teenager and reading your build thread on zilvia. The majority of the stuff you were doing I wanted to mimic because it simply made the car look cooler.
Fuses in the glove box, shaved bay, aggressive fitment with chrome wheels etc.. Now seeing you go back to a more calm and stockish setup with your car lets me know (and others know) sometimes its best not to go all out with parts to make the car look cooler but just to do things a bit more simpler.
You’re pretty much saving all of us from making the same mistakes you did and I appreciate that haha. Nice read Damon
Thanks a lot Lawrence! Always appreciate what you have to say. You’re totally right, I would be making fun of myself for my current decisions ten years ago. It’s funny how that works out. But at least all hope is not lost- it’s just going to take some work to undo it all.