
This post is a part of an ongoing series about the history of my S13. If you missed the previous entries, you can find them here: Part 1 Part 2
Fall 2009: A year had passed since I bought my S13. I felt that I had greatly improved the car overall with a reworked suspension, interior, and exterior. However, I didn’t manage to put a lot of miles on the car during the season due to little engine related issues constantly popping up. I was also fairly consumed with wedding planning, the honeymoon, starting a new job, and moving to a new city- but I think engine reliability also played a large role in a lack of miles being put on the car.
With my turbo on its last leg, I needed a replacement. It didn’t make much sense to go through the effort to install another used turbocharger, so I decided to upgrade. After doing some research, I found that it might be best to pull the drivetrain all together and go over it to make sure my engine and transmission were up to the task of supporting a larger turbocharger. My cousin Nick and I pulled the engine sometime around Christmas of 2009 and my plans started to take shape.

I hauled my SR20 short block to my friend Tim’s place in Grand Rapids about an hour West of my home and two hours away from where the chassis was stored. I was living in an apartment at the time and wasn’t confident in my ability to rebuild an engine, so it made sense to do it under Tim’s supervision as he was a mechanic by trade. I spent the next several months doing research, collecting parts, and refurbishing my engine from the ground up.

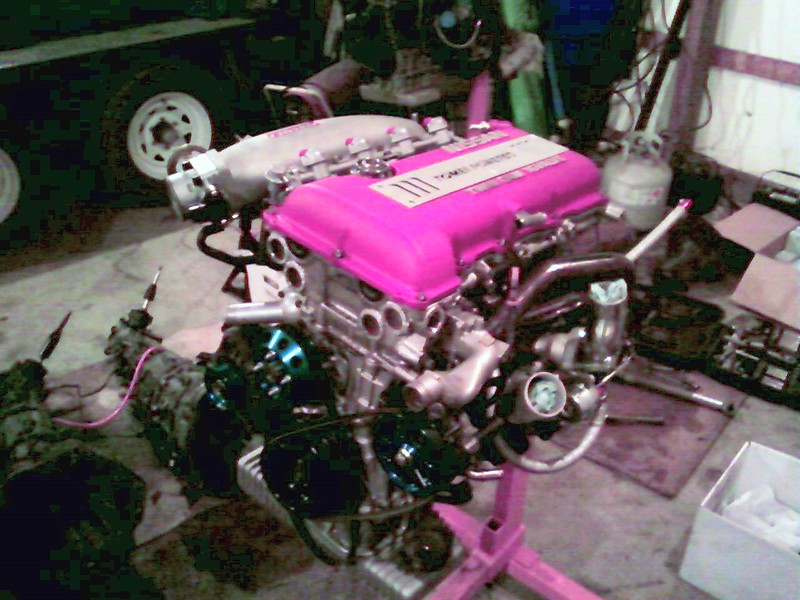
The heart of the new setup was an S15 GT28 OEM Garrett turbocharger. I liked that this turbo was a stock frame/bolt on solution that would make a good amount more power but remain reliable. Additional supporting bolt ons were added including a GReddy intake manifold, oil pan, and intake setup for use with the larger Z32 MAF sensor. I tore the engine down to the block but decided to leave the bottom end in place as everything seemed to be in order and I planned to keep power output somewhat mild. I reassembled the engine with a full OEM gasket kit, Apexi head gasket, and a number of OEM replacement items including freeze plugs, coil packs, oil and water pumps, and timing chain kit. A couple other aftermarket goodies were tossed on to round out the rebuild: a Tomei turbo manifold, NISMO fuel injectors, and a set of Tomei poncams.

While I was gathering items for the engine overhaul, I also began to spend more time on Zilvia.net. I ended up getting hooked on the original Kouki 180SX thread and fell in love with the optional late-model aero the 180SX wore when sold in Japan. Inspired by other stateside examples at the time like BH and KurruptR, I sold my existing aero setup to my friend for his car and began to source the necessary parts for the exterior conversion.


Slowly but surely I managed to collect all of the necessary exterior items through the course of the winter as the engine was being built up. I was able to find a full kouki 180SX bumper with front lip from an importer and picked up a used pair of kouki side skirts and a wing on Zilvia. I found a complete rear valence setup to replace my partial kit that was on the car as the center portion was missing. I also chose to add the kevlar RPS13 rear tail light panel, DMAX clear position and side marker lamps, and a pair of Ganador mirrors.

Progress was slow with so much on my plate and this portion of the build seemed to take forever. My engine and my chassis were both located over an hour from where I lived, so it was hard to find the time to make progress on either of them. As the weather grew warmer I was able to have all of the new aero painted and install it on the car. Things were finally beginning to take shape.


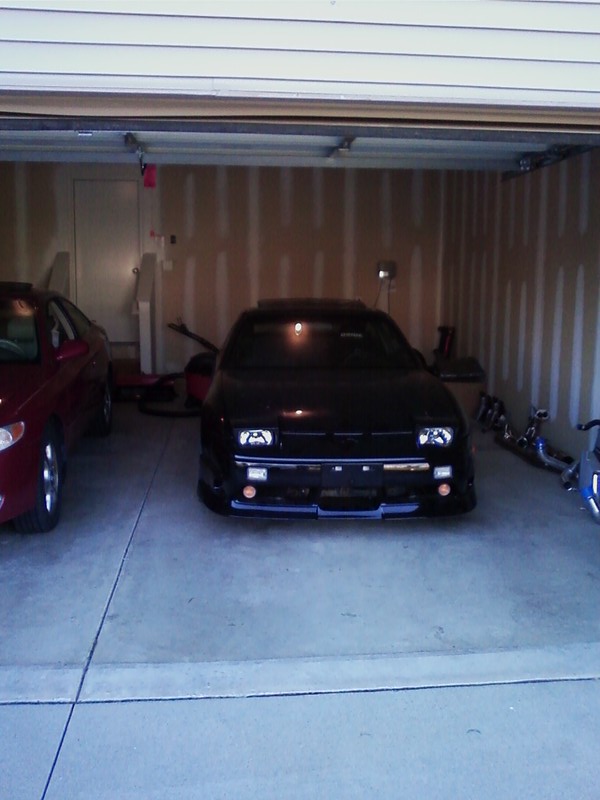
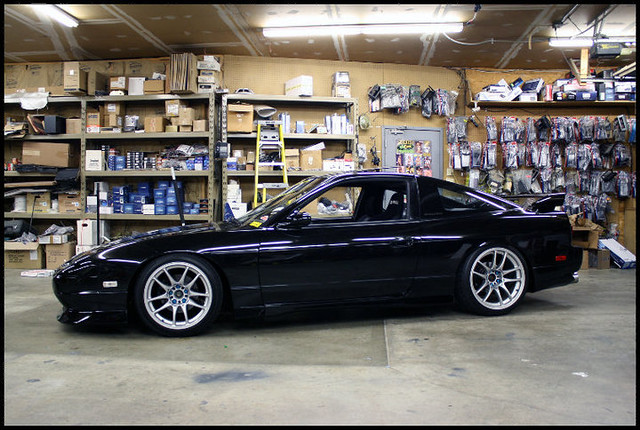
In May of 2010 my wife and I purchased our first home and were able to move in on Memorial Day weekend. This meant that I finally had a garage of my own to work on the car in. Before long, my cousin hauled the chassis to my house and I brought the engine home from Tim’s shop to begin putting it all together. A couple other items were changed during this time including a set of 17/18 silver Work CR Kai wheels, Work lug nuts, AEM digital gauges, a kouki 180SX passenger and rear seat, and a Bride Zeta III bucket seat.


When the engine was finally assembled, my cousin Nick and I spent a long Saturday afternoon dropping it in the car and beginning to button everything up. It was a great feeling to see the engine back in the car as this was my first time ever pulling and installing an engine. I was terrified that the car wouldn’t start or would jump timing when I fired it up. We began to install all of the support items at this point which included a bunch more new parts: a Driveshaft Shop driveshaft, Cusco engine mounts, NISMO transmission mount, Parts Shop Max Cobra downpipe, and a DMAX catback exhaust.

With everything bolted in, I began to add the final parts needed before I could start the car up. I chose to go with an Apexi Power FC for engine management and found a local shop that had previously tuned my Solara that had the ability to tune the Apexi system. After getting everything in place and holding a couple of vacuum ports closed, Tim was there with me to start the car up for the first time in about ten months. I’ll never forget how good it felt to get that car running.

By now it was nearly August and the season was beginning to slip away before I got to enjoy it. A couple friends I met through Zilvia that had Power FC experience came over to help me put a base map on the car that I purchased from a tuner on Zilvia. This would allow me to get the car to the dyno and have it tuned properly. With the base map on the car, I drove it to work a couple of times to be sure it held together before heading to Monkey Wrench and having the car tuned. There were a couple kinks to work out after that, but the car was finally tuned and on the road!

Not long after I thought I had everything under control, the car shut off during a drive over to stay with my in-laws one weekend. When I tried to start it, I realized that the hazard lights were the only thing in the car that had power. We had the car towed to my in-laws’ house and after tearing into it I found that the fuse boxes had filled with water, blowing the 75A alternator fuse and a couple of relays. By mounting the fuse boxes in the fender wells upside down, I allowed them to become filled with water. After thoroughly drying everything out and drilling holes in the fuse box covers, the car was back on the road once more.

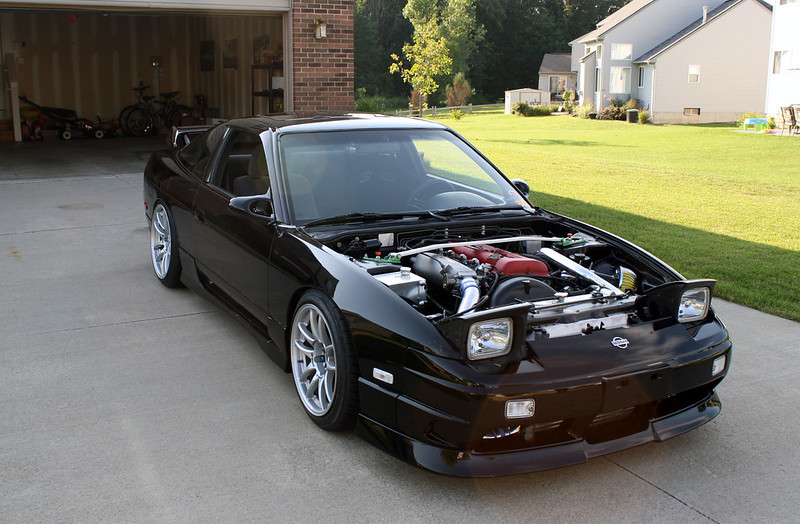
At this point it seemed that people began to take notice of the build a bit. The exterior was much more aggressive than the previous iteration and my reliability issues were finally sorted out (aside from the fuse box issue.) The bump in power made the car a blast to drive. It was around this time that my good friend Kyle messaged me on Zilvia and invited me to come down to Toby Broadfield’s house for his annual Nissan BBQ in September. Toby’s car was one of the first S13s that inspired me when I bought it, so I was honored to be invited despite their constant heckling.


I was really nervous about driving the car six hours South to Illinois after such an extensive rebuild. I remember anxiously watching the knock meter on my Power FC and wondering if the engine was going to blow up. Thankfully I had an awesome time and the car never missed a beat during the trip. Kyle, Toby, and their friends all turned out to be great people and we had a good time. While I was there Toby gave me a hand with wrapping my door panels in black Bride fabric. It was awesome to see the master at work!
I’ve been trying to cover about a year at a time in these posts, but this one is getting pretry wordy. I think I am going to stop there for today and pick up next time with a very special message I received from someone shortly after Toby’s BBQ. Thanks for reading!
Damon

Pingback: The Story of my 240SX: Part 4 | CamryOnBronze
Pingback: The Story of my 240SX: Part 5 | CamryOnBronze
Pingback: The Story of my 240SX: Part 6 | CamryOnBronze