
I gotta be honest with you- when the Governor of Michigan announced today that the Shelter In Place order was being extended from April 13th to May 1st, it kind of knocked the wind out of my sails. I knew it was coming and even predicted the date it would be extended to, but I think the fact that the sunshine and near 70º temps that we enjoyed yesterday had faded to snow and 40+ MPH wind gusts contributed to me feeling a bit defeated upon hearing this news.
It’s for the best, and it makes sense for everyone to be staying home and trying avoid going anywhere, but man is it tough to not spend time with family and friends or be able to go out to stores and other places as we please. It has definitely made me thankful for so many things that I previously took for granted. Michigan currently has the third most cases of any state which is pretty wild to me, but I don’t know the reason for that. Things are expected to peak about a week from now from the sounds of it, so hopefully everyone staying home helps to continue moving things in the right direction. We’ve got a ton to be thankful for and I really have no reason to complain. I’m looking forward to the return of warm weather and COVID-19 being a thing of the past. It feels so far away right now, but I am sure things will return to normal before we know it.
With the added stress of working from home with three little girls running around, my alone time in the garage every once in a while has meant more to me than ever. I love being with my kids and enjoying time with my wife in the evenings, don’t get me wrong- but it’s great to have a hobby and an escape that is purely my own to enjoy every few days. After getting the coupe running and celebrating Hattie’s sixth birthday about a week and a half ago, I spent a few nights continuing my progress on the car.


Knowing that both of the SR20s in my garage fire up and run feels like a huge hurdle has been cleared. I decided next to continue working on assembling the interior. I started by transferring the VIN plate to the replacement crack-free dash I sourced from a previous part out and bolting that into place. I was lucky enough to part out a few cars last fall that were completely stock, so when I took those apart I was sure to bag up every screw, clip, and bolt in individual baggies and label them for when the time came to assemble the interior in my own car. I had duplicates of a lot of them, but so far I’ve had every single item I needed to put things together properly- so nice!

A few months back, I purchased a 180SX gauge cluster as a donor and swapped the tachometer into my existing DOHC cluster so that it would display the correct redline for the SR20DET swap. After doing so, I installed a brand new cluster lens that I sourced from Japan. I think I lost those photos when my phone bricked a while back, but you get the idea. The refreshed cluster looks great bolted into the dash and was probably due for a clean up considering this car has nearly 350k on the clock.


After bolting the dash and cluster in place, I installed the radio and DIN pocket, HVAC controls, and a clean set of defrost vents I had been saving. This is always a stressful experience, but fortunately I got them in place without any damage.
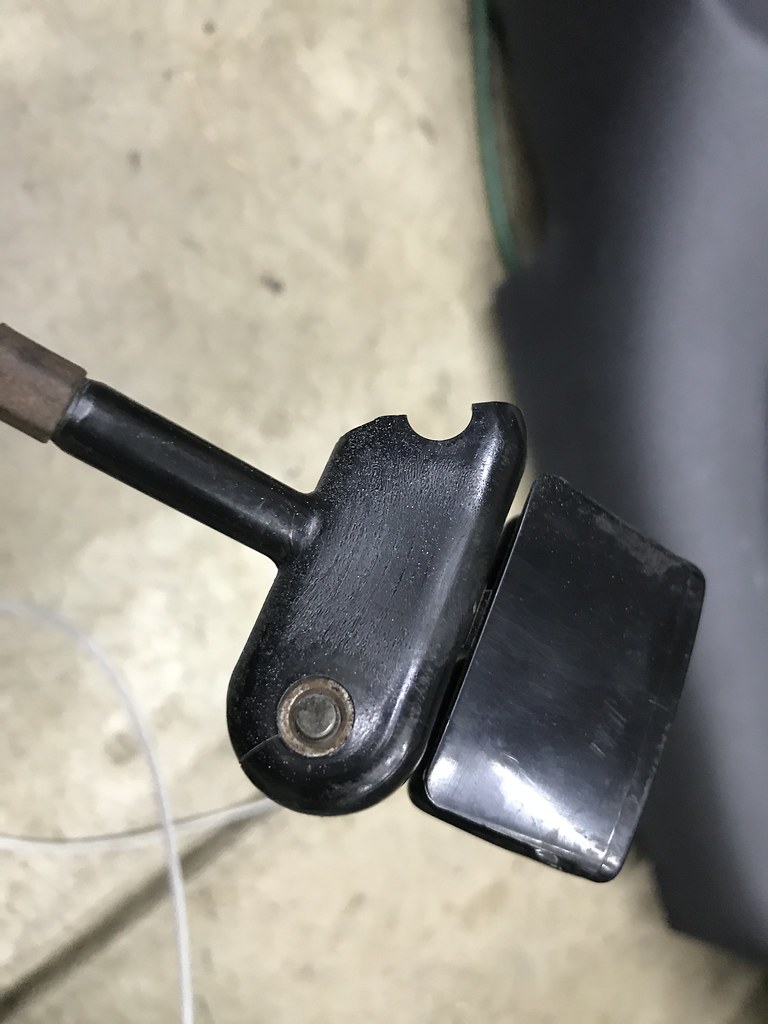 Still usable, but a fresh hood release cable and handle was too tempting.

The hood release cable on this car had a broken mounting point, so I decided to purchase a new one. Though they were available just a few months ago, I found that they had been discontinued by Nissan North America. This has been happening to me more and more frequently as of late- a sign of things to come for the aging S13 chassis. Fortunately the part number for the 180SX is the same, so I was able to source two of them from Japan- one for the hatch as well. I installed the fresh hood cable before bolting up the lower trim panel under the dash.
 Apologies for the terrible photo… but you can kind of tell there’s a handle there.
One issue I ran into when installing my Silvia seatbelt conversion was that I didn’t get the metal mounting bracket for the A pillar handle with the one I purchased from Japan. The 180SX and Silvia had an “oh sh*t handle” (for lack of a better term) on the passenger side A pillar, whereas the US and Canadian cars did not. I would prefer to have the Canadian A pillars as they look cleaner (not to mention it doesn’t make sense to have a handle on the US driver’s side) but wasn’t able to find a set like I have in my hatch- so I had to settle. I wasn’t able to bolt the handle in place without the metal bracket and had a heck of a time finding one on the auctions, but finally came across one on eBay from a JDM S14. It looked similar enough and the price was right, so I snagged it. I had to modify it slightly to allow for the clips on the pillar plastic to pass through, but it otherwise fit well and bolted right up.


In the back of the car, I installed the large rear plastic panels and a clean back seat I scored out of a parts car. Fortunately the rear seat belts were included with the Silvia manual belts I bought from Japan since the original ones in this car were brown (as was the rest of the interior.) Things are sitting relatively complete at the moment in the interior- I still need to finish trimming the carpet and install things like the lower kick panels, glove box, center console, shifter trim, etc. but hope to have that finished up fairly soon. I haven’t sourced a pair of seats for the car just yet. I would love to have some nice old school Bride buckets or something like that obviously, but it likely won’t be in the cards any time soon. I’ll probably settle for a pair of S14 seats if I can find a pair locally in decent condition and hopefully upgrade someday down the road.
 Before hammering…
 After…
 Chassis wiring tucked up over the metal seam on the chassis to avoid the front tires rubbing through the wiring- a classic S13 task. This is the easier of the two sides.
Next on the docket was addressing the front fender wells. I sort of forgot about hammering all of the metal seams flat when I undercoated up there (it’s been about 11 years since I last did this) so I had to go back and take care of that before patching up the fresh undercoating. I next tackled tucking the chassis wiring and hood release cable up out of the way to provide clearance for the tires at my desired ride height. This was another task I had not tackled in many years, but luckily I was able to get some practice and help Jimmy out with it on his S13 when I visited a while back to help jog my memory. I think clearance should be good, but maybe I’ll pick up some Auto Collect Storm chassis harness shields in the future just in case.


I had been dreading the fender harness tuck job so it felt great to have that finished and out of the way (literally.) This meant I could move on to executing the Silvia front conversion. I’ve dreamed of completing a Silvia front end swap on an S13 ever since I helped my friend with his back in 2007, so I have been really anxious to see all of the items I have collected over the last two years come together. My Silvia fenders are used and have some imperfections, but for the price I got them for I couldn’t pass them up. I’ve owned three or four pairs during the process to try to piece together as clean of a pair as possible without breaking the bank. I thought they were fairly bent up, but after some advice from my pal Logan down in Houston, I got them to fit really well along the doors and hood with minimal effort. This put my mind at ease knowing they should come out pretty nice once they’ve been cleaned up and painted. I’ll need to go back and roll them at some point though, along with the rear quarter panels.

 The first of many, many cuts to get enough clearance for the intercooler.
With the fenders and hood in place, it was time to tackle another job I’ve really been feeling anxious about- trimming my genuine Silvia aero bumper to clear the TRUST front mount intercooler. I was on the fence about this since this bumper is fairly tough to find these days and they aren’t exactly cheap. I even came close to running a factory side mount intercooler just to have perfect bumper fitment and to avoid hacking it up, but ultimately I gave in and decided it needed to be done. After some mock ups and measuring, I slowly started hacking away at the bumper.

This task was no joke- I probably mounted and removed the bumper 25 times, shaving away more material each time to try to get it to sit properly. It still isn’t perfect and I have some fine tuning to do, but I finally got the bumper and crash beam trimmed down enough to clear the intercooler and allow the complete bumper assembly to slide into place.

I next decided to install my OEM optional Silvia side skirts and rear valences to get an idea of what the complete package would look like. These are just sort of popped on the car for now, and obviously they are all different colors- but it was really exciting to see everything on the car at once. A lot of people prefer to run chuki 180SX side skirts on the Siliva since they are more flared along the bottom edge and look slightly more aggressive, but I’m a dweeb and just had to have the Silvia skirts. I think they match the lines of the coupe a bit better- even if they are less noticeable.

A day or two after I got the bumper and aero setup on, I was delighted to receive word from Jesse Streeter that my wheels I had ordered about seven weeks earlier had left Japan and were on their way to my house. I wasn’t sure how the whole COVID-19 situation was going to impact shipping and production, so to see the DHL truck pull up on a sunny evening earlier this week put a big grin on my face.

I really wanted to try my hand at a small wheel setup on the coupe for a number of reasons. Aside from it being something different and a bit out of my comfort zone, I really dig the look on coupes specifically for some reason. I also like the fact that I could leave the car four lug and save some cash instead of diving into a five lug conversion and Z32 brakes like I have on the hatch. I wouldn’t doubt that I will do that someday down the road, but I am geeked about trying this out.

I went with a set of Work Equip 40s in the standard brut silver face with polished lips and black hardware- nothing custom or crazy. I debated a staggered setup, but decided it would be cool to run the same sizes on all four corners- so I went with 15×9 -4 all around. Shoutout to Elvis of StanceNation fame for being supportive of me essentially copying the setup on his Silvia (not exactly, but to an extent) and helping confirm the specs I had in mind would meet my goals. I felt a little bad going this route since his car is so well known, but when a formula works it just works. I don’t often set out to do something groundbreaking or that no one else has done before, so I’m feeling very content about the direction. I think the color of the wheels will look amazing on the all black exterior (when the car is finally painted someday.)


With the wheels in my possession, I was dying to see everything mocked up. I tossed a wheel on the rear of the car and jacked up the rear suspension to grab some pics, but Jimmy convinced me to mock up the front as well. I wasn’t sure how I was going to do this since I don’t have tires or coilovers just yet, but I was able to rig something up with the help of some garden pavers, a scissor jack, my floor jack, an old coat hanger, and a pair of vice grips. It was a little sketchy, but it got the job done!


Though I had mocked up the Silvia front previously, I had never bolted things in place properly or installed any of the lights I had sourced. I was fortunate enough to purchase everything brand new through RHD Japan’s OEM store (among other sources) over the span of about 18 months, so I was hesitant to take that stuff out of the boxes and slap it on the car. I didn’t want to risk any of it getting damaged so I had been avoiding it. But with the wheels here and the rest of the front end in place, it was time to get an idea of what the finished product might potentially look like. Part of me didn’t even want to use those lights, but what’s the point in keeping things in boxes for the rest of your life?


Nothing beats the feeling of taking a few steps to observe for the first time what you have poured so much time and energy into. It’s the feeling that keeps me going with this hobby- and probably the reason I am constantly changing things on my cars. Researching what’s needed, tracking down and collecting the hard to find goodies, and installing them is an adventure that I enjoy so much. To finally see a running (more or less) SR20DET swapped S13 coupe with a complete OEM aero setup and Silvia front end sitting in my garage next to my hatch was an incredible feeling.


I love the way it’s all coming together. I think the Equip 40s are going to complement everything perfectly and produce a pretty cool look. Dialing the ride height and camber in is going to be a process, but hopefully I don’t regret the specs I have chosen.

 Still some trimming and adjustment needed here, but I am relatively happy.
 Lots of body work needed… but it will get there someday.
There’s still a very long road ahead, but the sense of accomplishment I feel right now is akin to the way I felt when I first installed the complete kouki 180SX aero and CR Kais on my hatch back in 2010. To see such a transformation on a junky old rolling chassis that I picked up for free feels great. Sure, it’s still eight different colors on blown out suspension and bad brakes, but for the first time it feels like the end goal is within reach. I’m really excited to continue making some progress on the car. While there are still a number of items I need to complete it, it feels like the bulk of it’s here- it’s just up to me to put in the hours and executing the actual building.
 Alexi wanted in on the glamour shots- she is my youngest at two and a half.
 Hattie just turned six a little over a week ago.
 Kinsey will be eight this summer… which blows my mind.
There’s talk of furloughs coming at my job, but I have yet to hear how it will impact me. I’m crossing my fingers that I am able to continue working since I have been doing a ton of projects related to COVID-19 and I am probably the busiest I have ever been, but time will tell. I’m sure everything will work out in one way or another, but these are definitely uncertain times. I’m hopeful I can continue to tinker though as it provides me with a healthy dose of sanity during all of this craziness. I know many people are in a much worse situation, so I really have nothing to complain about.
Thanks a lot for coming along on this journey with me- I hope you are as geeked about the mockup photos as I am! Looking forward to continuing with this project and making some more progress in the weeks ahead. Stay safe and stay sane everyone- take care of each other and have a great Easter weekend!
Damon

love the progress! that front bumper is 👌👌.
Thanks Yuri!
This is great.
Thank you sir!