
I’ve decided to embark on a years long restoration of my S13, as opposed to continuing to make further aftermarket modifications. I will attempt to provide helpful information for other members of the community should they also decide to follow this pursuit. I hope to publish new content every Friday at Noon EST. This is the first of such posts- more to come!
Interior improvements have always been one of my favorite aspects of building my S13. I remember thinking in 2008 when I bought my 240SX that it was going to be pretty tough to save it, but by today’s standards I was actually dealt a pretty good hand.
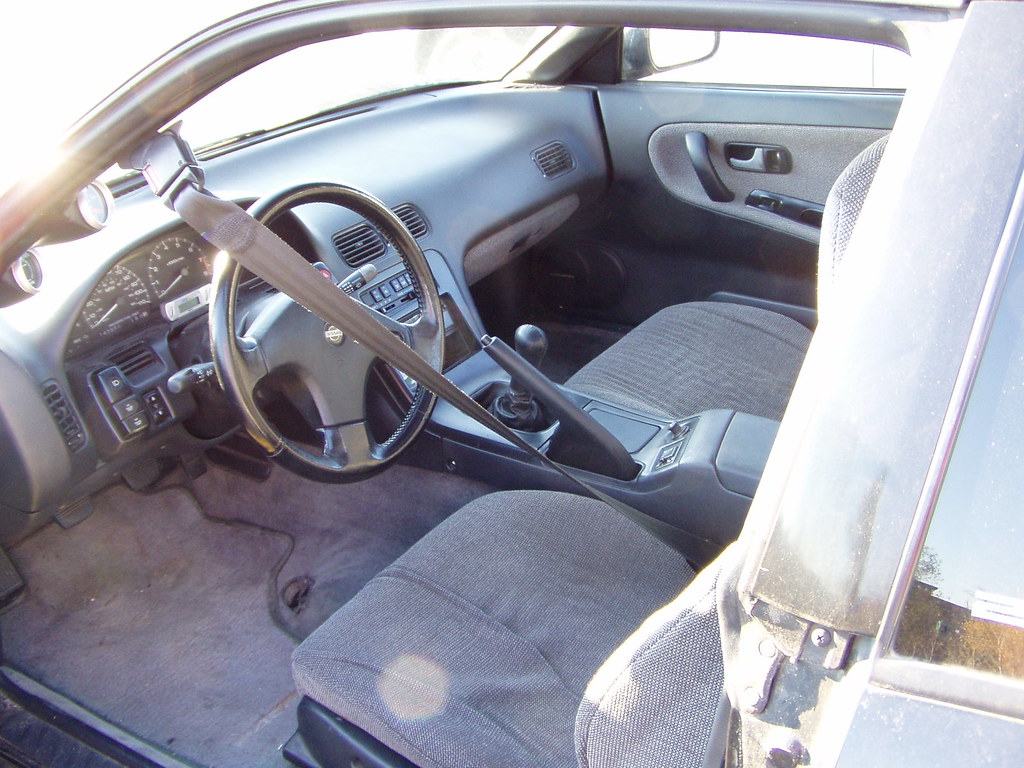 My S13’s interior when I bought it circa November 2008.
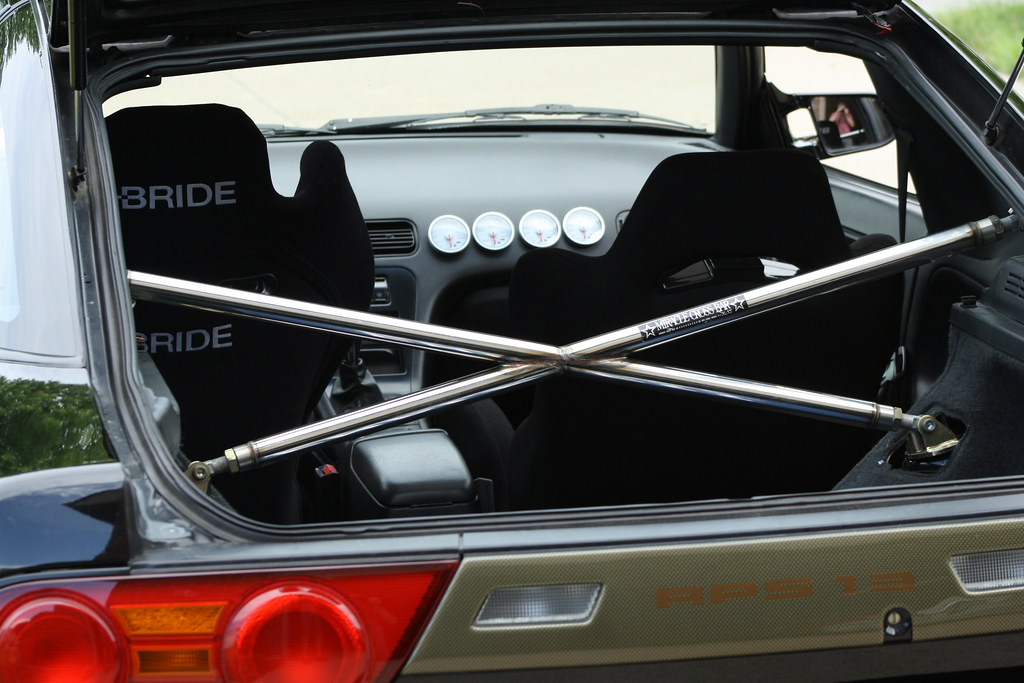
My interior has been through numerous iterations over the years ranging from tame to wild. In 2016 I went back to kouki 180SX seats (after running a set in 2010 and most of 2011) and reinstalled the rear seatbelts I had removed many years prior to allow my two daughters to ride in the car with me. The convenience of a set of factory seats was great, but I ended up returning to a Bride Maxis and Brix combo with a NeXt Miracle Cross Bar for the 2017 season. My daughters were bummed they couldn’t ride in the car anymore, but my wife and I were expecting our third daughter at the time and I figured we wouldn’t really use the car for that purpose much anymore.
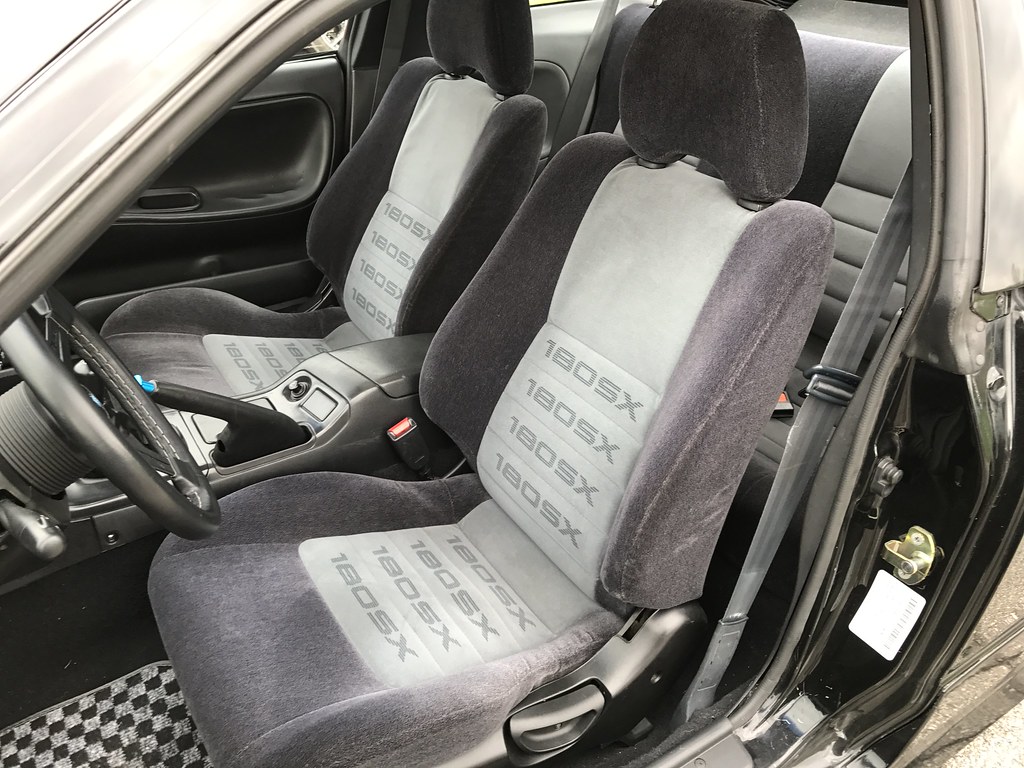
Fast forward to this spring and I was itching for a more convenient solution again. My oldest daughter is in kindergarten now and I wanted to be able to drive her to school in my S13. I also wanted to begin restoring the car and needed to free up some funds to do that, so it made sense to sell some of my interior items like the Bride seats to make the switch. My good friend Liam brought over a clean set of 180 seats from a car he was parting out in Canada which was a huge help. After cleaning them up a bit I installed them and have been enjoying them for about a month or so now.

 I attempted to source new plastic covers for the rear seat bolts and sliders from Japan as they have been discontinued here in the states, but I found that unfortunately they aren’t available overseas anymore either. Thankfully a couple people from Instagram offered to send me theirs. It’s really cool to have small details like this that have been missing from my car for years.

 I think my next interior modification should be cleaning it…
I wasn’t sure how to get the rear seatbelt covers to stay in place. It had been close to a decade since I removed them and I couldn’t remember what they were held in place with. Thankfully I found the part number (84995-75N10, you will need four total) and was able to order replacements. They’re now held securely in place. It has been really fun to take my two older daughters around town in my car again this spring. I’ve said it many times before, but I think this configuration is here to stay. Like they say about kouki 180SX seats- the third time’s the charm, right?
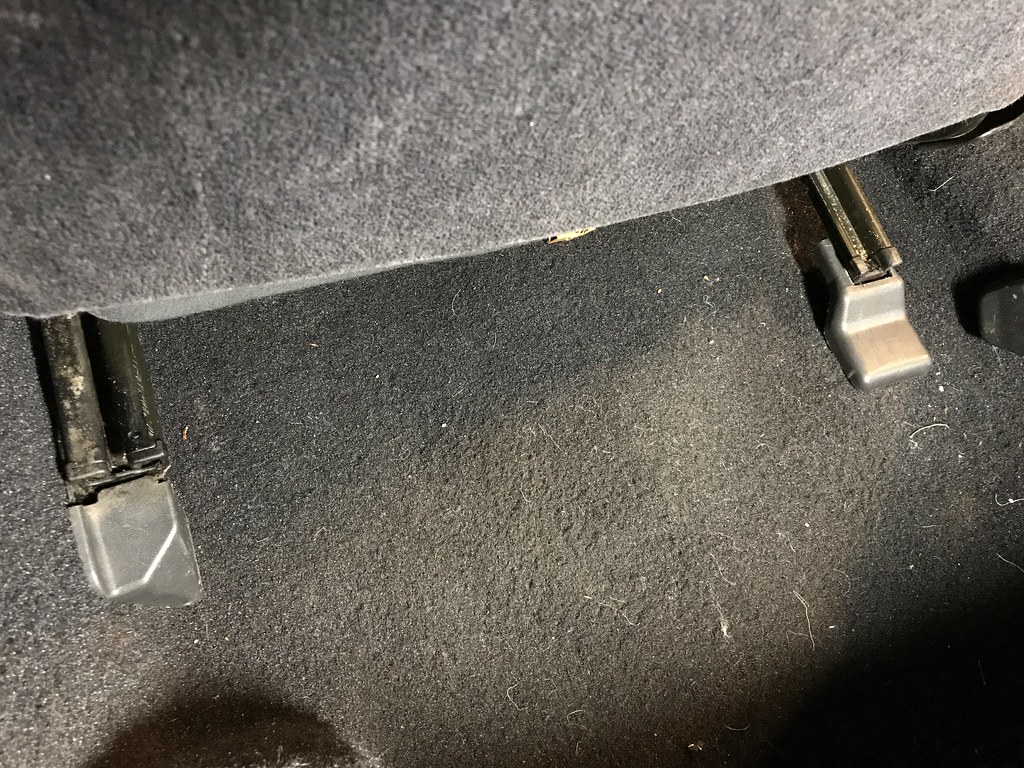
 One of the seatbelt covers refusing to stay in place.

 Now held firmly in place with the new clips installed.
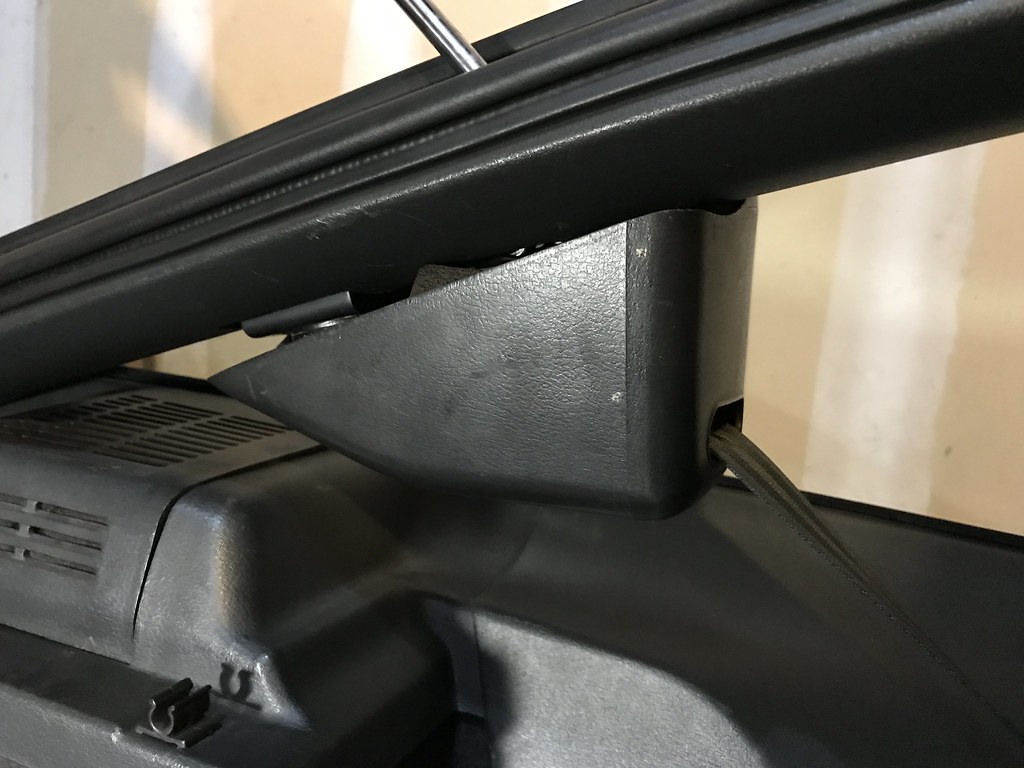
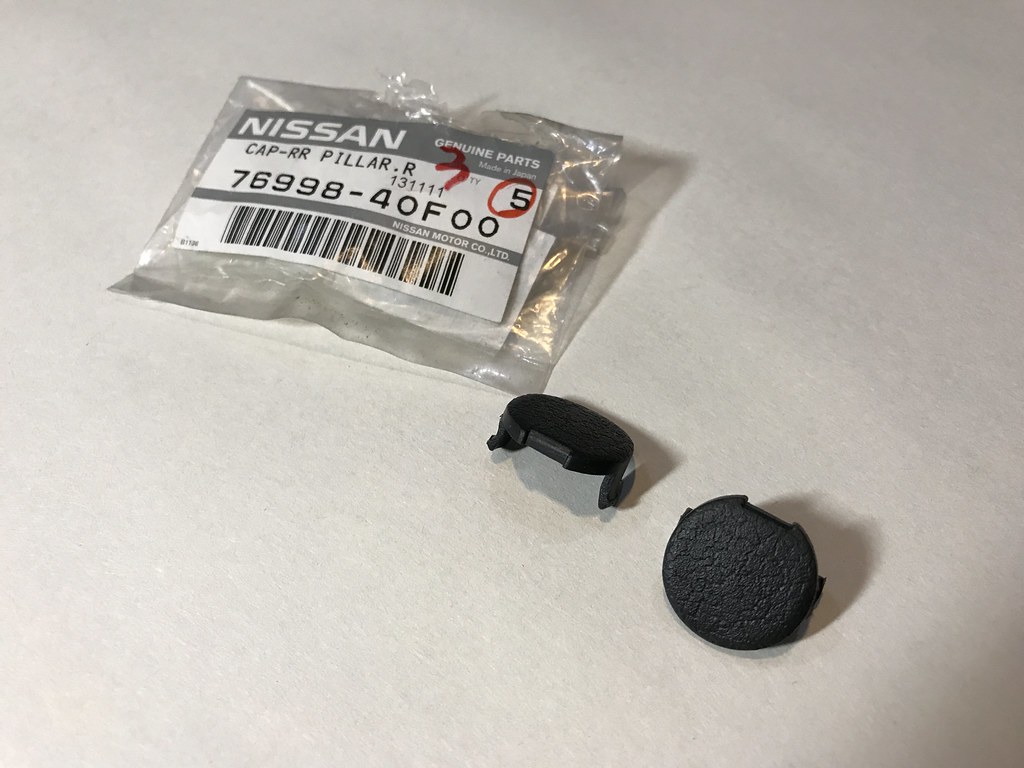
My 180SX seat belt setup was missing some screw covers, so I was able to source two of them from Japan (Nissan part number 76998-40F00). Unfortunately the other two are L/R specific and are discontinued, but I am hoping to get a hold of some from a 180 that a friend is parting out. Another small detail I thought was pretty neat. These seatbelts and headliner are one of the favorite things about my interior- really makes a difference when compared to the USDM auto belts.

 The plug on the right is one of the above pictured items installed. The hole to the left is missing its cap but unfortunately these have been discontinued.
Another item I was really excited to get a hold of were the rear strut top hats and carpet covers for the hatch area. My car didn’t have these when I bought it and I found that both were discontinued. Thankfully the Instagram community came to my aid again and someone sent both to me free of charge. The carpet covers were black and didn’t match my rear panels, so I decided to remove my panels and dye them black with DupliColor fabric spray. I’ve been considering this for years and was hesitant, but I am glad I finally went through with it. I’ll miss my Miracle Cross Bar as it is one of my absolute favorite parts for this car, but rear seatbelts are more important to me at this juncture. This also allows me to run my OEM privacy cover which I am in the process of sourcing some new OEM installation hardware for- more on that in a future interior post.


 While browsing eBay one day, I stumbled upon a pretty neat part I had not seen before. My S13 is an SE model meaning that it came with power mirrors, but for some reason they haven’t worked for a number of years. I am usually running Ganador or East Bear mirrors anyway, so this hasn’t really been an issue for me since even if the power adjustment worked I wouldn’t be able to see very well out of mirrors designed for a RHD car. I thought the block off plate for base model cars without power mirrors looked pretty clean, so I decided to give it a try. I am actually running non-power OEM mirrors at the moment, so it compliments those nicely.

Still some items to address in this photo- all in due time!
At some point down the road I would like to install OEM power mirrors again and figure out why they aren’t working- I’m even considering installing 180SX power folding mirrors at the same time. But for now, the mirror block off plate is a neat option. It’s still available stateside as it works for numerous applications. The part number is 68493-01F02.
One of my favorite things I managed to track down this winter was the windshield wiper and turn signal stalks. Every S13 owner knows these are notorious for fading and just generally looking gross. I picked up a used pair to replace mine shortly after buying my car, but they still weren’t quite perfect. I decided to do some research and found that both items can still be purchased new. The windshield wiper stalk can be ordered through Nissan. The turn signal stalk is a bit tricker as it has been discontinued by Nissan, but I found the identical unit for sale through Rock Auto. I was skeptical about using what I thought was a non-OEM stalk, but it’s completely identical in every way including the brand name on it and part number- it’s just not purchased directly through Nissan.


Quick Sidenote: If you find replacing the stalks with new units to be a bit too pricey, my good friend Ron at RestoMod Ninja sells replacement water slide decals to allow you to restore your current stalks. He also offers instructions on his website www.restomod.ninja Huge hat tip to Ron and everything he is doing for our community!
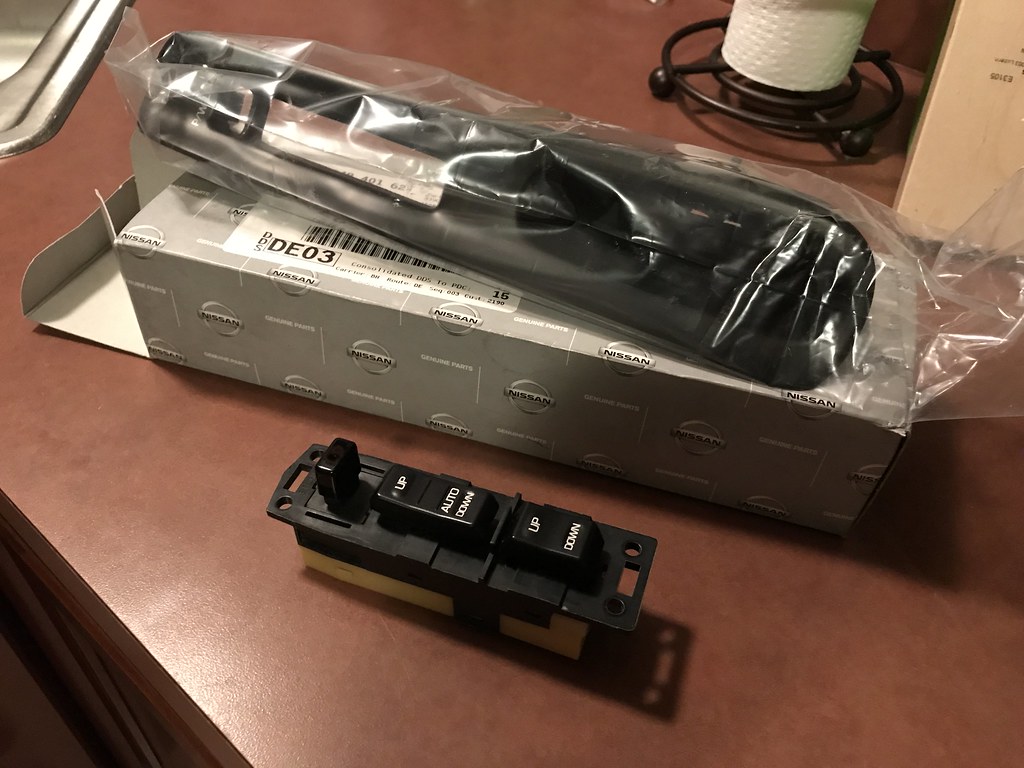
While replacing my window and turn signal stalks, Ron reached out to me and offered to send me a pair of restored window switches with his custom waterslide decals installed in exchange for my old, worn down units that he could use as a core. I highly recommend his decals and refinishing instructions- it’s crazy that these are what the buttons used to look like! And since I believe the window switches are discontinued stateside, this is really the only option at this point (since 180SX window switches are tailored for a RHD configuration and cannot be used without extensive modification.)

I also elected to replace my window switch bezels with new Nissan units. Truth be told, I bought the passenger side back in 2012 and fortunately it came back to me when I bought the chassis back in 2014. Unfortunately, the passenger side bezel has been discontinued, but the driver’s side was still available new. The bezels have a matte textured look, as opposed to the smooth and glossy finish they develop after years of use. If you’re stuck with what you’ve got, SEM Color Coat is a great spray paint solution for aging interior trim that has held up well in my experience.
 The door panels will be addressed soon- stay tuned for a future interior post.
The interior item I am asked about the most is my replacement carpet. I think the word is more or less out there at this point, but for those that may not know I sourced my new carpet from Stock Interiors. They offer it in numerous colors and options. I originally replaced my aging factory carpet with this when I bought the car in 2008, but ended up replacing it again last fall as mine had seen a fair amount of abuse including holes cut for a roll cage and other items I no longer have. I nearly went with a gray color this time around to more closely match the factory carpet, but couldn’t stay away from the simplicity of black. I don’t think it was ever offered as an S13 carpet color, but this is one of those deviations that I am more than comfortable with. The carpet comes untrimmed and it takes a while to properly trim it and make all of the holes for your accessories to bolt in, but it is more than worth the cost and effort. The carpet in most S13s has been destroyed at this point. (Pro tip: be sure to keep the plastic retainers from your factory carpet and transfer them over- learn from my mistakes.) They also offer matching floor mats on their website- look for some content about those in a future interior post as I plan to forgo my checkered floor mats in exchange for something more subtle soon.
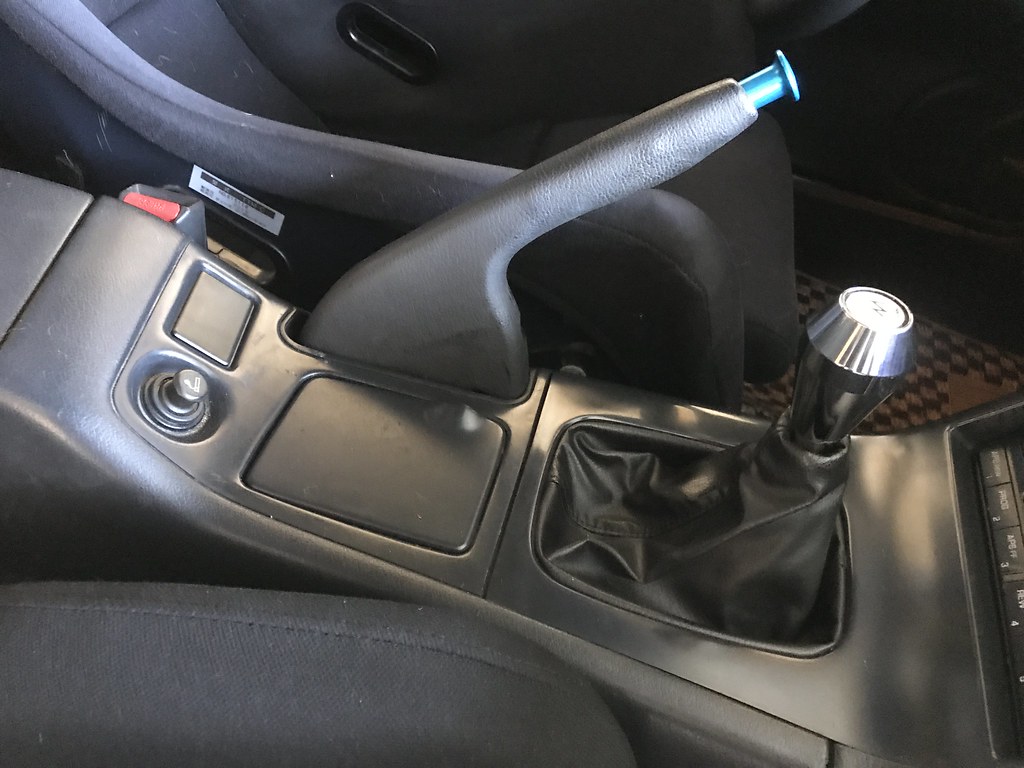
Lastly, I decided that a shift knob change was in order to match the more factory appearing interior look I am going for. I’ve been using a TRUST shift knob lately and really like it, but I thought a duracon NISMO GT knob would be a better fit. This shift knob holds a special place in my heart as it was the first shift knob I purchased when I bought the car in 2008. I’ve owned a couple over the years and was really bummed to see it had been discontinued when I tried to buy one again- even in Japan. Fortunately I found a fellow enthusiast through- you guessed it, Instagram- that was willing to let his brand new one (without packaging unfortunately) go. It’s much lighter than the TRUST knob which took some getting used to, but I really like the look of it.
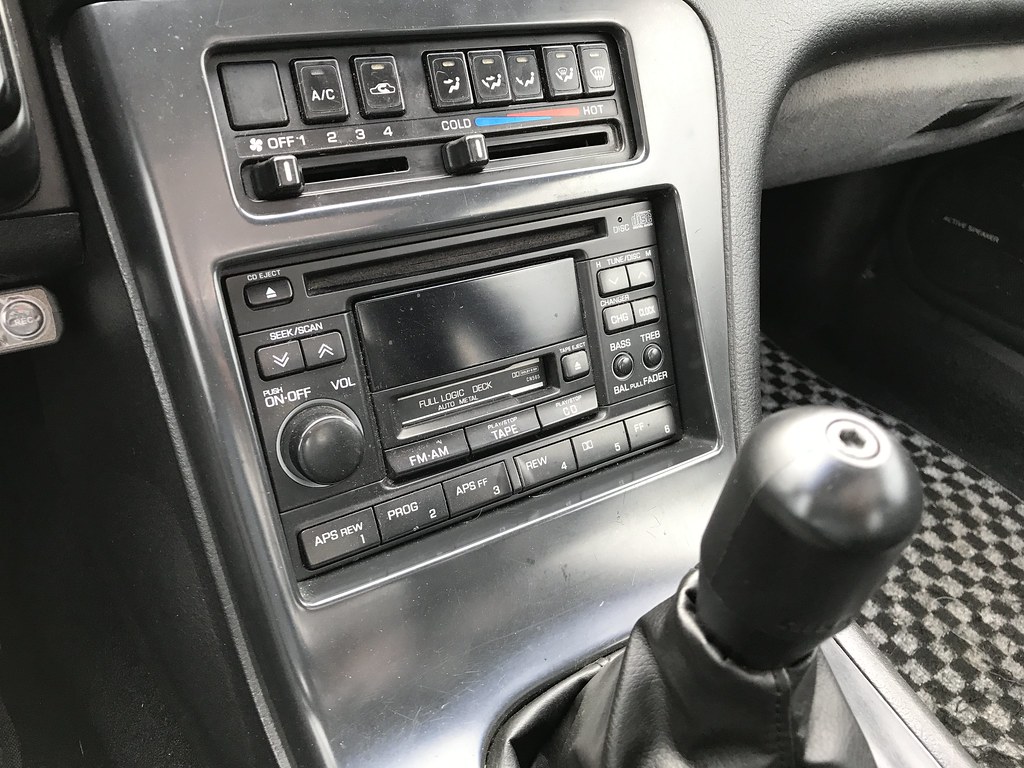 More details on the kouki 180SX (Maxima head unit) in a future interior post.
The NISMO GT knob adds a subtle upgrade to the interior.
The factory shift boot was sagging a bit with this shift knob compared to the TRUST one, so I ended up wrapping some 3M double sided tape around the shifter below the boot to keep the boot in contact with the shift knob- a trick I learned from a Honda forum. Although the duracon version is discontinued, the titanium version is still in production- albeit it a bit more expensive.

I think that just about covers my most recent interior restoration efforts. I am feeling really good about it at this point, I’ve just got a few more details I would like to address. At this point the white face Defi gauges are sticking out like a sore thumb considering the rest of the interior is more or less factory appearing, so it may be time for those to go. I’ve got a number of missing screws and clips on the way as well to really button things up- some of which have been absent for years. Look for that info and more in a future interior installment.
Feel free to comment and let me know if you find this information useful. My primary goal is to document my build information for my own personal reference, but I also hope that it will assist other members of the community with their own builds. I am always open to questions! Feel free to drop me a line at Damon@camryonbronze.com

If the Defi gauges are sticking out like sore thumb look into the Defi ZD display. Super simple multimeter gauge. Essentially will look like you have no aftermarket gauges in the car.
Good call! I did have one of those briefly in the past but never used it. Not sure where I would mount one at this point. We’ll see what happens though!
Yay, Friday! All the detailed information does not necessarily help me, since I don’t own an S13 (yet, maybe?), but nonetheless, I truly enjoy this kind of posts. Good pictures and well written. Besides, this and Engineered to Slide’s red S13, are my all time favourite S13s, so it’s always a pleasure getting to see/read more about them. Now I have something fun, car related, to look forward to on Friday afternoons when work is slow hehe. Keep it up!
Really appreciate the kind words! Thank you for stopping by. 8)
Good read man, when I needed clips or interior screws, Lowes sold Nissan specific ones that worked for me however I didn’t know nissan still sold them new though. I wish nissan would consider reproducing some of their interior parts, would be good money for them but I doubt that will ever happen haha =/.
Glad your blogging man, keeps me occupied when I have nothing to do at work lol.
Yeah, I am sure a lot of people probably wouldn’t pay what Nissan charges for a lot of that stuff. Sure would be nice though- I agree! I didn’t know that about Lowe’s, I will definitely check that out.
And thanks for reading! I’ll try to keep you occupied if I can, haha.
I’ve been following your build for a few years now and I really appreciate that you put in the effort to keep up documentation. I am around your age and I also love reading forums and blogs and lament that social media has taken precedence as the outlet for many people. I understand that it has become the norm and it’s great in some ways but it seems so temporary and fleeting compared to a well done thread or blog.
Keep up the good work and good luck finding all those little parts!
Glad to hear I am not the only one that feels this way. Appreciate you following along over the years and dropping a comment!
Pingback: Interior Restoration: Part 2 | CamryOnBronze
It’s awesome how you track down all the little clips and covers. Keep up the great work!
Thank you! It’s probably a huge waste of time, but I enjoy the results haha.
Boy, you think restoring a 240sx is hard, try restoring a 92 240sx convertible. In 92 only like 669 where made in Aztec Red (AG2) and finding parts is a real pain in the butt. And not to mention I wonder how many are even still around, since kids love to drift them. I live in Washington state up by mount Rainier and HWY. 7 goes through a canyon along the river with some real hairy corners that kids love to drift on and end up crashing. 240sx’s parts are getting hard to find.
Daniel
Definitely true!
240sx rocks