Engine Time

Well, there I go not updating my blog again. The holidays were busy but restful (if that makes any sense) and now that 2015 is upon us I am back at it in the garage when my schedule allows.

Since last time, I finished up the majority of the work I planned to do to the engine. I installed new coolant hoses under the intake manifold and looped the heater core lines as my car does not have HVAC anymore. The inside of the intake manifold was filthy, so I gave that a good scrubbing as well before reinstalling it.

With the intake manifold back in place, I pulled the engine off of the stand and replaced the front and rear main oil seals. I still need to install the alternator and pick up some bolts for my power steering pump as the power steering was not installed in the coupe I sourced the engine from.

My SR was still using the factory clutch and flywheel, so I wanted to replace the clutch at a minimum to save myself some work down the road. Fortunately the good f0lks at Turn 14 Distribution hooked me up with a Competition Clutch Stage 2 clutch and lightened flywheel for my build making life a ton easier. This should be the perfect street setup for the car with minimal complication- that’s the goal this time around, right?

At this point I turned my attention to the transmission, installing a new OEM shifter plate and gasket, along with new input and output shaft bearings. Once the new Comp Clutch release bearing and clutch fork were back in place, I was able to mate the engine to the transmission. The C’s short shifter and Cusco brass shifter bushing will be installed later when the drivetrain is in the car.

With those items out of the way and the NISMO transmission mount in place, I was able to drop the engine in the car. It’s always a great feeling to have the drivetrain back where it belongs, even if a lot of work still remains.

On the parts front, I picked up a couple items around the holidays. My family hooked me up with a Cusco brass shifter bushing, HKS radiator cap, Works Bell steering wheel hub, checkered floor mats, and a new pair of DMAX position lamps for the car.

I also picked up a Cusco/Safety 21 seven point roll cage from someone located up North. Unfortunately it turned out to be a non-sunroof model, but I am hoping to have a friend help me modify the main hoop prior to powdercoating it to fit my chassis. This is lower on the priority list but will be nice when it is finished.

I think that is more or less where things stand right now! I’m hoping to keep plugging away at the engine bay and the suspension to get this car ready for spring. I’m really enjoying having the S13 back again. I’ll do my best to keep the updates coming. Thanks for reading!

Damon

Posted in Uncategorized | 2 Comments

Weekend Engine Work

I spent some time in the cold garage last night and managed to get the exhaust side of the engine back together. Painted the exhaust manifold, installed all new gaskets, cleaned the block, put the new water pump on, and installed the NISMO engine mount on that side.

/home/wpcom/public_html/wp-content/blogs.dir/f50/10309154/files/2014/12/img_6552.jpg

Next step is to take care of the intake side: clean the block, install new coolant hoses, loop the heater core, etc. Should hopefully have the engine back on the ground and ready to bolt up to the transmission (when the clutch shows up) within a couple of days!

Damon

Posted in Uncategorized | 3 Comments

Interior

Here’s how my interior sits at the moment. Jimmy helped me out by selling me his NeXt Miracle Cross bar which I am super excited about. Most of the interior items are here as well, I just need to take the time to put it all together. Defi Link Meters (60mm white face), Bride Zeta II & Ergo, Nardi Classic 350mm, etc. Only items left to acquire for the interior will be a Defi oil pressure gauge, perhaps some red Bride fabric again, and a Bride FG seat rail since the Nagisa rail I had interfered with the trunk/gas tank latch and was driving me bonkers.

I had to source and reinstall another set of 180SX seatbelts, a DIN pocket, shift boot, digital climate control, and center dash vent as those items were missing when I got the car back. I still need plastics for the rear seat area as well.

I’ve been really torn lately on how I want to handle the interior treatment. Part of me wants to run a full interior again since I have virtually everything I need, but another part of me wants to run a more gutted interior like Itai and Itoh. I know that their cars were not street cars though and a gutted interior would probably stink on the street. But at the same time, I won’t be able to drive the car as much as I used to as I pick my kids up from daycare two days a week. Maybe it wouldn’t be that bad?

Here are a couple pics of my interior from years past:

This was in 2010. Bride Zeta III Type L (all black), Nardi deep corn 330mm, NISMO GT shift knob, AEM gauges, DMAX mats, 180SX passenger and back seat, etc. No fancy bars. I kind of like the black/subtle look sometimes.

2011: Added a Cusco dash escape cage, Defi Advance CR gauges, Bride Zeta III black gradation, and a Tomei shift knob.

End of 2011- At this point I think I added a NeXt Miracle Cross brace, Cusco diagonal cage bar, Bride Zeros, Bride Ergo, and digital climate control. No more back seat.

2012 is when things got pretty wild. I added a Do Luck floor bar, Takata harness, Pivot controller, red Bride fabric accents, red DMAX mats, Nardi Classic 330mm, and a Pivot shift knob.

I want to keep some of the same styling this time as I really liked a lot of aspects of the interior in the car’s previous life. I’m considering changing a few things up:

  • NISMO GT shift knob
  • Bride Zeta II
  • Defi Link Meter white face gauges mounted in dash
  • Safety 21 7 point roll cage (picking this up over the holidays)
  • Old school DVD player (Kind of like my tape deck though… lol)
  • Red Bride fabric (how much? Less than before, but undecided…)
  • Gutted rear interior with seat brackets removed (undecided)
  • Mats with smaller checkers (should be here next week)

My hope is that the result will have a similar feel to Itai’s interior, but I really like Itoh’s as well. I’ll probably only do the door cards in red fabric this time, possibly the glove box- but I will not do the arm rest or shift boot. I’m not really planning to run a Pivot knob as it was not very comfortable, people want crazy money for them, and I don’t want my wife to make fun of me again. lol.

Itai’s interior:

Itoh’s interior:

We’ll see how it turns out when it is all assembled, but I am excited. What would you do? Gut, strip, and paint the interior like Itoh and Itai? Or leave it similar to how it was when I had the car previously and keep the full interior? I might try it out, and if I don’t like it I will put the interior back in. Could be a lot of work though, haha.

Have an awesome weekend!

Damon

Posted in Uncategorized | 19 Comments

Thursday

The holidays are almost here and I am really excited for some time with family. It’s making it pretty tough to get through this week, but I think by tomorrow I should be in pretty good shape.

I had about ten minutes out in the garage last night before I came inside to help Alicia with our Christmas cards. I removed the coolant hoses under the intake manifold so that I can replace them and loop the heater core lines since I don’t run a heater core anymore. I also removed the engine mounts/brackets and alternator bracket so that I can paint them, install the NISMO mounts, and clean the surface of the block behind them up a bit.

Here’s some of the engine parts on the floor right now that I need to clean and reassemble with new gaskets and vacuum/coolant hoses. It’s weird to be working on an SR again, but I really like it. It feels very familiar despite the time that has passed:

I’m hoping to work on it some more this weekend. I want to get the block all cleaned up and start reassembling everything. Hopefully my clutch will be here soon!

Damon

Posted in Uncategorized | 2 Comments

I’m Back

I decided to part ways with my Lexus GS project. I sold it and to my surprise, I ended up purchasing my old S13 back- super excited! I have had it back in my garage for about a month and a half now and I have really been enjoying working on it when I have free time. I purchased the car back nearly six years to the day after I bought it initially.

I parted it out and sold the car as a bare shell back in 2012- no seats, brakes, differential, engine, transmission, front bumper, etc. A friend of mine that I sold it to was building an LS1 for it but decided to abandon the project and I am really thankful that he gave me first dibs on buying it back He installed coilovers, brakes, and suspension arms that I was not going to use, so I sold them for him as a part of the deal we worked out.

Here she is sitting back in my garage last night. It’s a trip to walk out of the house and see this back where it used to always sit! So many aspects of my life have changed since I owned the car so it’s just wild to have it back again.

I purchased a rusted out S13 coupe from another friend of mine that was equipped with a stock Red top SR20DET. I am adding an OEM gasket kit, water pump, new clutch, clutch fan, C’s shifter, NISMO engine/transmission mounts, and a Wiring Specialties pro engine harness to freshen things up a bit before I drop it all into the bay. I got an amazing deal on the coupe and sold a few of the items that were on it (as well as the shell) to leave me with a very reasonably priced drivetrain setup.

I was even able to get my old valve cover back (you can sort of see it in the first garage photo) which I thought was really cool.

I got some kouki tail lights and Hot Road aero for the car. I’m really excited as I have always wanted to run Hot Road like Itai’s 180SX. A friend from Zilvia imported it from RHD Japan back in 2010 and had been holding onto it for a rainy day. I’m really grateful that he decided to pass it on to me. I’m really excited to see it all come together.

Don’t mind those blue wheels.- I borrowed those for transport, haha.

Here’s the inside right now. I kept my Bride Zeta II and Ergo from the GS project. I’ve been working to source a few of the small interior pieces I was missing, as well as a couple other cool things I stumbled upon. I’m really pumped to see this come together in the next couple of months. I’m debating if I want to gut the hatch area or not… we’ll see what happens!

With the help of a friend I was able to find a Kakimoto exhaust just like the one Itai ran on his car. Pretty excited to have a canister style exhaust setup again! I’m hoping it sounds similar to the DMAX unit I had way back when. It’s up in Canada now but it should make its way here very soon.

A lot of things will be similar to the car’s previous life, but I am changing up a few things as well. The engine will stay stock for the time being, so it will be down a lot of goodies in that department. It should still be a lot of fun though. I’m the most excited about the interior and exterior right now. I’m really trying to scale back on the excess and focus on the details that I really enjoy- not take anything for granted and be content with what I am given. I’d like to imagine that I will not let this car slip away again.

I’m hoping to have the drivetrain in the car by early January. I would like to have it ready to drive by the time the snow melts in April or May, but we’ll see how it goes- family and day to day things are always the priority. I don’t think it should be too much of a stretch though. I’m really excited to drive it to Final Bout in 2015, so hopefully that works out OK!

I’ll start posting pictures on here as I make some more progress! I’m going to try to at least post a photo every day if I can. Thanks for reading!

Damon

Posted in Uncategorized | 8 Comments

August GS Update

Welp, here we are again. Another month has passed and I have not managed to find the time to update everyone on the progress with the GS build here on my personal blog. I tend to post photos as parts arrive or I make progress on Instagram (@camryonbronze), but when it comes to the detailed writeup portion of this build I’ve been falling a bit behind. My posts over at Speed Academy share the most technical info and are split into specific areas of the build process, while my posts here tend to be a bit more of a personal and chronological look at the build journey (AKA less organized.)

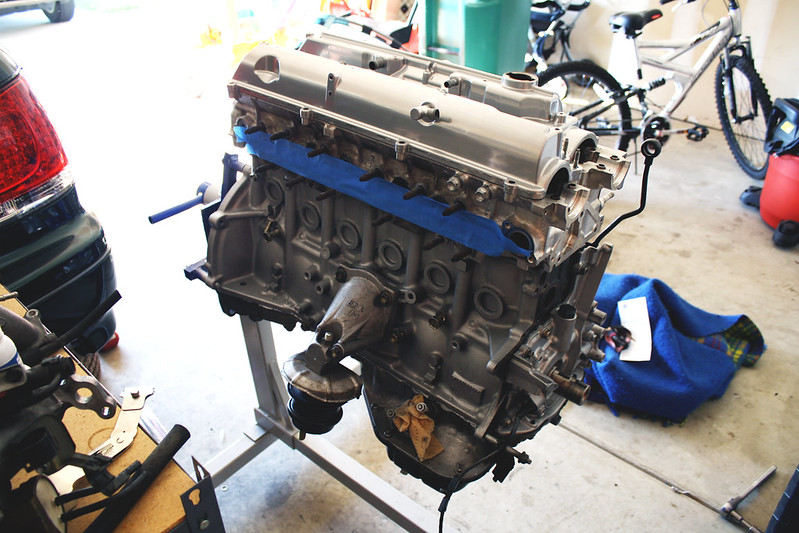
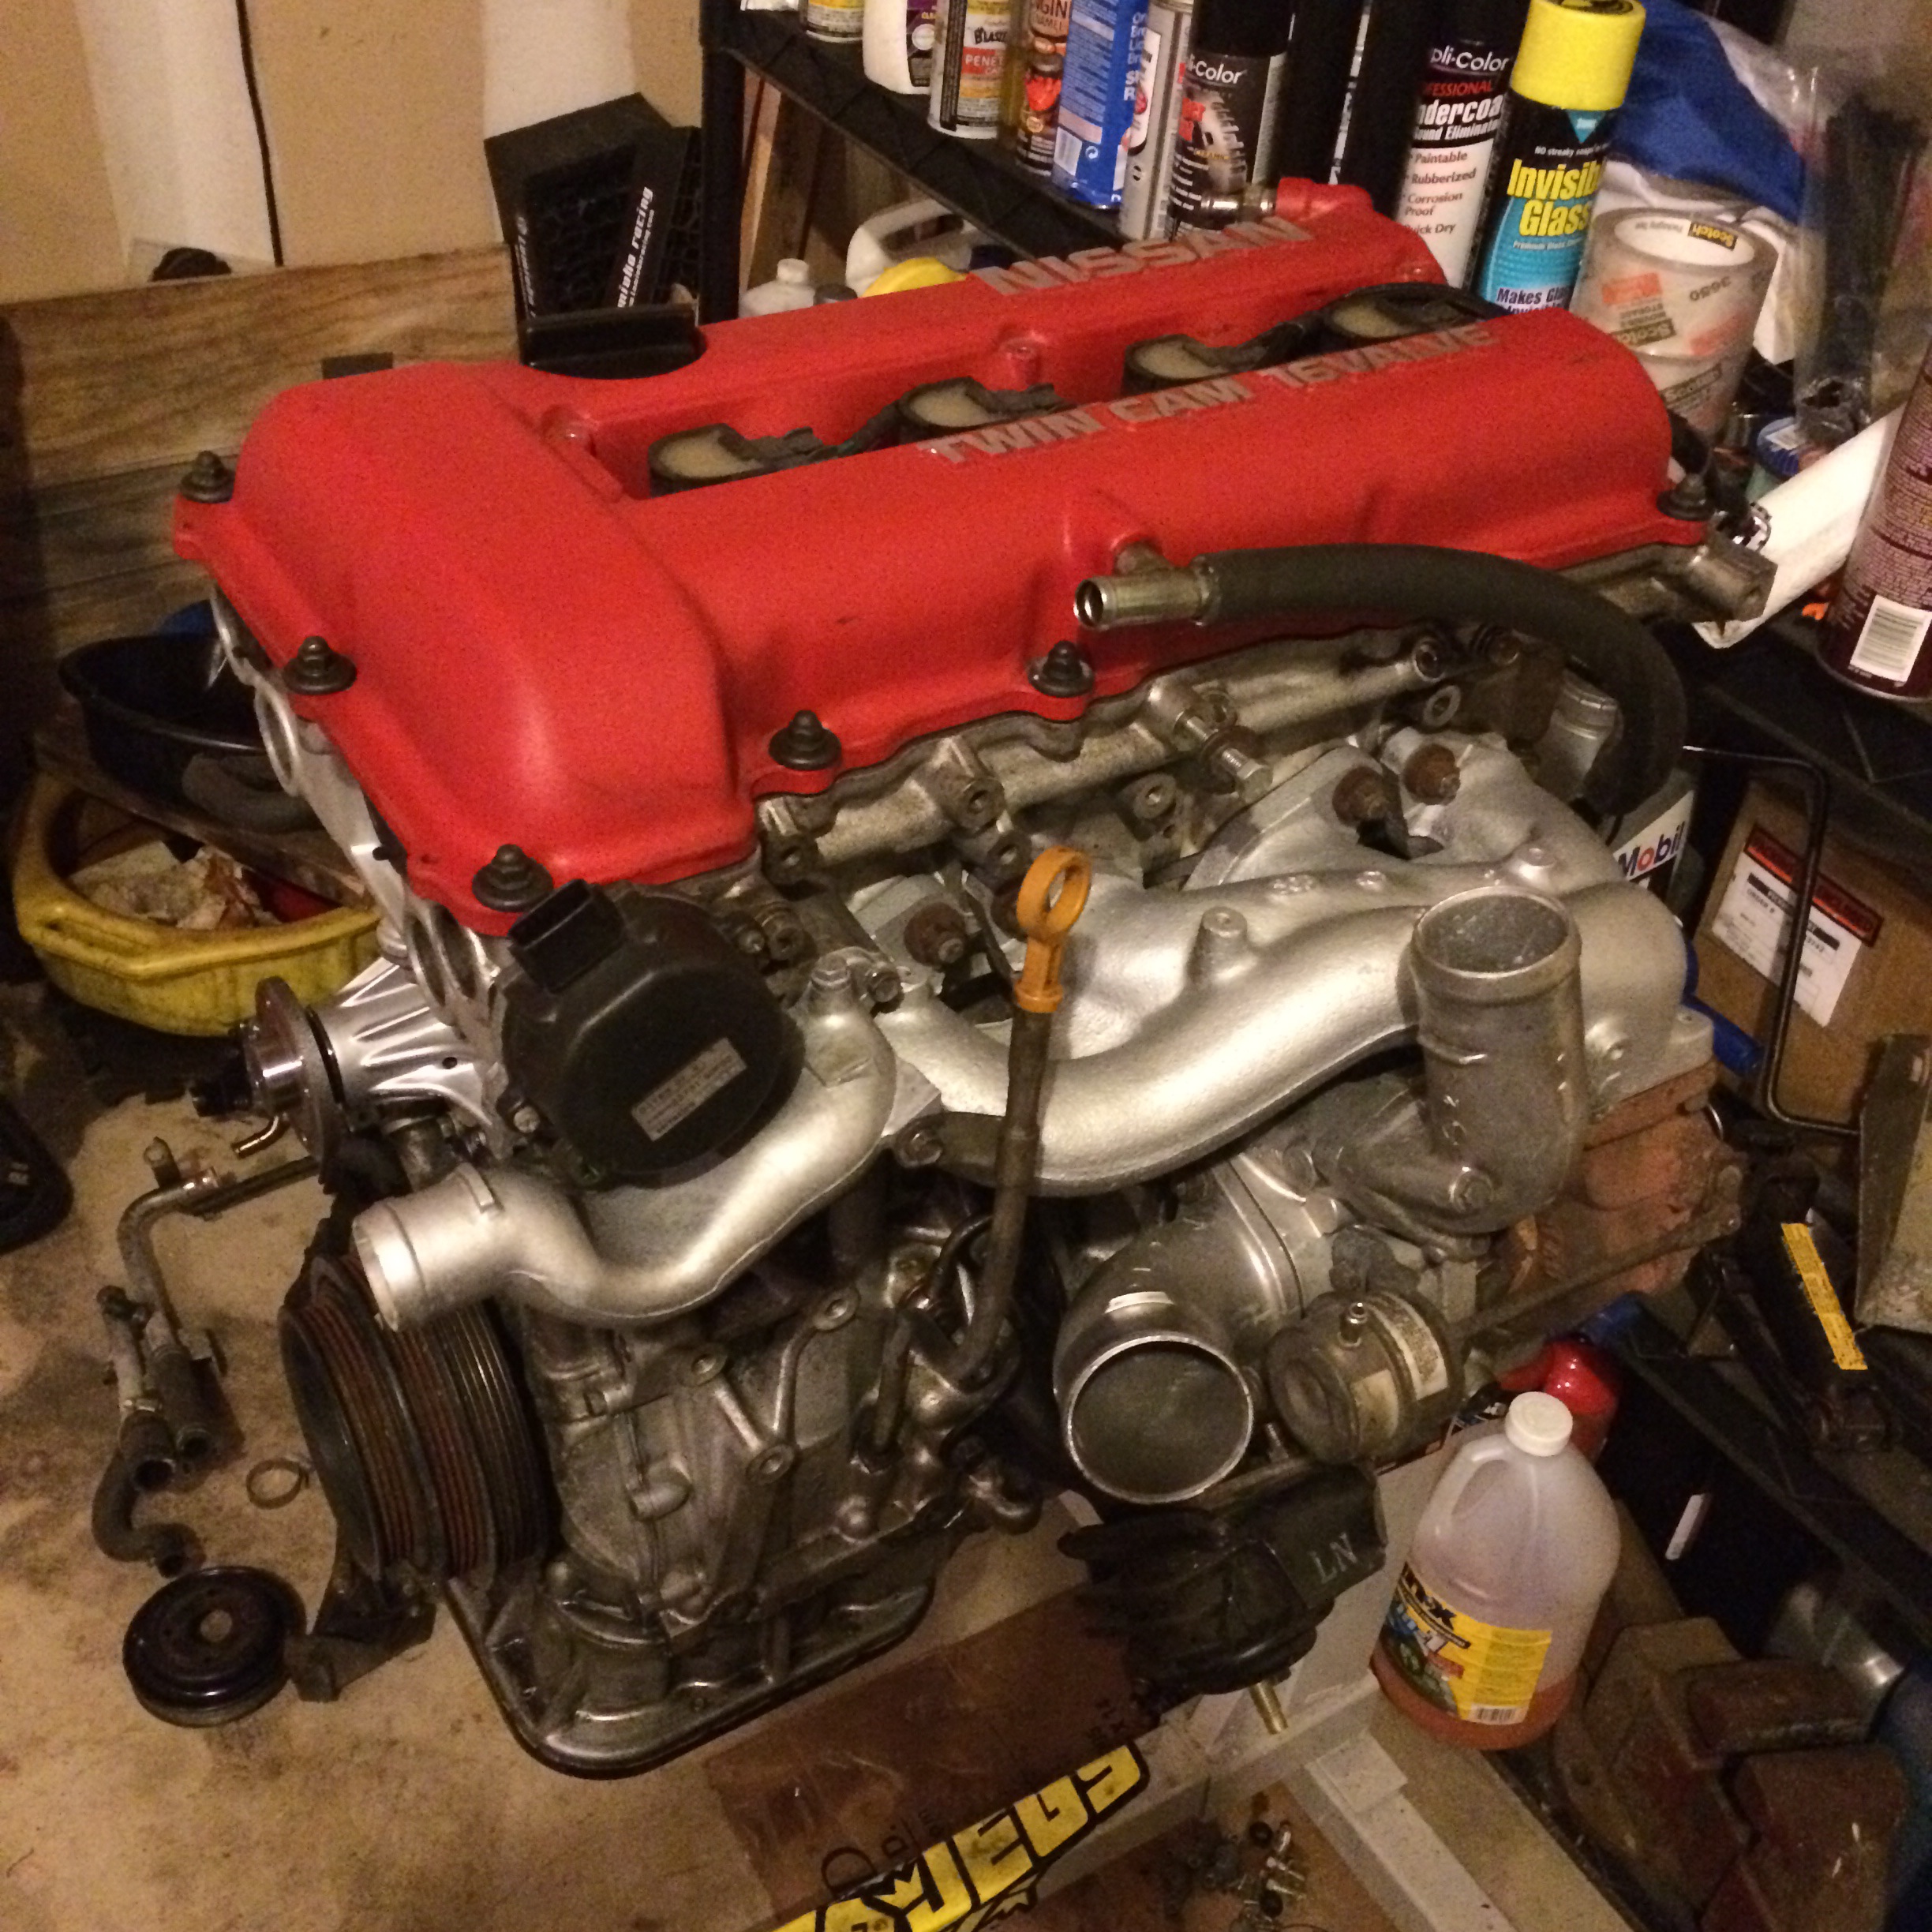
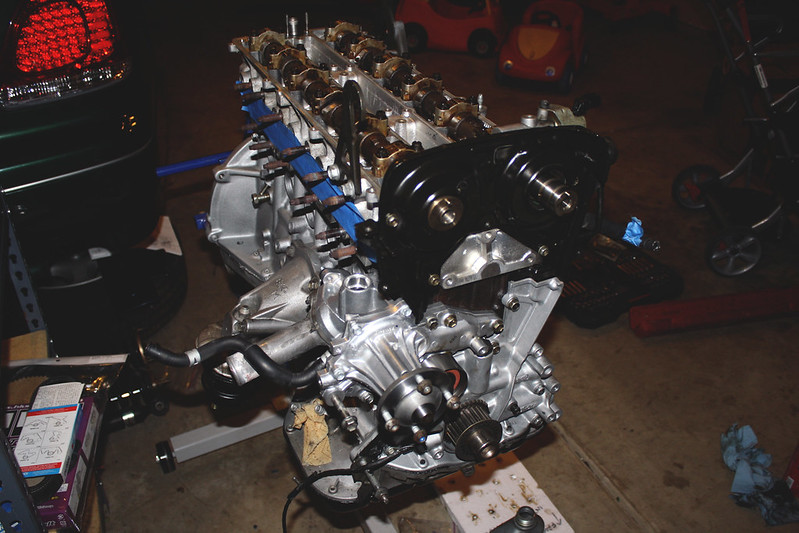
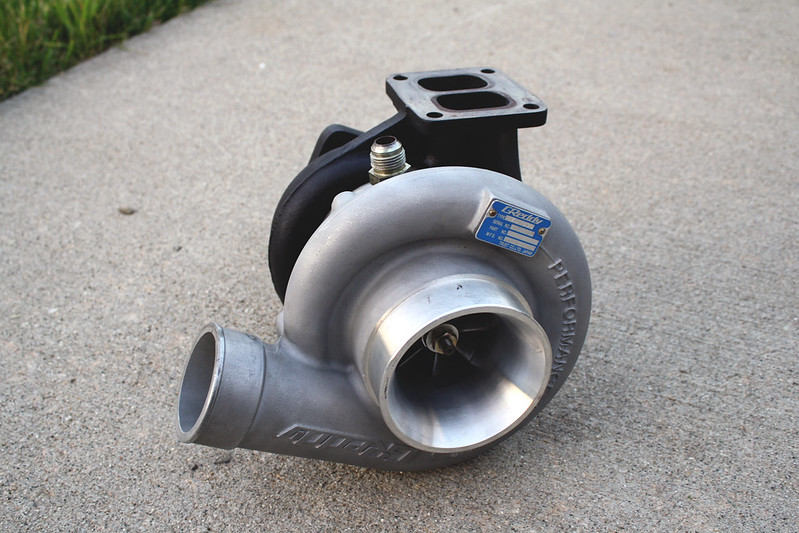
When we left off about a month ago, my GReddy T78 turbo and Type R wastegate had just arrived. I had finished assembling the bulk of the engine, but was hitting resistance when I turned it over by hand. This was really frustrating, and after resetting the timing about six or seven times I finally caved in and removed the head from the engine block a second time. With some helpful advice from my friend Liam, I rigged up a makeshift engine head stand and installed the cams individually, then turned each one over slowly to see if I could pinpoint where things were binding up.

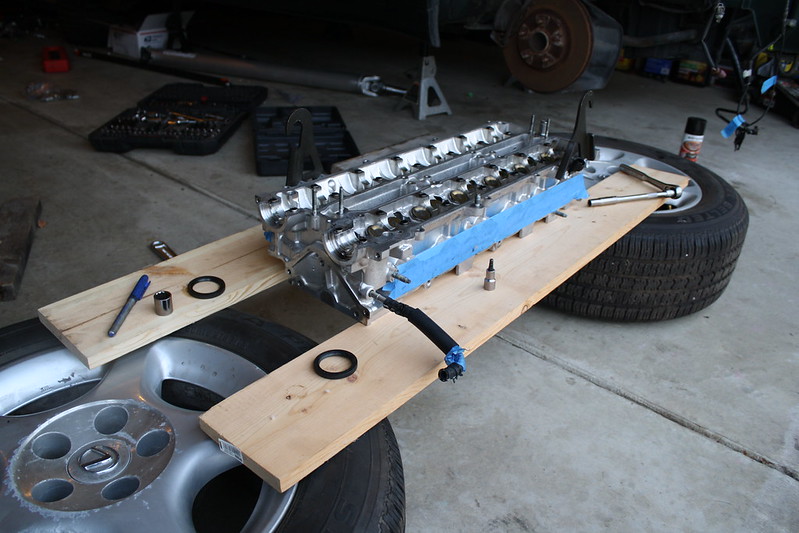
As it turned out, there was one particular valve on the exhaust side that was “stuck” and would not depress when the corresponding cam lobe was rotated over it. I was relieved to know that the valves had not been contacting the pistons like I had feared and that I had been setting the timing correctly all along. I took the head back to the machine shop and they took that valve assembly apart, reassembled it, and the binding was gone.

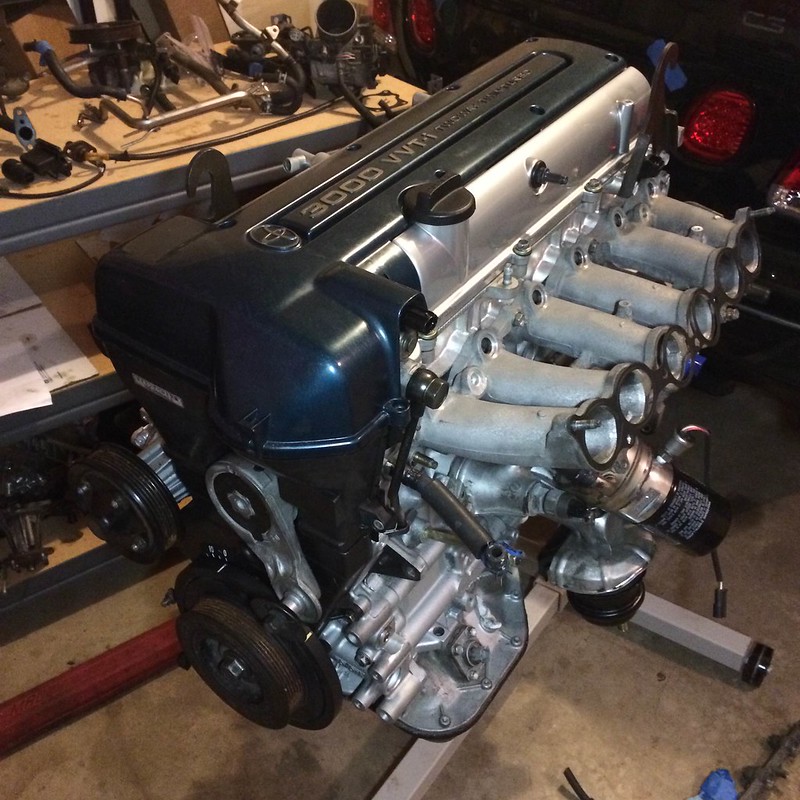
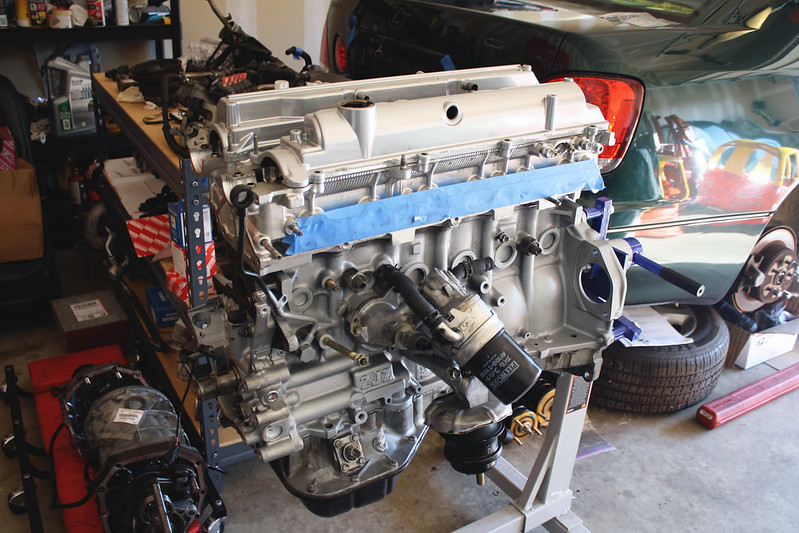
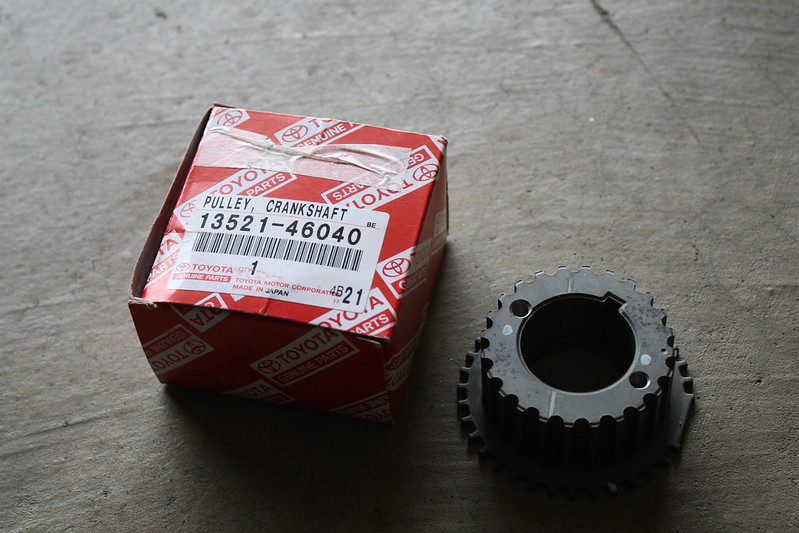
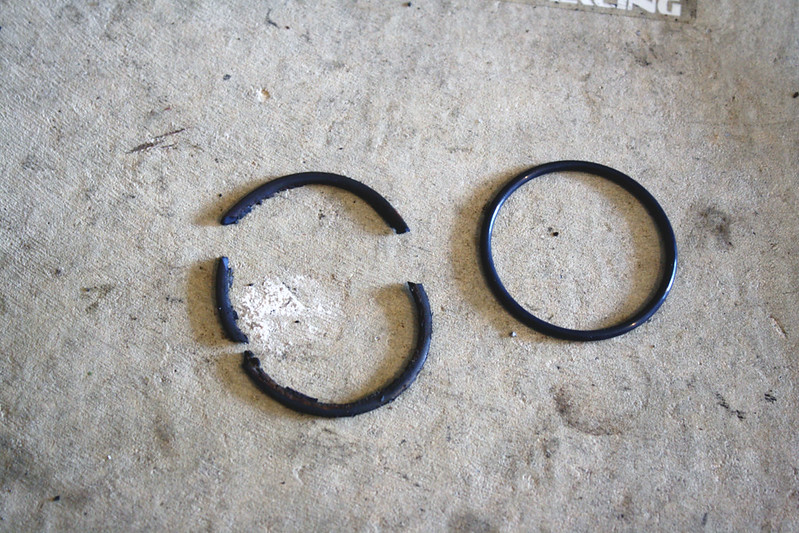
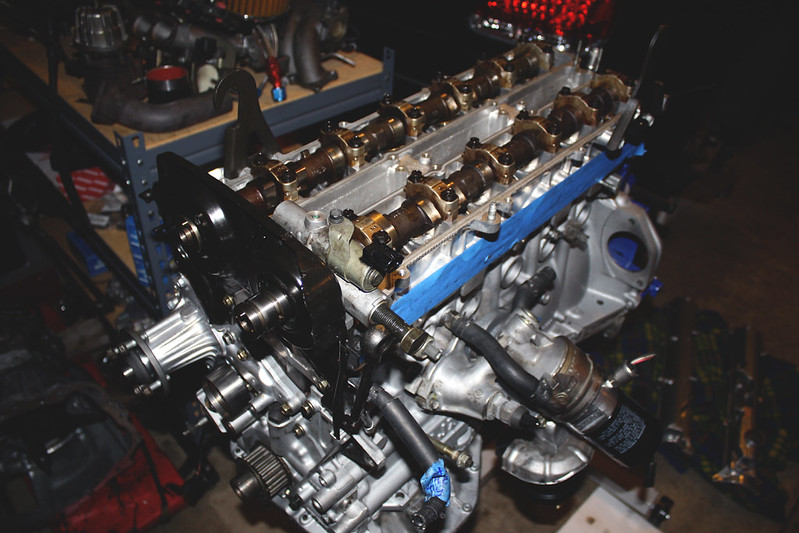
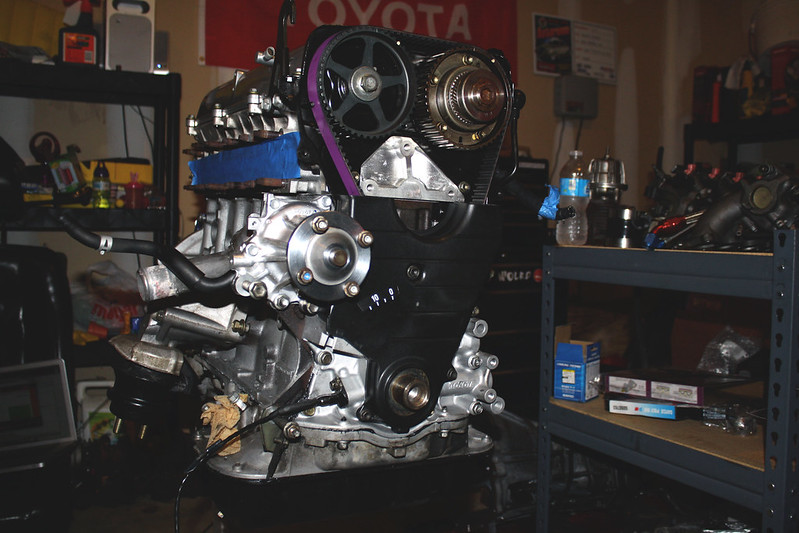
That being said, a lot of August was lost to sorting out that debacle. It only took me a couple of hours to have everything put back together when the engine returned from the machine shop and I was back to where I had left off about two weeks prior- except this time, the assembly rotated properly. When I was removing the head, I realized that my timing gear had been damaged at some point during disassembly or reassembly after replacing the oil pump, so I promptly ordered a replacement and installed it.

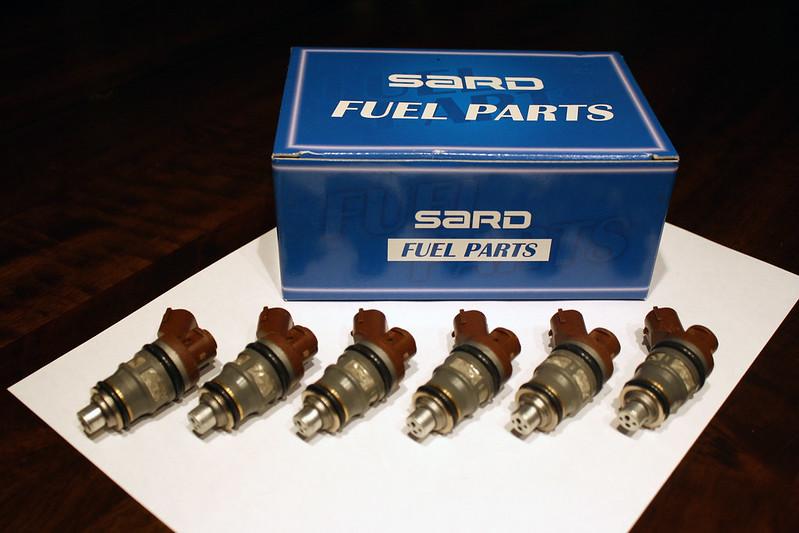
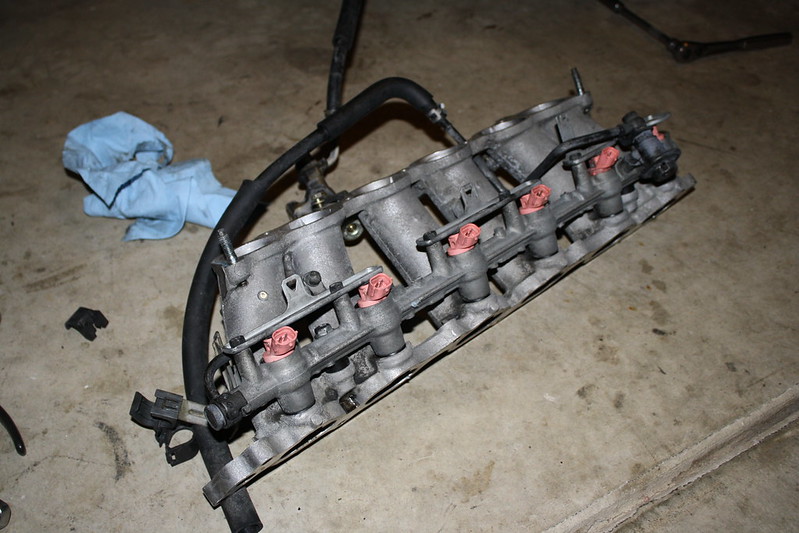
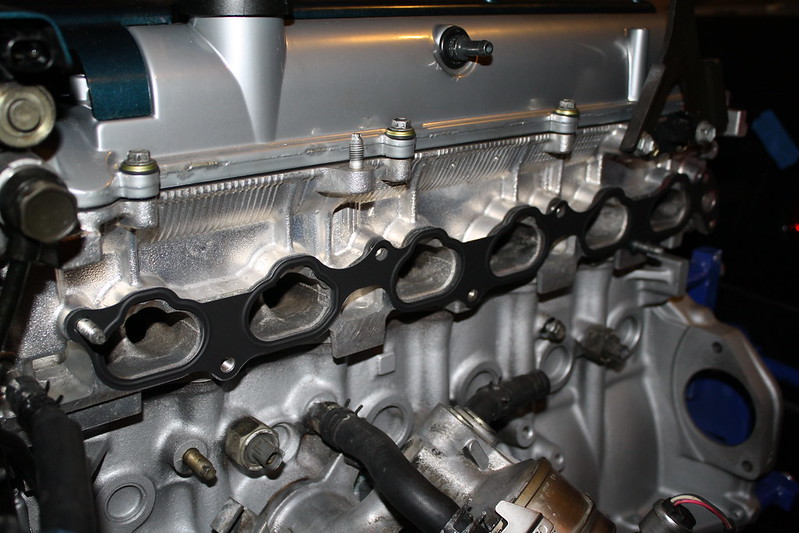
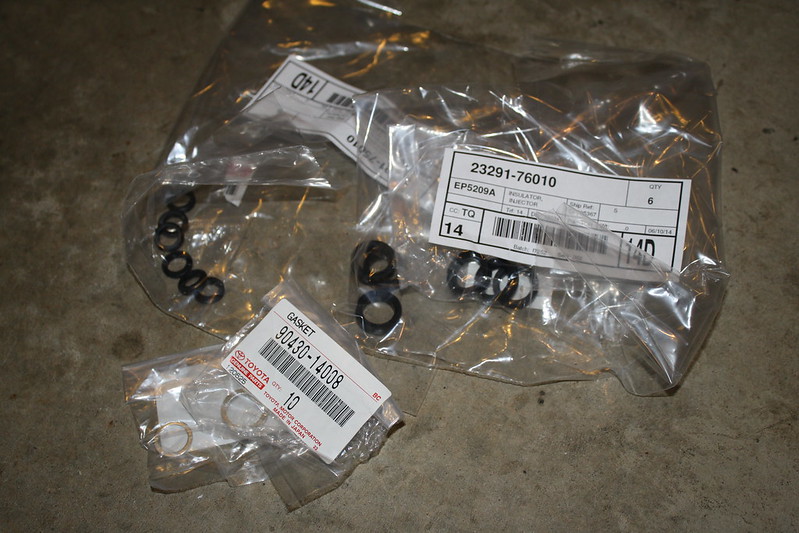
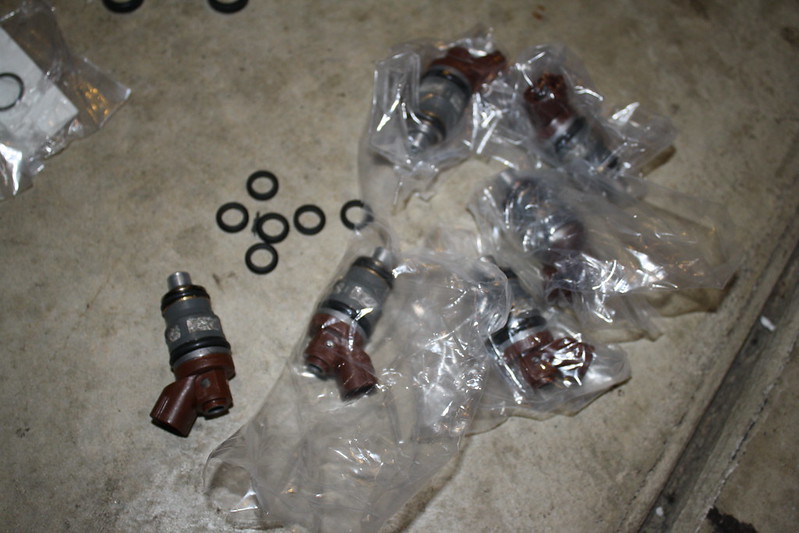
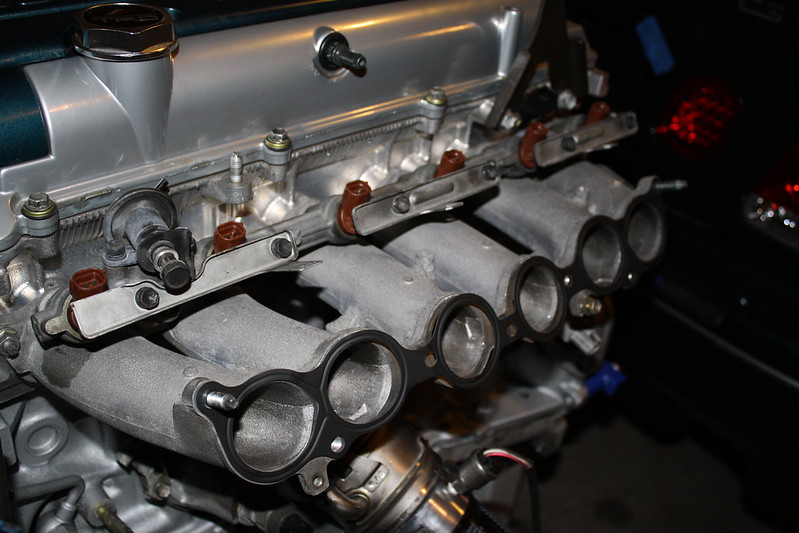
The next order of business was to install my SARD 840cc fuel injectors. When removing the factory injectors, I found that all of the o-rings and isolators were brittle and cracked. After another order from Toyota arrived, I was able to install the new injectors with the freshened up o-rings. After tossing on a new intake manifold gasket, I bolted up the lower intake manifold and fuel injectors.

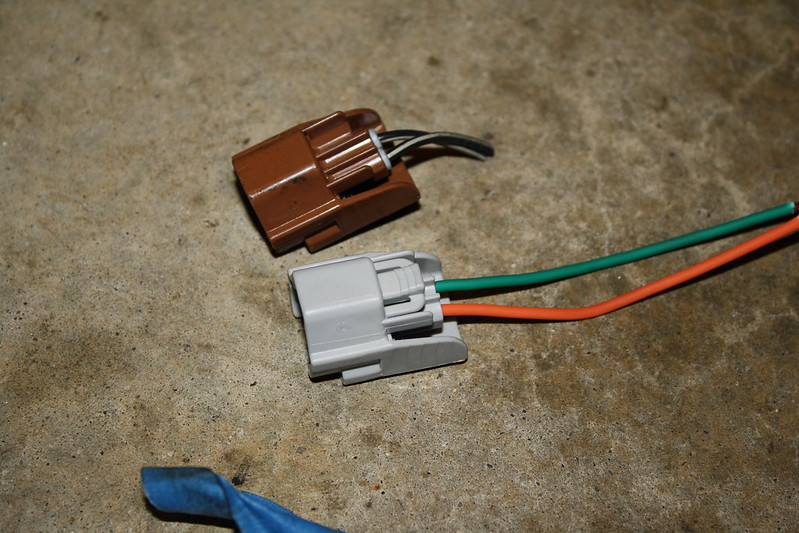
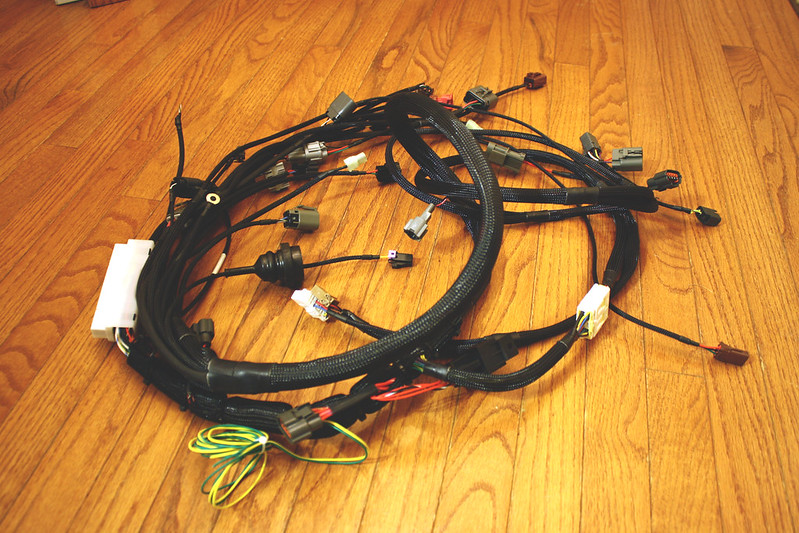
My hope was to install the main engine harness next, as a few of the connectors are a bit tricky to get to with the upper intake manifold installed. When I attempted to do so, I found that one of my fuel injector clips was damaged and no longer locked in place. I ordered a replacement from Wiring Specialties and wired it up when it arrived a couple of days later, only to find that another injector clip was failing. I decided to replace all six, so I’m currently waiting on those to arrive before I can install the harness, upper intake manifold, and throttle body. It’s always something with this build!

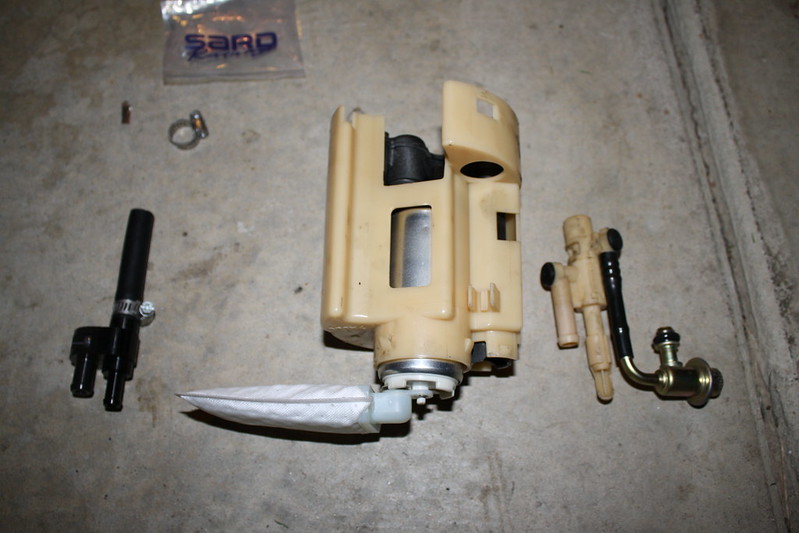
I removed the stock fuel pump assembly from the car and installed the Walbro 255lph fuel pump. I’m currently in the process of installing the SARD jet pump killer and -6AN return fuel line, but I need to order another fitting to connect everything and drop it back in the tank. Once the braided lines have been run to and from the engine bay to the tank, I can begin to piece together my fuel pressure regulator setup. Most of that work won’t actually go down until the engine and trans are situated in the bay though.

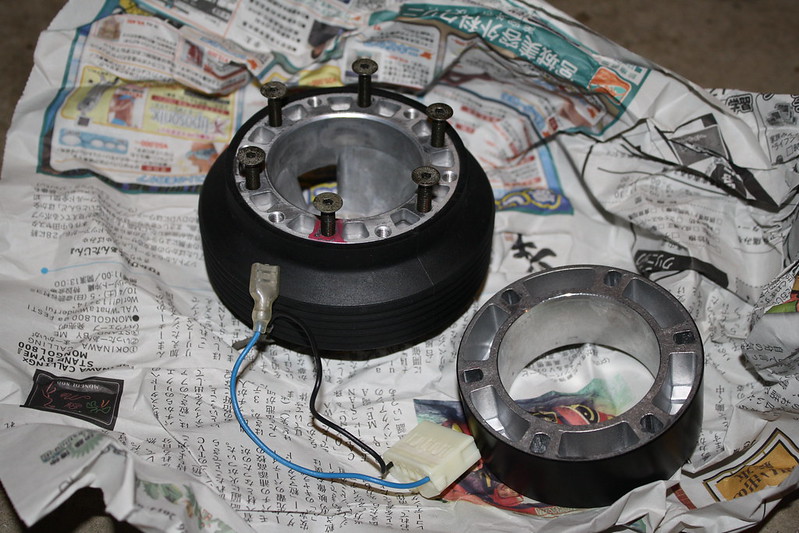
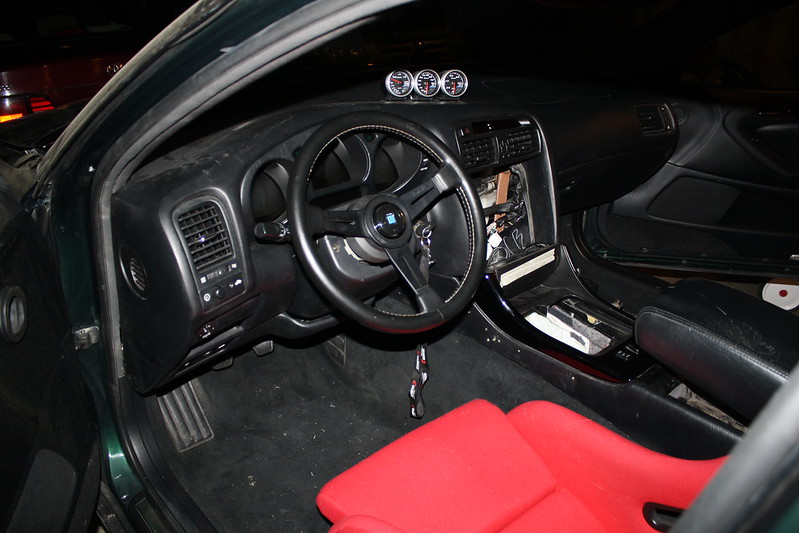
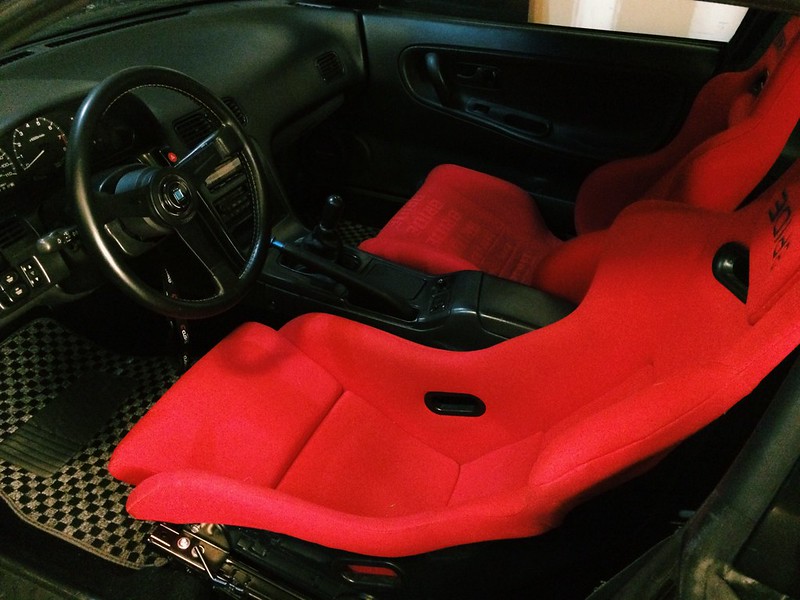
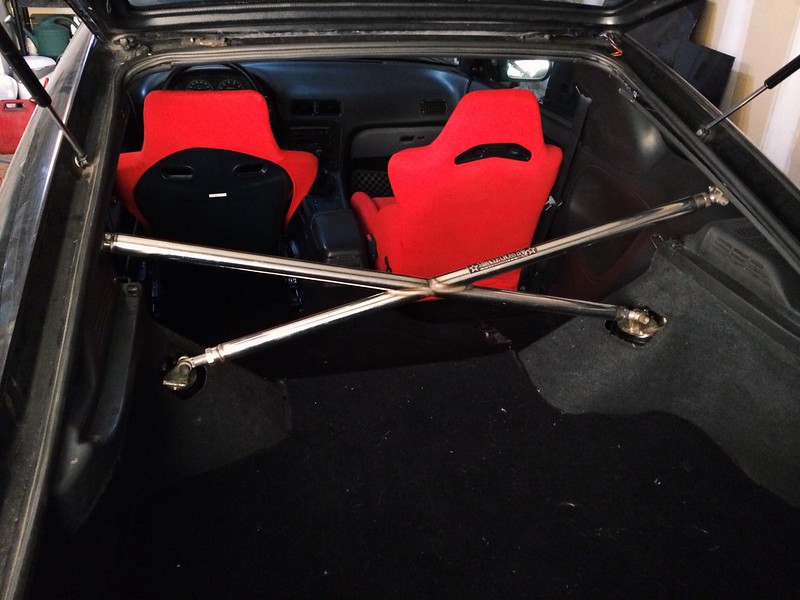
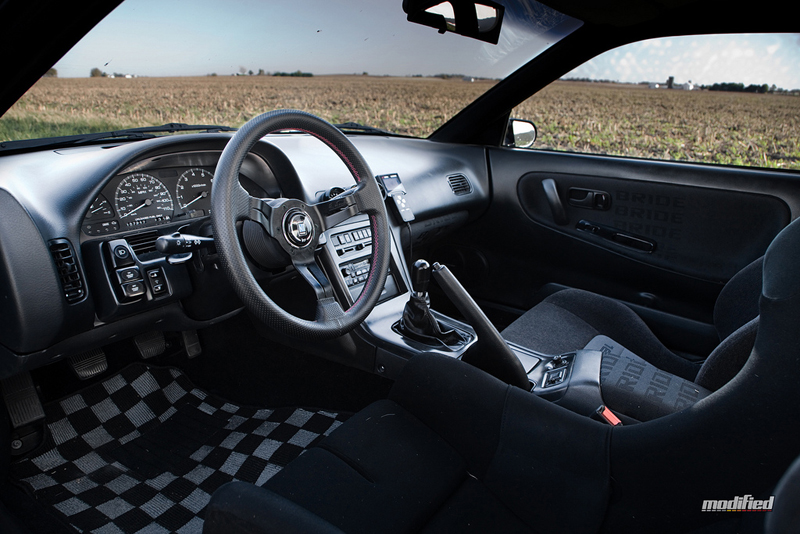
While I was waiting for fuel system parts to arrive, my Works Bell SPLASH steering wheel hub showed up and I was finally able to install my steering wheel. I’m really happy with how the interior is coming together. There’s still some work to be done here, but it should be fairly complete once the drivetrain is installed. In fact, there should be a pretty cool change coming along in the near future by way of the return of an old friend if you will, so stay tuned for that…

Here’s a bad photo of the wheel installed:

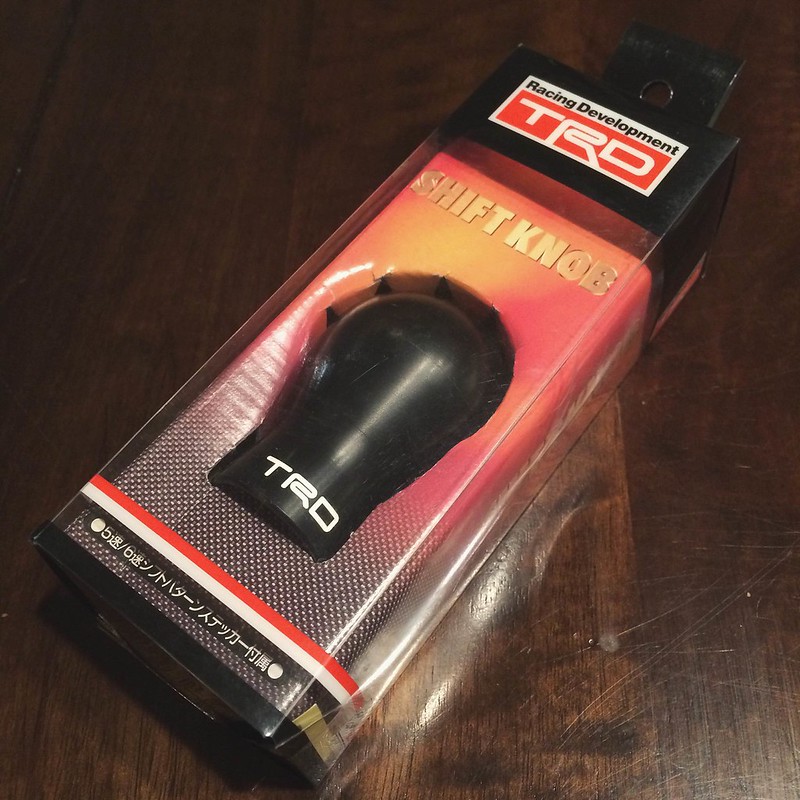
When I had my six speed Toyota Matrix, I bought this genuine TRD duracon shift knob from Japan. After I sold the car, I sold the shift knob to my friend Peter of Modified fame since I no longer had a use for it. Of course, by the time I started this project the shift knob was nowhere to be found online. Fortunately, Peter is a really cool guy and I was able to convince him to sell it back to me. Really excited to have this piece back! I might need to hit up Broadfield to come up with a solution for my shifter trim and shift boot for me once the transmission is in the car.

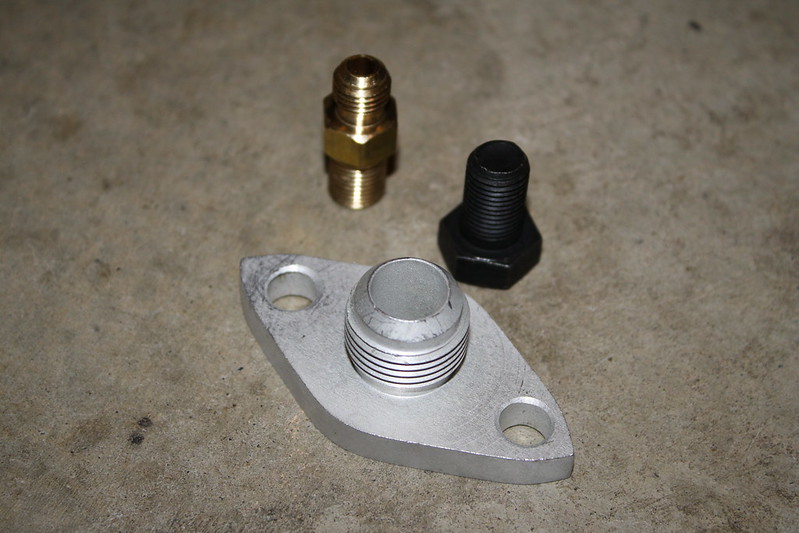
With some more interior stuff sorted, it was time to get back to the engine and transmission. I confirmed that the oil feed and drain line that came with my turbo were going to work with my engine, so I ordered a drain fitting for the block to allow me to connect the -10AN drain line for the turbo. The kit also included a -4AN fitting to attach the oil feed to the block and a block off bolt for the other oil supply hole in the block that is no longer needed with the single turbo setup.

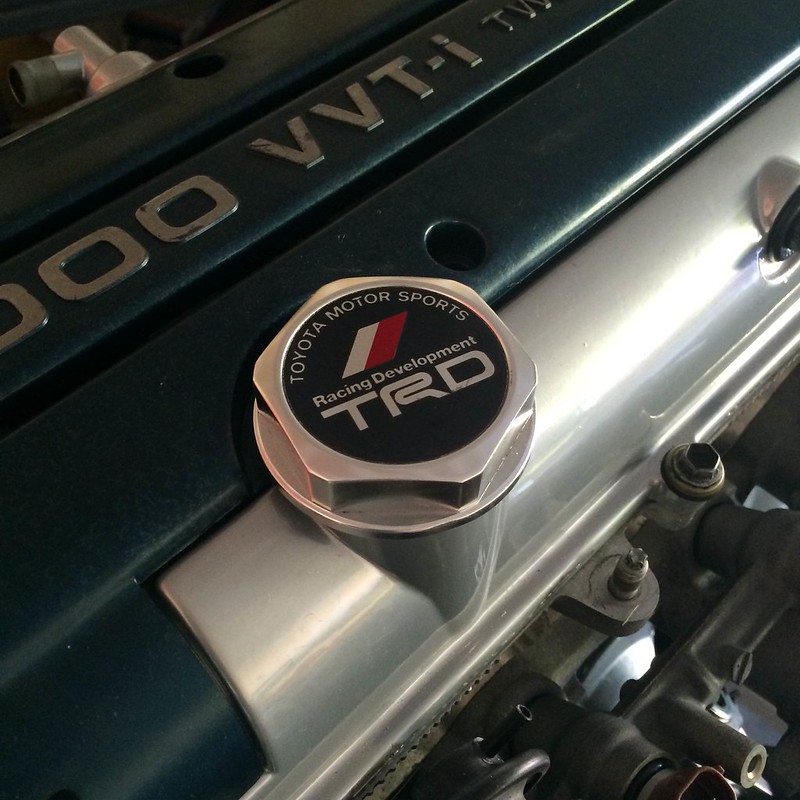
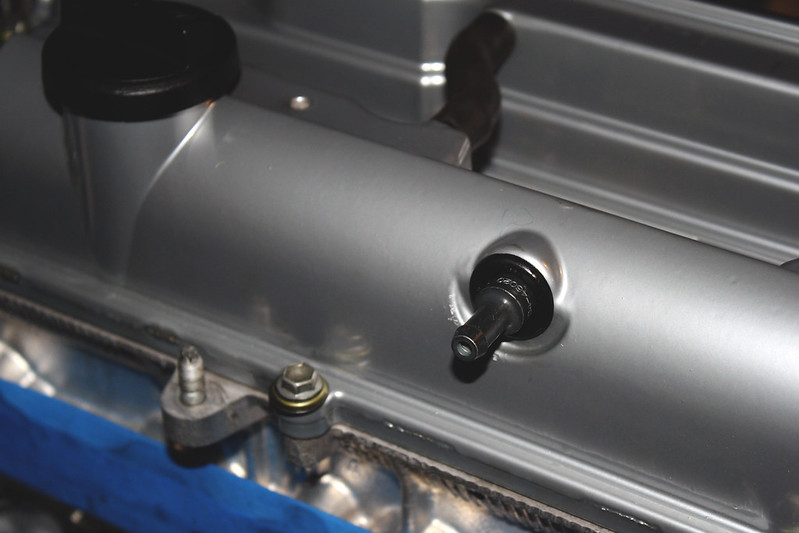
The addition of those items essentially takes care of the oil side of things, topped off by the TRD oil cap I picked up from the Supra forums. My factory oil cap had a crack in it, which was a great excuse to add something that looked a lot cooler.

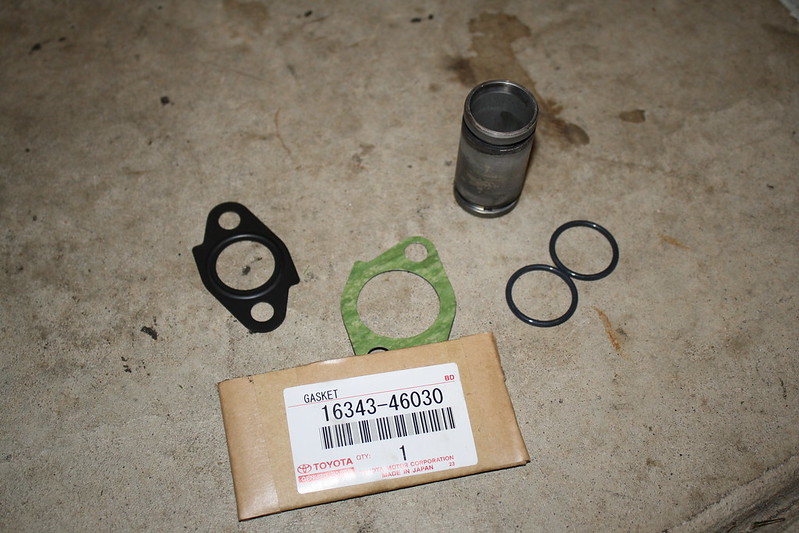
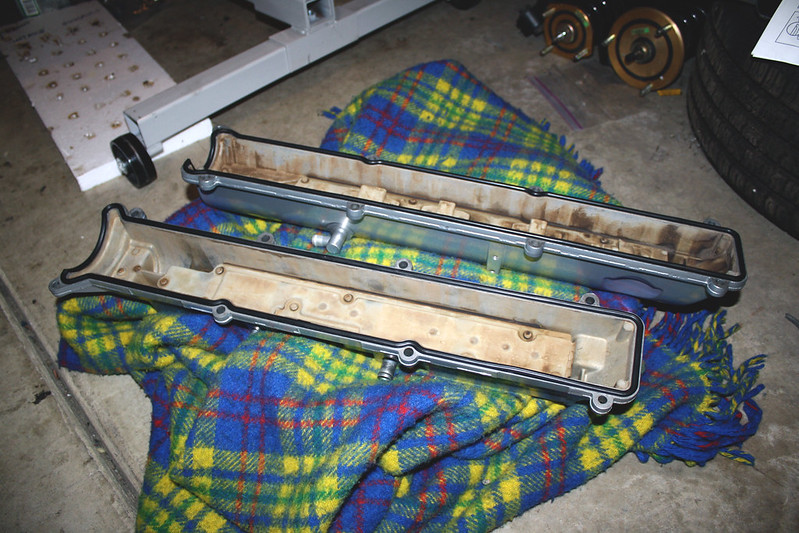
The next thing I needed to address was the coolant system. I picked up some replacement gaskets for the water neck and coolant crossover pipe, so I went ahead and installed those items.

Since my turbocharger is a journal bearing unit, it is not water cooled. This leaves me with about four or five open water ports that I no longer have a use for. It would probably be best to weld these shut, but I opted to install rubber caps with hose clamps since some of the ports are on the water pump and I did not want to go through removing it to have them welded. Some will surely scoff at this, but it will get the job done.

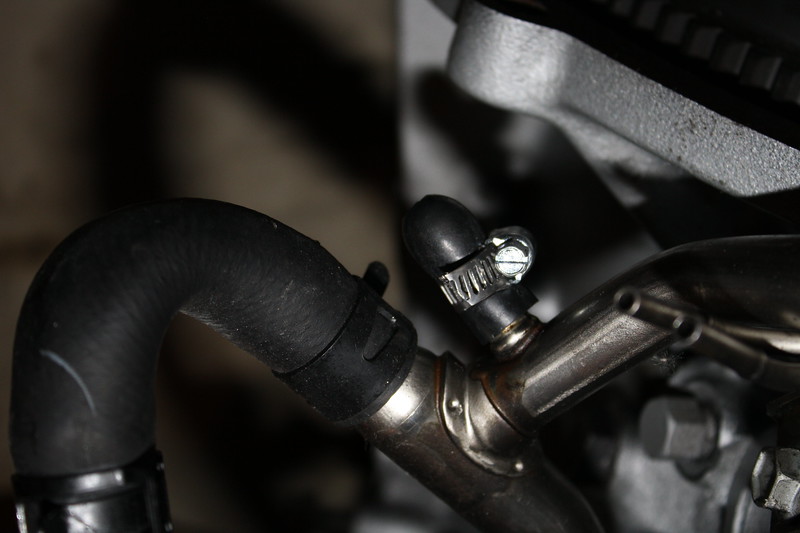
All of the ports have been capped off except for the water neck, so I’ll either need to have mine welded up or purchase one from Supra Store to take care of those in the near future. I still need to source a radiator and hoses, as well as hoses for the heater core and then everything coolant wise should be complete, aside from the addition of a water temp gauge at some point down the road.

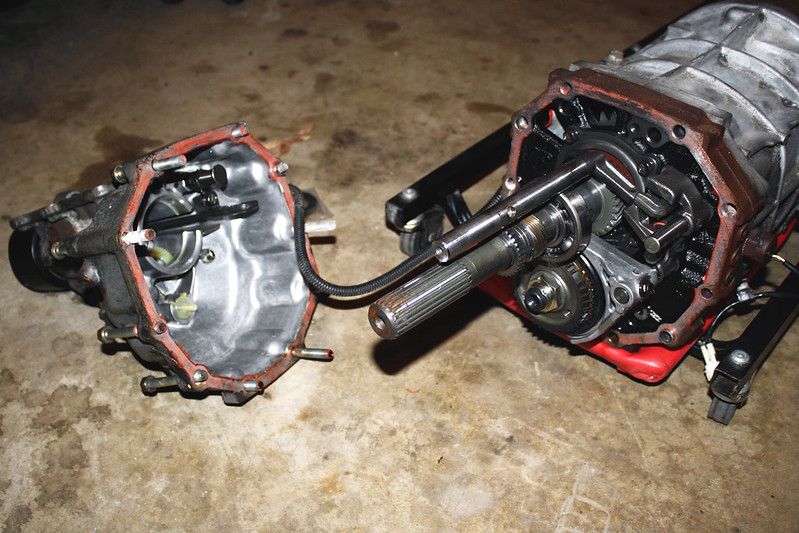
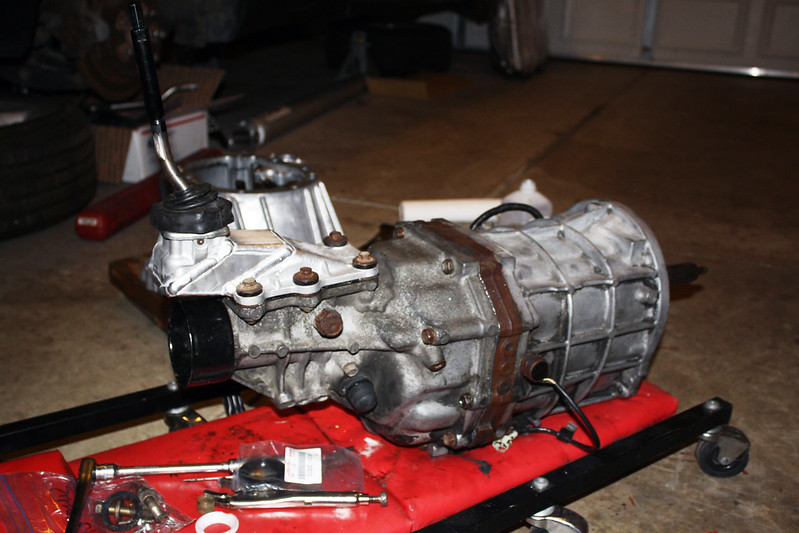
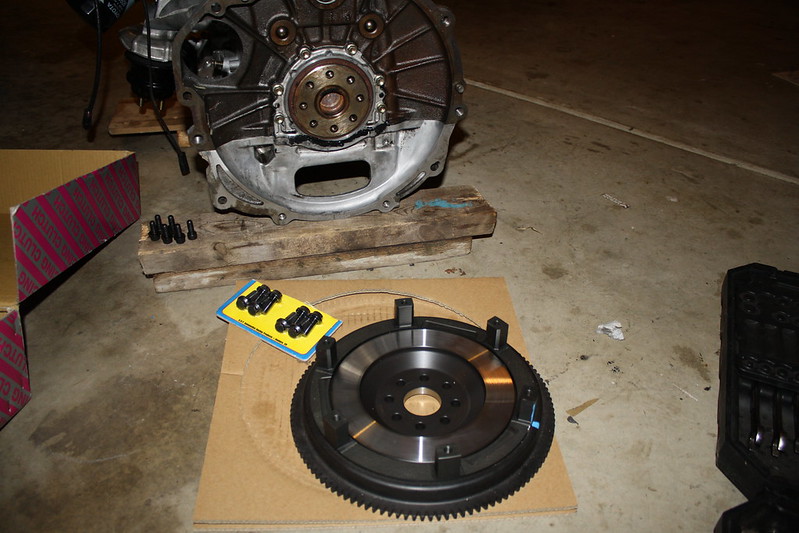
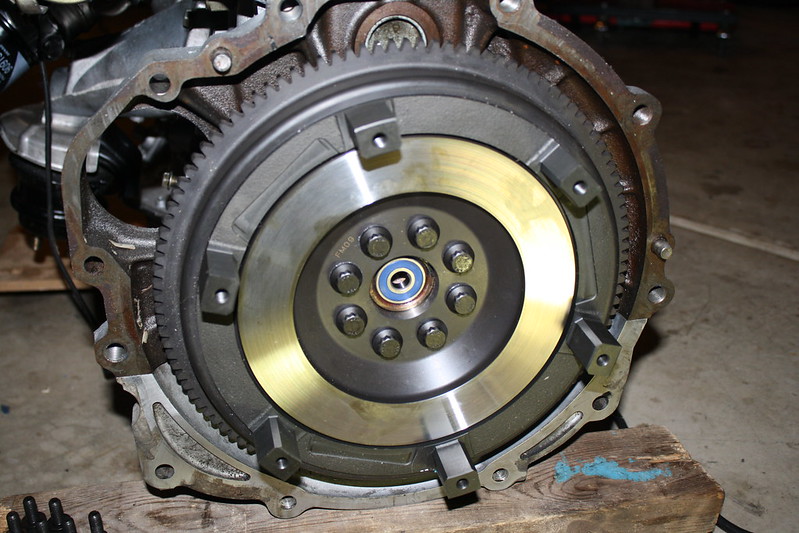
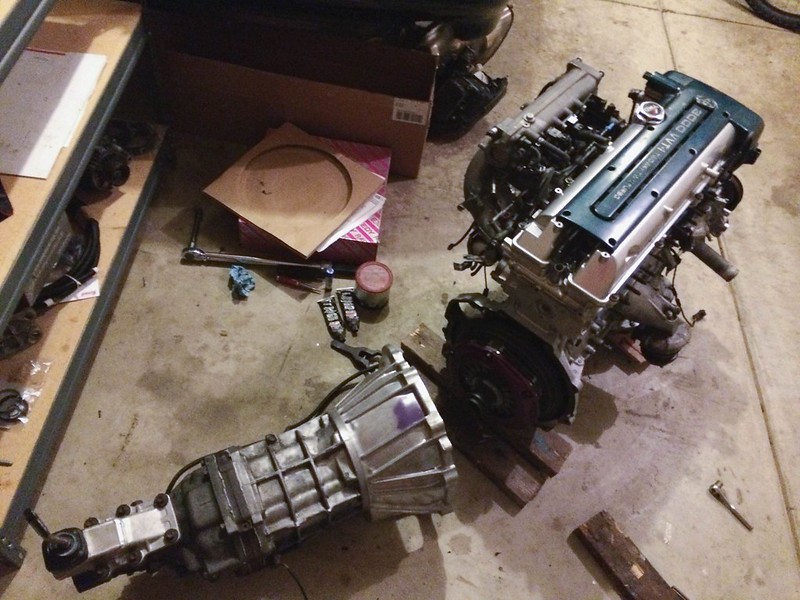
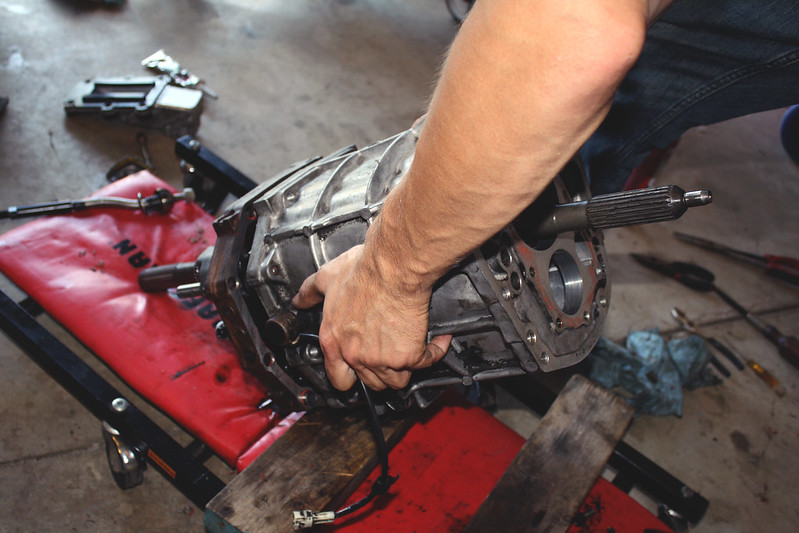
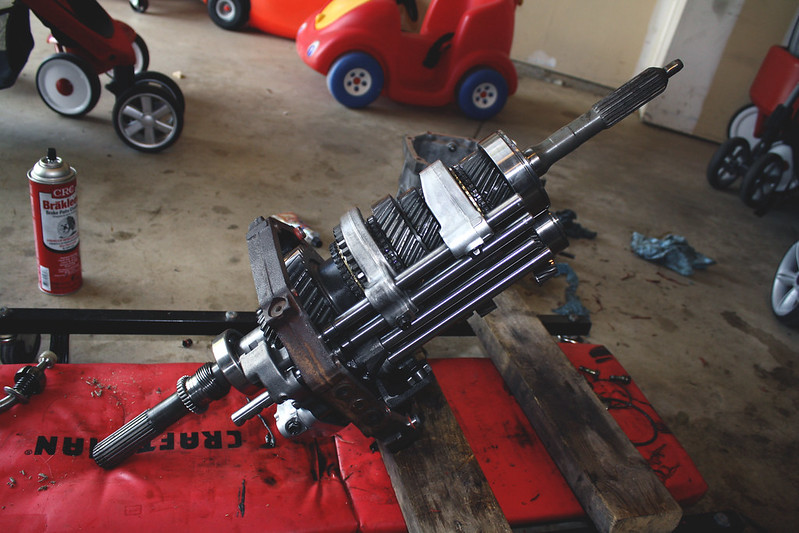
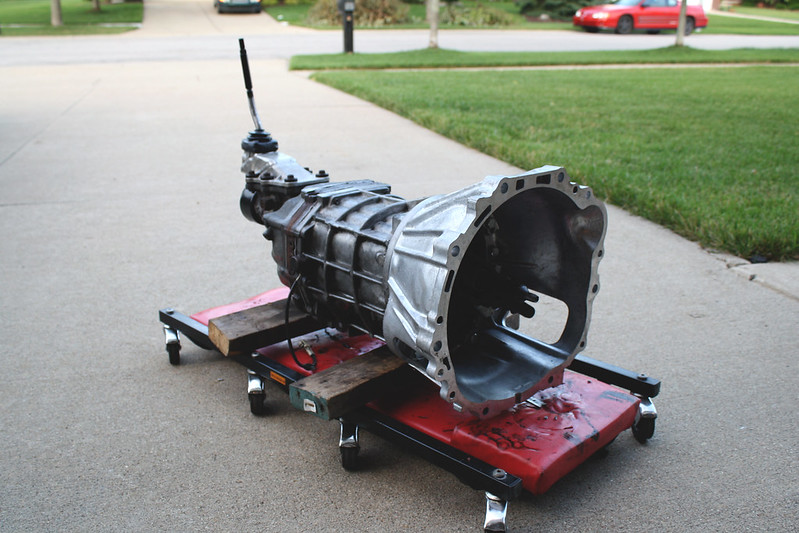
After messing with those items for a while, I decided to install my Exedy twin disc clutch along with a new OEM pilot bearing and ARP flywheel bolts. I’m ready to mate the transmission to the engine at this point, but I’m having a heck of a time getting the trans into position by myself. I’ll have to keep messing with it, and if I can’t get it alone I’ll have to bribe my cousin to come over again and help me out.

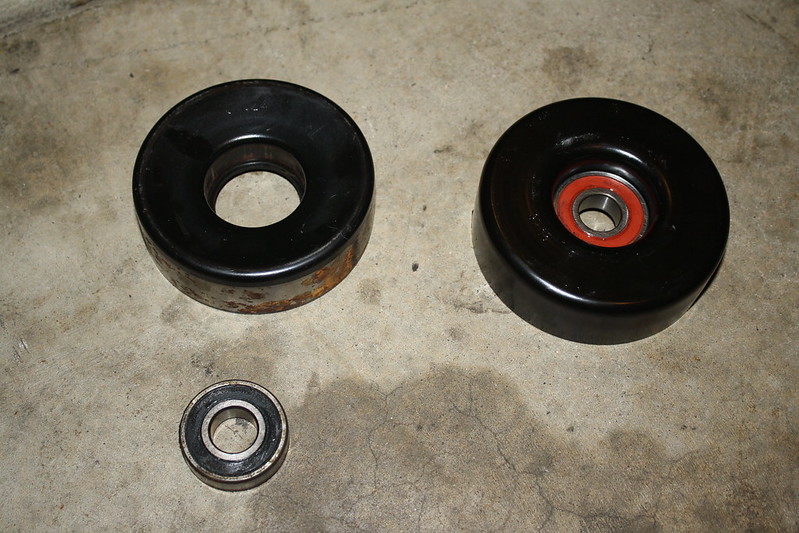
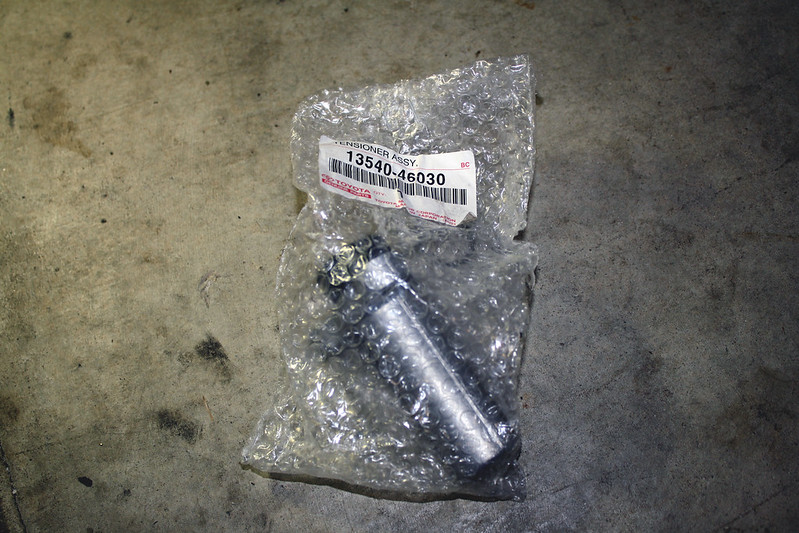
I noticed that my serpentine belt tensioner pulley had some play in it, so I decided to replace it. I believe that Toyota only sells the complete tensioner, so I sourced a pulley and bearing from Autozone for a JZA80 Supra. As it turns out, the pulleys are slightly different between the two. I was able to remove the defective bearing, but I will need to press the new bearing out of the Supra pulley and into the Aristo pulley when I find the time to use my cousin’s press at his work. Another hangup with something that should be very simple…

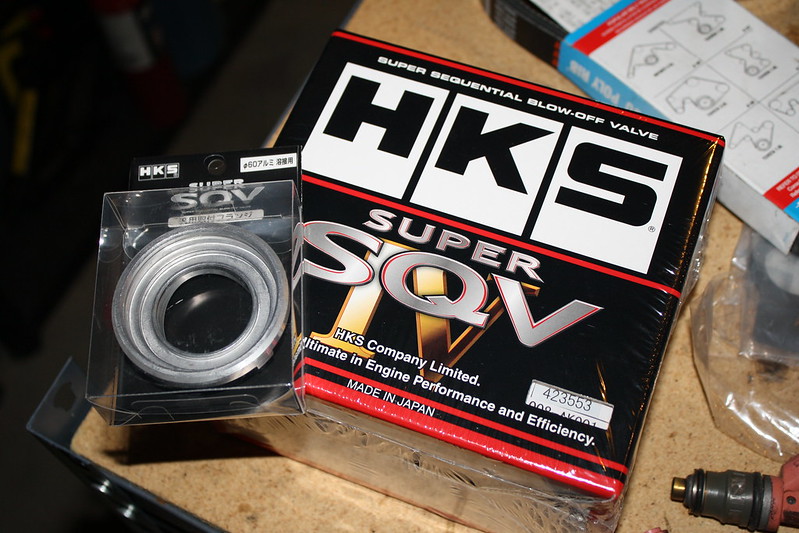
As for parts showing up, I’ve had some pretty cool things arrive lately. Motivicity Distribution (AKA HKS USA) hooked me up with an SSQV IV blow off valve and flange for the build. Huge thanks to them for helping me out!

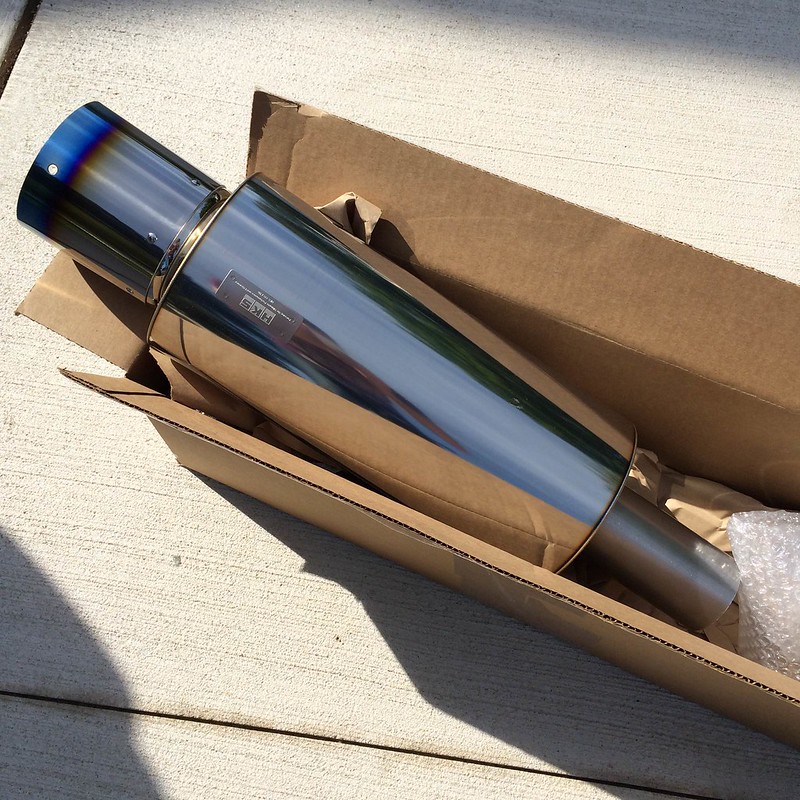
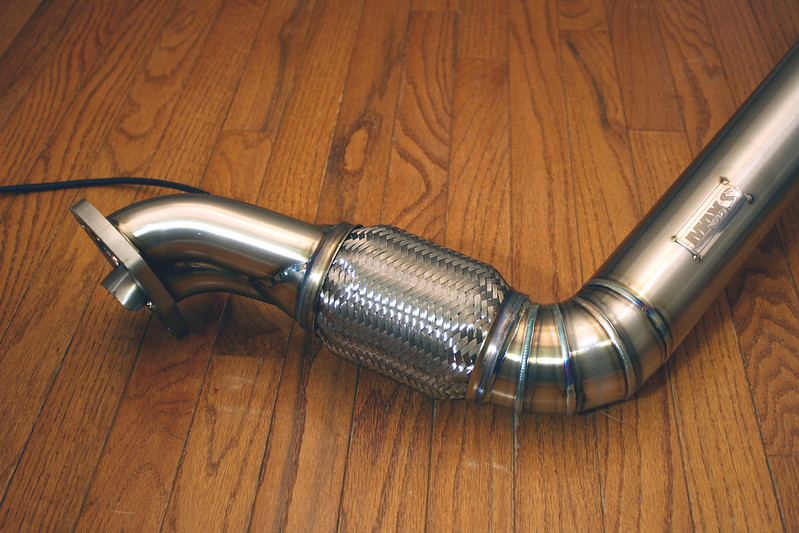
In addition to the blow off valve, I also picked up an HKS Hi Power muffler with titanium tip. All of the aftermarket exhaust systems for this car utilize dual mufflers and I’m not really crazy about the look. I noticed that Orido and NOB both use custom single-muffler setups on their cars, so I decided to follow in their footsteps and do the same. I’ll have my friend Mike fabricate a turboback system with this muffler when the time comes- probably some time this winter.

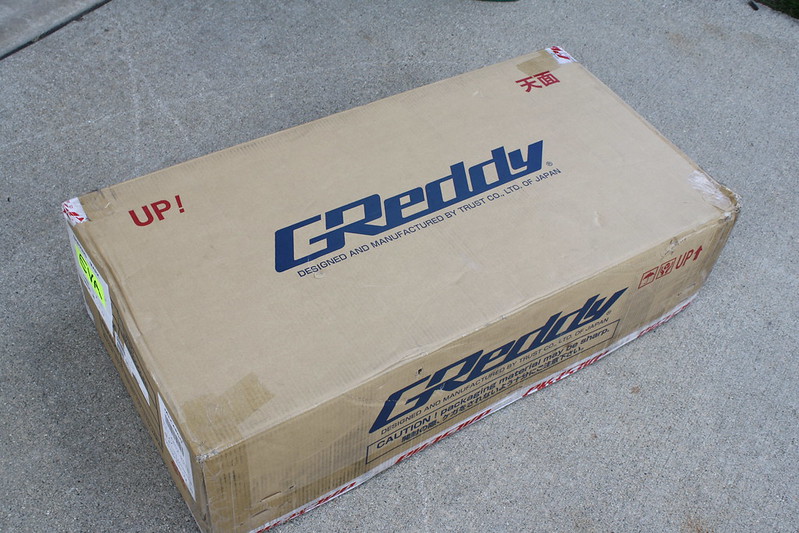
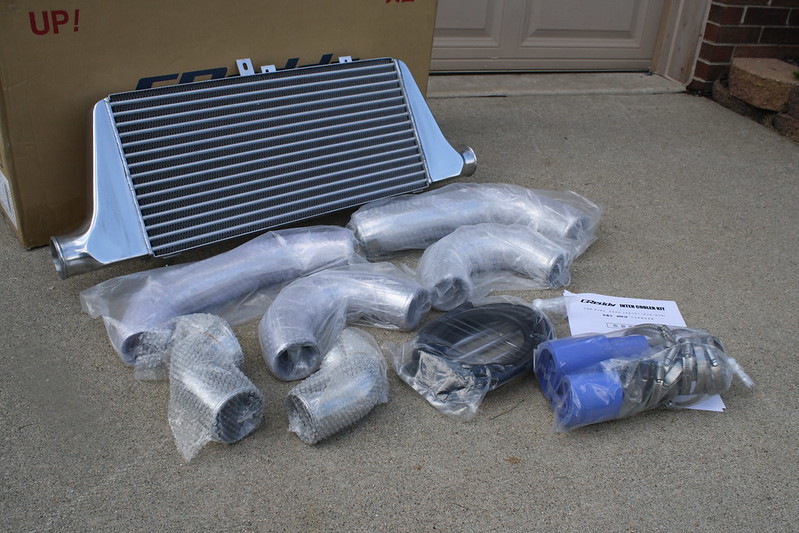
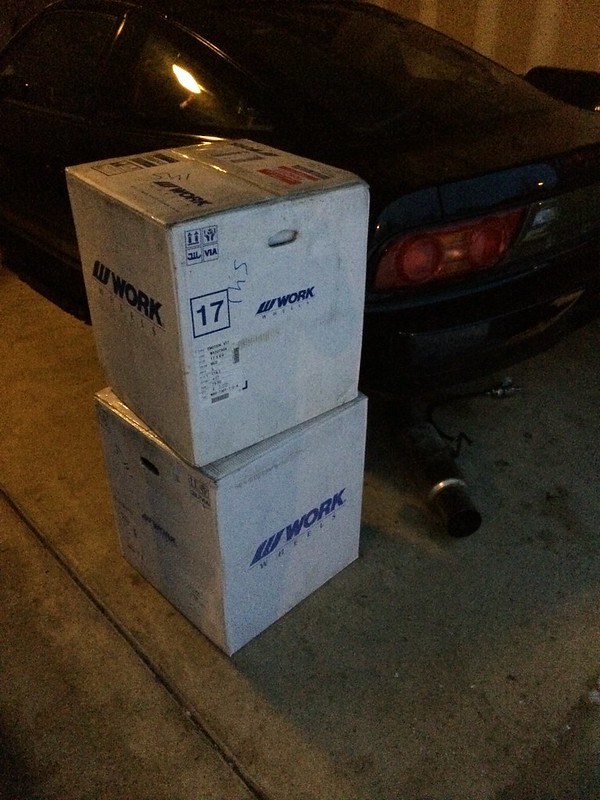
After nearly six months of waiting, my TRUST/GReddy intercooler kit for the Aristo finally arrived at Evasive Motorsports in the states. I’m really happy with the looks of the kit. I was also able to source the original GReddy T78 piping to utilize this intercooler kit with the single turbo setup, so that should arrive sometime late this week.

My hope is to source the remaining supporting items to complete my piecemeal GReddy turbo kit in the coming weeks. At this point I mainly need the turbo manifold and intake pipe to complete the setup, but I would love to find a downpipe as well. Even if it doesn’t fit perfectly, it will be a good starting point for a custom setup. I was able to find most of the gaskets I need for the kit, with the last one on its way to my house right now.

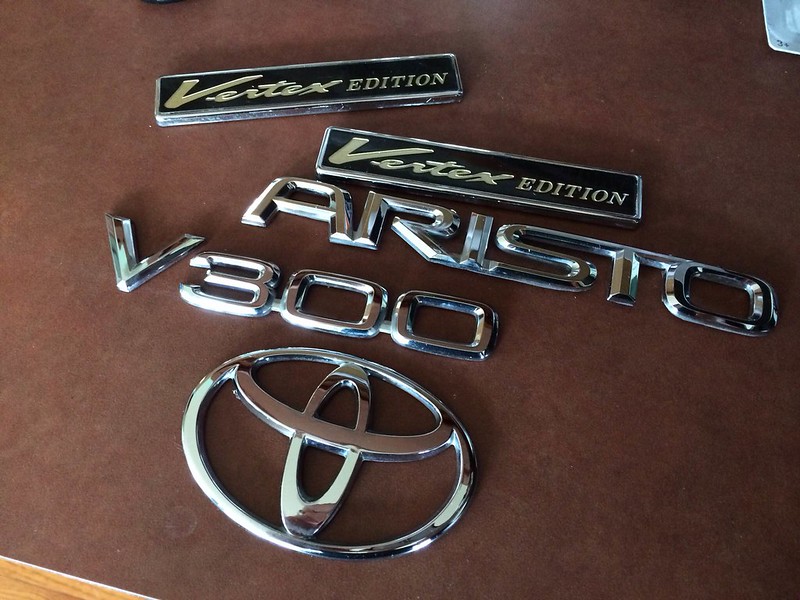
Finally, I scored a set of second hand Toyota Aristo emblems from the motherland. I’m not sure if I will run some or all of these yet, but we’ll see. I guess I probably have more important things to work on and sort out at the moment…

Wow, that was a massively long update with what I feel like was a small amount of progress. There’s so much research that goes along with every step of a build like this, so it sometimes feels like I have gotten a lot less work done than I thought I did. But with a long term project that’s just the way things go! Hopefully by the next update I’ll have the transmission bolted up, the intake manifold and turbo installed, and the drivetrain bolted into the car. Fingers crossed!

Thanks a lot for reading and following along. Keep an eye on Speed Academy for more detailed tech and swap info on this project over the coming months!

Damon


Posted in Uncategorized | 3 Comments

What Happened to July?

Somehow it has been nearly a month since my last update. It’s hard to believe how fast time flies when life gets busy! Family life has been wild and we did a little bit of traveling recently for our anniversary, so updates have fallen a bit behind. Let’s get everyone up to speed with the current state of the build.

I found after putting my transmission back together that I couldn’t get it to go into gear. I had never torn into a transmission before aside from replacing seals and whatnot, so I called my cousin Nick up for some assistance. Nick is a mechanical engineer for Aisin, the company that just so happened to design and build the R154 transmission.

We were able to take the trans completely apart and verify that everything appears to be in good working condition. I probably could have beefed things up a bit more with some more accessories from Drift Motion and Marlin Crawler while we were in there, but my setup probably won’t see a ton of abuse anyway.

With everything properly reassembled, I installed my Marlin Crawler shifter base bushing, Freed extended shifter housing, and 1JZ bellhousing. The transmission is now finished and ready to be installed in the car, which is a great feeling. Couldn’t be more grateful to my cousin for his help with this.

Next up was the installation of the replacement OEM Toyota water pump. I nearly missed the o-ring located on the block, but after seeing the condition of the seal that was in there I am really glad I caught it.

With the o-ring replaced and the new water pump bolted on, I decided to reinstall my camshafts and replacement cam seals. These are a common oil leak culprit on this engine, and I could tell that the seals on my engine were beginning to fail when I first tore into it.

I was really hoping to install a set of Tomei Poncams while the engine was torn down, but I just couldn’t justify the cost right now. There are a lot of other things I could use the money towards to get this car into a semi-completed state, so those items needed to take priority. Definitely something I would love to install someday down the road though. Here’s a shot of the water pump and camshafts installed. Note that the new timing idler assembly is also now in place:

You can also see that I installed my GReddy oil filter sandwich plate and a new OEM oil filter, as well as the sensors for my Defi oil pressure and oil temperature gauges:

Next came the cam gears. Again, something I would love to upgrade down the road (at least the exhaust side anyway):

With everything set in the valve train, the next step was to install the valve covers with a pair of fresh gaskets:

I tossed a new PCV valve in while I was at it for good measure. My oil cap is cracked, so I’ll need to replace that with a much cooler piece in the near future:

Next it was time to put the timing belt in place:

It was at this point that I realized my lower timing cover was looking a bit worse for the wear. It was caked in old oil and had a few broken tabs, so I decided it would be a good idea to replace it:

The last piece to the timing assembly puzzle was a new timing belt tensioner:

So at this point I am feeling pretty good- the majority of the engine is put together and I can move on to installing the intake and exhaust manifolds, right? Well, when I went to give the engine a couple of quick rotations by hand to ensure everything looked good, I hit hard resistance at just under one rotation. Total bummer… I checked the alignment of the VVTi cam gear and found that I did not have it rotated all the way to the right, but that didn’t solve my problem. If I get the time this weekend, I need to remove the camshafts and try putting everything together again. All of the timing marks are aligned, but I had to have made a mistake somewhere along the line. I suppose that’s all just a part of the build process, but it can definitely be frustrating.

As for new parts arriving, things have been pretty quiet this month. I did however decide on a turbocharger after finding a great deal on one of the forums I frequent. I decided to keep things fairly old school and go with a GReddy T-78 journal bearing tubo. The unit I found was installed on an RB26 but the engine build was never completed, so it is essentially brand new.

I’ll probably get a lot of flack in the 2JZ community for choosing to go with this turbo as there is a lot of newer and improved technology on the market today. But as I am sure most of you know by now, I really enjoy staying true to genuine Japanese components whenever possible with my builds. This setup is sure to be reliable, and will look and sound awesome in the process. While it may be contradictory to the approach a lot of people take, it’s the way I prefer to go.

I also managed to source a second hand GReddy Type R wastegate to use with the setup. These are typically more than $1k new, so I was more than happy to find one in decent shape that has seen a bit of use over the years. The dump pipe was included and I don’t think it is a GReddy piece, so I am not sure if I’ll be utilizing it or not. This is my first externally gated setup, so I’ll have to make that decision when it comes time to fab the downpipe and exhaust.

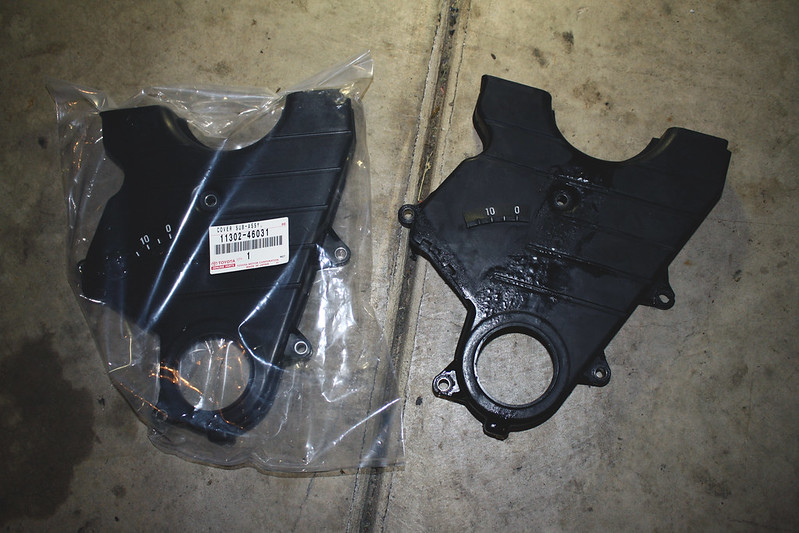
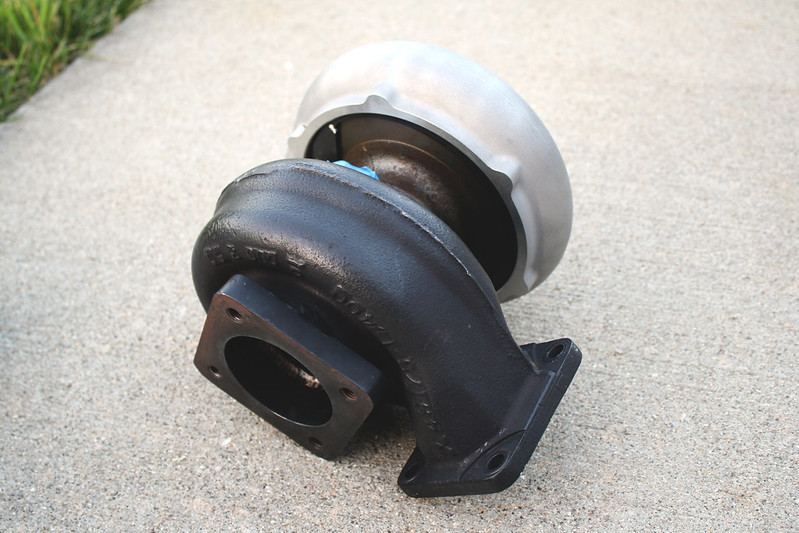
 The next order of business will be to source an exhaust manifold and complete the water and oil lines for the new turbo setup. My hope is to find a TRUST manifold originally designed as a part of the T-78 kit, and I believe I might have a solid lead on one of those. We’ll see what happens though.

Finally, I got bored and decided to toss the hood on the car while it continues to wait patiently for the new drivetrain. I can’t wait to see some crystal clear headlights, a new bumper, and my GReddy intercooler looking back at me from the garage. Here’s a blurry photo that I’m going to post anyway:

I’ll try to do better at keeping everyone updated through the rest of the summer. In the mean time, keep an eye on www.Speed.Academy for updates on my build. Speed Academy is the new venture headed up by my friends David Pratte and Peter Tarach, the guys that ran Modified Magazine before it was shut down earlier this year. I’ll be posting updates on the build over at their site roughly every two weeks in addition to here on my personal blog. I’ll go into a bit more technical detail over there as well, so if you’re looking to rebuild your 2JZ or swap your Lexus GS it should be worth checking out!

Thanks as always for reading.

Damon

Posted in Uncategorized | Leave a comment

Progress Report

Fairly light update once again this week. My oldest daughter Kinsey turned two over the weekend, so we were pretty busy. I managed to sneak a couple hours in last week though. Here’s a recap of what went down.

The first order of business was to tighten up the head studs. I finally managed to find the proper 12 point deep socket and was able to get this all taken care of. The next step will be to install the cams. I’m thinking I will install the factory cams for now so that things keep moving and I’ll add a set of Tomei Poncams later on when I can swing it. I’m starting to get a little anxious to have the engine assembled.

My intake cam gear bolt is stuck in the camshaft and beginning to round out, so I ordered a replacement bolt for when I finally break that free. This is one of the reasons I want to purchase new cams instead of messing with it, but maybe the machine shop can break it free if I am not able to figure it out. I also picked up the pilot bearing needed for the automatic to manual swap:

Some of the paint was coming off of the block, so I decided to hit it with a quick coat of high temp silver. I guess iron blocks are typically black and not silver like aluminum ones, so maybe it was in poor taste. I might shoot it black, but I might leave it too- we’ll see what happens.

The engine mounts that came with my swap were old and brittle. One of them managed to snap in half during my test fit, so I needed to replace them. I am not usually one to buy parts from Megan Racing, but I could not find any other aftermarket replacement engine mount for this chassis. I had hoped to find some solid Cusco mounts like I had in the S13, but no such luck. For now I guess these will get the job done.

Old broken engine mount vs. the new mount:

Installed:

With progress slowed down a bit on the engine, I turned my attention to the transmission. I started by installing the output shaft seal:

Next I moved on to installing the shifter extension, rear case, and shifter housing:

I also installed the Marlin Crawler shifter bushings while I was at it.

Next up will be installing the bellhousing, input shaft seal, and slave cylinder. One last piece of the puzzle arrived last week- a set of 840cc SARD fuel injectors.

Perhaps these are hinting at something else that might show up soon? Stay tuned to find out…

Damon

Posted in Uncategorized | Leave a comment

Engine Assembly

It feels as though progress has been painfully slow as of late, but life is crazier than ever with summer in full swing. With my wife’s maternity leave drawing to a close and my oldest daughter’s birthday coming up this weekend, the build has taken a back seat to my usual day-to-day craziness. I’ve just got to remember that this was supposed to be a long-term build, as hard as that is for me to do sometimes. I’m terribly impatient, haha.

It took quite a while to remove all of the old head gasket material from the block. I was really nervous about damaging the block or introducing junk into the bottom end, so I had to spend a ton of time with a razor blade cleaning the surface. Hopefully I got it clean enough though and things will seal up nicely.

I installed the ARP head studs, followed by the Apexi head gasket. I learned the hard way that the head needs to be mated to the block before the head studs can be installed or you won’t be able to put the washers onto the studs. After removing each stud individually and placing the washer in first, I was able to get everything all buttoned up.

I must have borrowed a 12 point deep 1/2″ socket when I did this with my SR, because I didn’t have one to torque the head studs down. I’ll have to pick one up this week and take care of that.

I got my valve covers came back from powder coating last week. They didn’t turn out as chrome as I had expected, but they look kind of cool. Much better than the dirty and dull condition they were in previously.

The next order of business is to decide on camshafts. The cam gear bolt on the intake side is stuck in the cam, so I need to break that free and replace it regardless of if I go with OEM cams or Tomei Poncams. Everything else for the intake side and timing related should be ready to go once that is sorted out though. I’m thinking about painting the block silver while it’s apart as well.

I can’t wait for the engine to be back together and ready to drop in. Thanks for reading!

Damon

Posted in Uncategorized | 2 Comments

FIPG Everywhere…

I’m a little behind on my update for last week, but I knew that I had a three day weekend for Father’s Day and was hoping to get some work done on the car during that time, so I decided to hold off on posting an update until today. I didn’t get as far as I had hoped, but things always take longer than I think they will. So with that being said, I’m happy with my progress!

After checking out the bottom end a bit, I decided to proceed with reassembly without getting into pistons, rods, etc. I took the same approach with my SR20DET and was happy with the results, so fingers crossed that I’ll end up in the same place with the 2JZ.

The first order of business was to remove the timing gear from the front of the engine, allowing me to swap the old oil pump out for the new unit. I had to purchase a gear puller from Auto Zone since my typical two-jaw puller wouldn’t work with this type of pulley. The included bolts were too large and standard thread pitch, so I had to make a trip to the hardware store for some new bolts. Once I had those in place, the puller made quick work of removing the gear.

With the gear out of the way, I was able to pull the oil pump. I needed to press the new front crank seal into the new oil pump, but was having a hard time finding something to press the seal in evenly with. I read that a piece of PVC pipe worked well, but it was about 1 AM at the time, so all of the local hardware stores were closed. I ended up removing a piece of PVC pipe from the side of my house that I had repaired at one time (something to do with my washing machine) and it was the perfect diameter! A redneck solution? Yes. But it got the job done! I promptly reinstalled it before my wife noticed I ripped the house apart…

Here’s a shot of the old oil pump and front crank seal with the new OEM Toyota unit:

I also replaced the three o-rings on the engine block- two of which are situated behind the oil pump. Seemed like a good time to get these freshened up:

With those seals installed, I was able to bolt the fresh oil pump into place. Much better:

I also took the time to replace the rear main seal. I didn’t have any reason to believe it was bad, but this is a nasty one to get into once the engine is in the car. Might as well, right?

Next up was the upper oil pan, oil baffle plate, and a new oil strainer & gasket:

And finally, the lower oil pan. Here’s how the engine sits today:

I got the head back from the machine shop late last week, freshly decked and with new OEM intake and exhaust valve stem seals installed. I was hoping to have the head, head gasket, and ARP head studs installed by this morning, but the surface of the block still needs to be cleaned up quite a bit before I am able to complete that work. Hopefully by the next update it’ll be back together.

So, on to the items that arrived since last time. I had great luck with my Apexi head gasket in the SR, so I decided to grab one for this engine build as well. The OEM gasket would have been a little cheaper, but hey, bonus points for my mod list. Thanks to Mike at Evasive Motorsports for helping me out with getting this quickly!

I’ve been meaning to order Bride seat rails for a while now, but drivetrain components have taken priority. I spent some time translating Bride’s website to find the rails I need, but just hadn’t pulled the trigger yet. Fortunately, I just happened to find a fellow in Chicago selling the driver’s side seat rail I was after for a great price. Not to mention the fact that next day shipping is essentially a guarantee from Chicago to my house. Really excited to have the seat rail here so quickly without a long wait from Japan:

I sat it in the car, but got distracted before I bolted it down. It was fun to actually sit in the car since the factory seats were removed when I got it and I hadn’t bothered to bolt the black leather OEM seats into the car previously.

And hey, here’s an out-of-focus photo of the seat:

Speaking of long waits from Japan, I finally got a nice box from the motherland early last week after waiting about two months. Inside I found a really clean Bride Ergo that I picked up from Juicey on Zilvia for an awesome price. This was an impulse buy that resulted in me picking up the Zeta II to match, but I am really glad I did:

I also grabbed a Nardi Classic 350mm steering wheel to complete the package. I’m really excited about this setup since it is so similar to my S13 interior that I miss immensely:

I just need to pick up a Works Bell hub and a Bride rail for the passenger side and then the interior should be very close to complete. I’m sure a set of red checkered mats from Japan for the Aristo will be the icing on the cake. I’m still considering installing red Bride fabric on the door panels, but I almost prefer the subtle black leather look with the contrasting red seats in this car.

Alicia was kind enough to give me some more time in the garage last night after our Father’s Day festivities to reset things a bit and get organized. The garage was completely out of control and I was worried about losing critical engine components, so it was great to be able to get a handle on it to stay organized.

I’m looking forward to getting the drivetrain assembled and into the car soon. This might happen before my turbo setup is all sorted out and installed, but I am guessing it will be much easier to install a single turbo with the engine in the car than it would be to install the twins. I have a lot of research to do before the turbo setup will be here and ready to go, but I pretty much have everything to get the rest of the engine and transmission together and in the car. I always seem to under estimate how long these things take, but here’s to hoping I’ll be dropping it in within the next month or so.

Thanks for reading!

Damon

Posted in Uncategorized | 2 Comments