A Note to the Future S13 Builder

I recently decided to test out Instagram’s new question feature that they included in this week’s update to the app after seeing some other people use it and was really pleased with the resulting conversations that followed. I have been wanting to post something similar on IG recently offering to answer general S13 questions for people for a number of reasons. As nerdy as it may be, I am really passionate about these cars and always enjoy talking about them in just about any context. I enjoy meeting new people from different backgrounds and hearing their stories and really appreciate when someone comes to me with a question or for advice with their build. It’s a great feeling when someone tells me that the car I have put so much time into over the last 9+ years inspired or influenced their own build. It’s never what I set out to do, but I’m always grateful when someone takes the time to reach out and tell me this.

One of the questions I received was something along the lines of “Do you have any advice for a 17 year old that would like to build an S13?” and I thought it was a really awesome question. Being 32 years old, it’s easy to talk down on the current generation and the way they modify their cars. There’s no doubt that the landscape has changed with the downfall of forums and the rise of social media. Getting attention has somehow become both monumentally easier and more difficult at the same time. Everyone has a desire to be noticed and included, which can sometimes translate into a car being hastily thrown together in order to gain followers- the supposed determinant of success in this day and age. The fact that someone so young took the time to ask this question reminded me that blanket statements like “Kids these days don’t care about building a car properly” are unfair and do nothing to further the scene. I’ve always been a firm believer that taking any opportunity to spread positivity is time well spent.

The day I bought my S13 at age 22 back in November 2008.

As someone that has been building and tinkering with an S chassis for almost ten years now, I thought it would be fun to write a bit longer response to this question than I was able to on Instagram. I’ve made plenty of mistakes along the way, so working through a hypothetical build beginning at age 17 feels like a good way to share what I would have done differently for any aspiring high school age S chassis builders out there.

My first piece of advice for someone in this situation would be to get a hold of a cheap, reliable car to transport you to and from school and work. Having a job in high school (and college if you go) will be key to help fund the future project, so find a vehicle that can get you to and from work reliably and affordably. It doesn’t need to be anything remotely cool- think an old Camry or Accord. Something practical that won’t let you down and will allow you to avoid needing to make a car payment every month. In fact, I would encourage you to find something that you have zero temptation to modify. Even at age 32, my current daily driver is a 2004 Pontiac Vibe with over 200k miles on the clock and an automatic transmission. It’s not remotely cool in any way, but it gets me to work during the winter months and only cost me $1,000. I was fortunate enough to have my mother purchase me a ten year old Camry in high school, so I got a major head start in this arena.
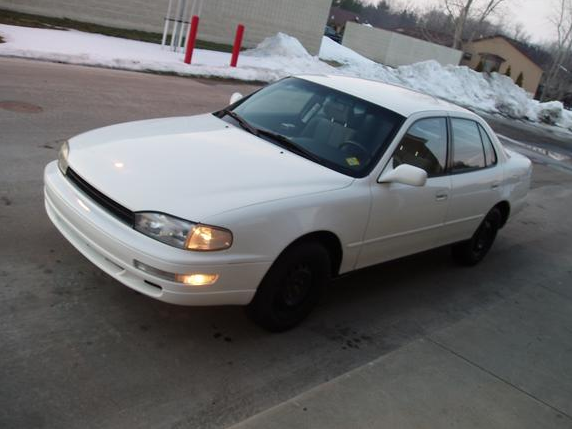

My 1994 Toyota Camry that my mom bought me in high school. I was able to squeeze 150k miles out of this car (on top of the 110k it had on it when it was given to me) as my winter beater during much of my S13 build process.

Save as much money as you possibly can. This will obviously be key to building one of these cars. Try not to purchase any parts until you have the actual car in your possession (something I have not always been able to stick to in the past.) As for the car itself, my personal preference would be to find something as close to stock as possible. Obviously this is what most people would prefer, but it’s obviously not easy in this day and age as these cars are getting older and older. The tales of finding a stock chassis that has been sitting for years are few and far between, but they do still pop up from time to time. Don’t buy one of these cars until you have a place to store it. My S13 spent time at both my grandpa’s house and my cousin’s house until I had a garage of my own. Finding somewhere free, safe, and accessible to keep the car with someone you trust is a huge advantage.
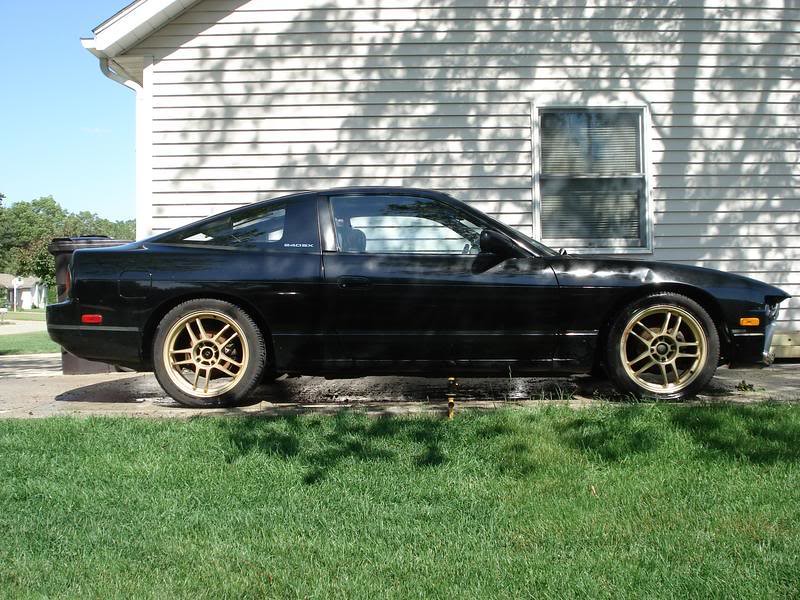
A photo of my car from the original Craig’s List ad in 2008.

Buying someone else’s project can be a headache, but sometimes buying a car that doesn’t run can be much more affordable. If you can find a chassis that is in good shape without any rust, includes most or all of the body and interior panels, and has a few modifications that are easily reversed it might not be a bad buy. Buying someone else’s unfinished project might help you get a good deal if they need the cash fast or are frustrated and just want the car gone. You also might be able to sell some of the parts they installed if they aren’t what you would personally choose to recoup some of your funds. For example, I bought a rusted out and smashed up S13 coupe back in 2014 as a donor car for rebuilding my own S13. I paid about $2600 for the complete car but was able to sell the coilovers, 2 way differential, and some other items the car came with to get some of my investment back quickly. I was left with a complete SR swap that I knew was in OK shape (since the car was running when I bought it) for about $900. Stay away from anything with a tube front end, ruined rear quarter panels, or the chassis harness removed. A car that has been stripped to a bare shell will likely be too difficult to get back on the road. Find the best balance of affordability and completeness possible.
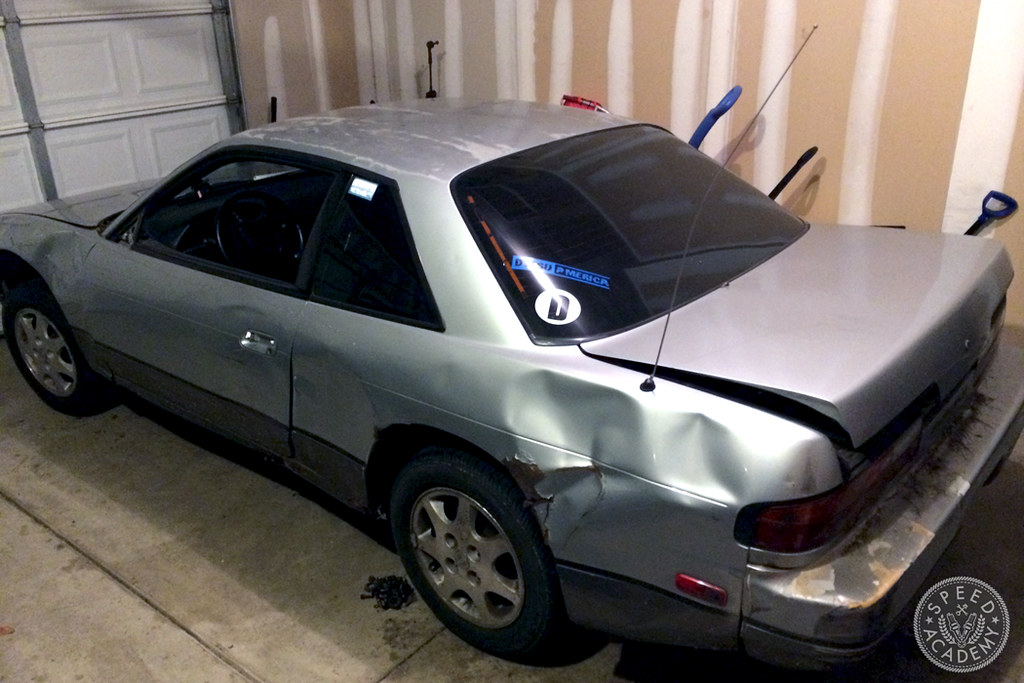
The donor S13 I purchased to source an affordable SR20DET swap.

Once you have the car, try to work in stages of the build: exterior, interior, chassis, drivetrain, etc. Come up with a solid plan for what you want to achieve and a parts list for each area. Focus on one portion of the build first, then execute it. If you can start with a car that runs and drives, keep it that way for as long as possible. For example, if you find a mostly stock S13 with a running KA, take time to enjoy driving it before you tear it down. Collect all the items you need for each stage and install them as complete modules as you go. You could begin with the suspension and brakes by replacing bushings, adding coilovers and adjustable arms, upgraded brakes, and a five lug conversion with some decent wheels and tires. Enjoy driving the car in this simple state, then work on piecing together an SR20DET swap. Wait until you’ve sourced everything needed for the swap and have sourced a place to complete the work, then try to knock it out in a week or so. Obviously this is easier said than done and takes a huge amount of patience, research, and money. It’s definitely not easy!
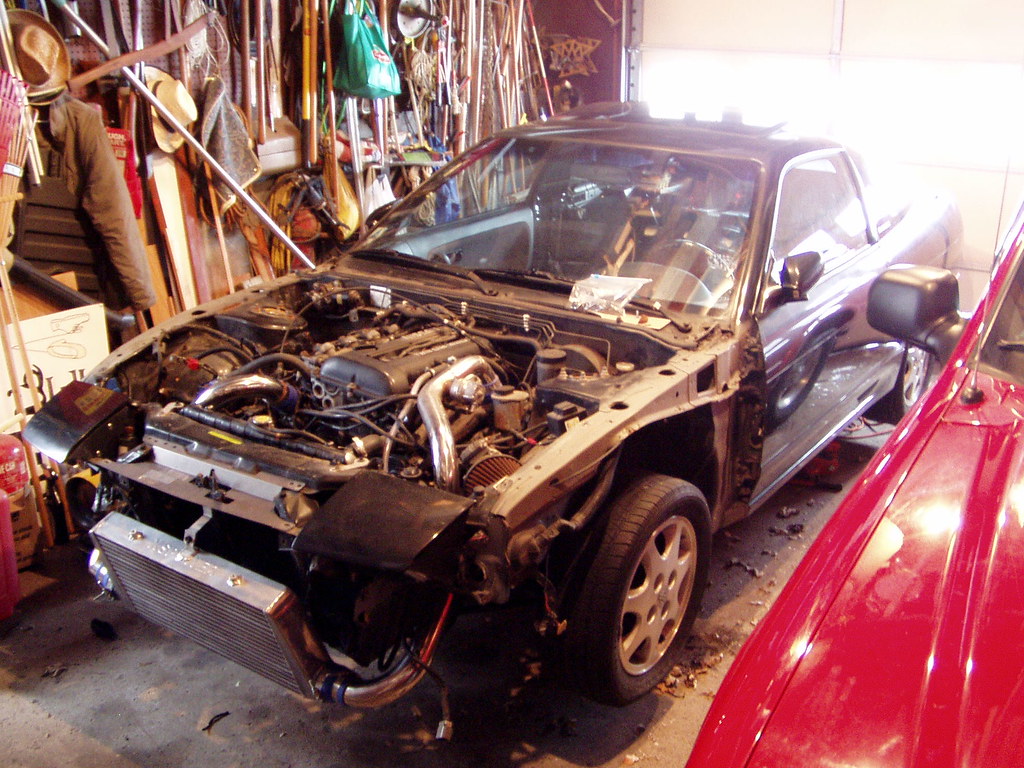

My grandfather’s garage wasn’t the cleanest work environment, but it sure beat letting the car sit outside in the snow all winter. Circa 2009.

Being able to actually drive the car is a huge motivating factor in completing a build like this. I learned the hard way when trying to piece together my 2JZGTE swapped Lexus GS400 from a rolling chassis I purchased that it’s tough to stay motivated with a car you have never even driven. There’s no connection with the car and it makes it easy to want to give up. Keeping the car as complete as possible through each stage will allow you to enjoy it a bit during the process and hopefully keep your dedication alive. Far too man S13s are stripped down to a bare shell never to see the road again because the time and funds are not available to complete them. The task becomes too daunting and it’s easy to just give up. It’s much easier to strip a car down to begin a “build” than it is to put it all back together, so it can be tempting to fall into this trap just to make some progress. Try to avoid it if possible.

Remember along the way that the car won’t immediately represent the end vision you have for it- that’s OK. Don’t let what others are doing around you push you to cut corners or make sacrifices to your vision. You can live with the imperfections in the mean time knowing what the finished product will hopefully look like once completed. Enjoy the build process! It can be really stressful, but I almost enjoy the process more than the end result. Remain humble and appreciative for what you have because you never know when it could be taken away. There are aspects of my car’s paint job that drive me bonkers to this day, but I have to take the good with the bad and enjoy the car for what it is knowing that I’ll hopefully have the opportunity to paint the car properly one day like I originally had planned.
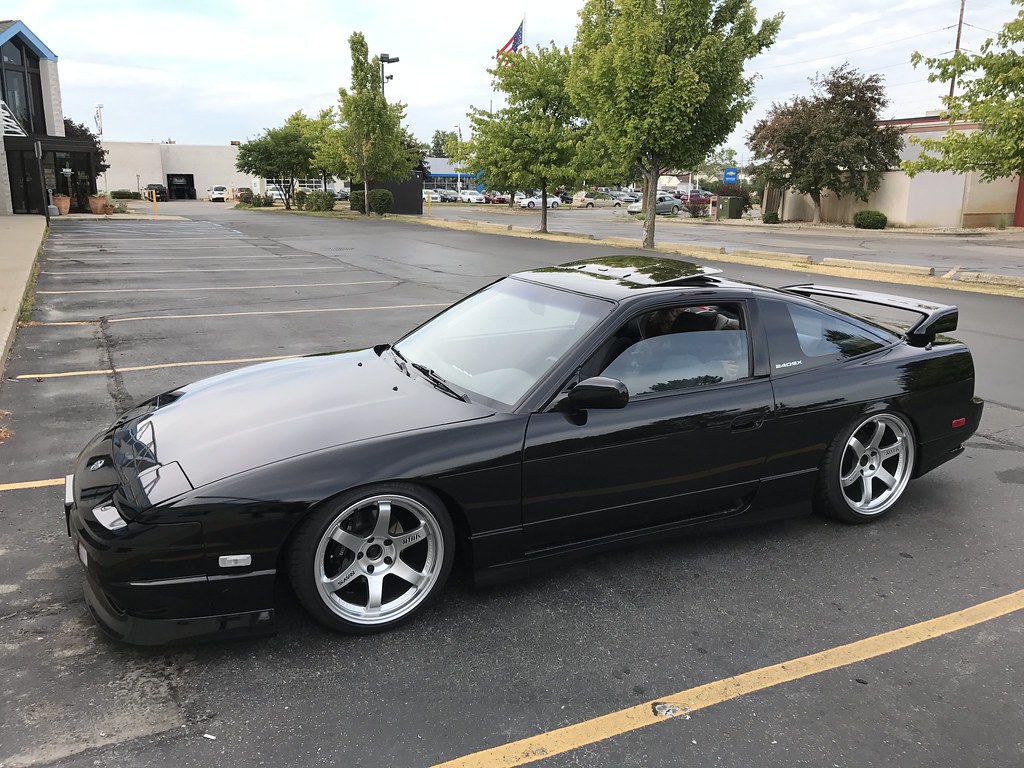
Building a car is a ridiculous expense that makes no financial sense whatsoever. It’s incredibly difficult to achieve while still in college or high school, which is partially why I didn’t take on building a chassis like this until I graduated from college and started my career. It’s a balancing act that is very hard to maintain. It’s paramount to take your time and realize that it could take years to achieve your vision. It’s no fun to wait in the mean time, but make sure you don’t let life pass you by while you’re chasing down the goal of building a car. A good balance of your time is important to maintain. It’s not going to happen overnight, so make sure you take care of life’s priorities and yourself as you go. Be sure to capitalize on the more important aspects of a hobby like during the process- traveling to new places and meeting new people. The car will always be there when you get back.

I hope someone out there finds my two cents useful. I can’t say I have always followed my own advice, but this is what I have to offer after living the journey myself. I wish you the best with your S13 project!

Damon

Posted in Uncategorized | Leave a comment

Exhausted

The weather has been unseasonably hot up here in Michigan as of late, making it difficult for me to find the motivation to drive my car much at all, let alone work on it. With actual temps in the mid 90s and the heat index well over 100º with humidity factored in, today’s high of 75º is a welcomed change as far as my ability to enjoy my car is concerned.

Between the weather and my daughter’s birthday party last week, the car has been on the back burner. However, I did manage to install my new OEM SR20DET exhaust manifold heat shield while nearly sweating to death a few nights ago. I painted my exhaust manifold when I swapped this SR20 into the car back in 2015 but the paint did not hold up well and the manifold was looking a bit worse for the wear. I searched around for a used heat shield to install but didn’t have much luck.

I ended up sourcing a brand new unit from Japan as it turned out to be fairly affordable. Having this cover in place cleans up the engine bay a lot- and I’m sure it spares my hood from a bit of heat in the process.

While my engine bay isn’t as clean and filled with aftermarket parts as it used to be, I am fairly content with it. I went through a phase of wanting my engine bay to look completely shaved and tucked with a lot of go-fast goodies, but these days I prefer the basic SR setup with a more factory look. I try to keep a fairly neat and tidy appearance, but I’m much less concerned with what things look like under the hood these days. As long as the car is running well I am a happy camper.

Aside from installing the heat shield and fixing a small exhaust leak that developed due to the bolts between the downpipe and catalytic converter coming loose, I don’t have much else to report this week. I picked up a pair of generic battery post covers and installed them in the hatch area to ensure that none of my cargo in the trunk bumps against the battery and causes a short.

I’m looking forward to driving around a bit and enjoying the cooler temps over the next few days. Have a great weekend and thanks for reading!

Damon

Posted in Uncategorized | Leave a comment

BUMP

In my quest to replace virtually everything made out of rubber on my aging S13 chassis, I found myself inspecting all of the little rubber bumpers located on the different parts of the car. I had replaced a couple of these when I had my engine bay painted back in 2012, but most have them are still original. These seemingly insignificant little pieces of rubber can have a big impact on how your body panels line up and how efficiently your doors close so they’re a fun detail to consider adding to your build.

Beginning with the engine bay, there are three pairs of bumpers located under the hood. The first pair are located on the headlight brackets at the front of the hood- these allow you to adjust the gap between your hood and front bumper:

The second pair features a similar threaded design that allows you to adjust where your hood rests. These are a big help when adjusting the gap between your hood, fenders, and headlight covers:

The third pair is missing from my car entirely as I once thought they were discontinued. I had to remove the metal plates along the shock tower and create new ones from sheet metal when I painted my engine bay in order to remove some pesky rust. The rubber bumpers fell apart during the process and I never managed to replace them, but you can see the hole where they should be located:

Next up are the rubber bumpers on the driver and passenger doors. These ones gave me a hard time as I could not find them here in the states, but thankfully I was able to track them down. You’ll need a total of four of these since there are two on each door. These are a perfect compliment to replacement door strikers!

Finally, I purchased replacements for the two bushings located on the rear hatch. Mine are extremely hard and brittle so I am looking forward to the day that I can replace them.

There’s one final rubber bumper on the car that has managed to elude me, and that is the tiny one located on the fuel door. This one seems to be discontinued in both the US and Japan despite my best efforts to locate one. I even looked into replacing the entire fuel door, but the bumper is not included. Perhaps one day I’ll be able to find one that carries over from another Nissan, but fortunately mine isn’t in too bad of shape.

Not much has changed with the car itself in the last week other than a quick car wash. I’ve been enjoying driving it whenever the weather and my schedule allows which fortunately is fairly often. My wife and I drove the car down to Ann Arbor for dinner and a movie earlier this week which was a lot of fun. It’s rare that we get to drive the car since we always have the kids with us so it was quite a treat.

The interior is still in rough shape, but I hope to have it looking presentable again soon.

I would be remiss if I didn’t wish a happy sixth birthday to my oldest daughter Kinsey today! I can’t believe how the time has flown by- pretty amazing.

That’s my update for this week! Hopefully you find this information useful. Have a great weekend!

Damon

Posted in Uncategorized | Leave a comment

Sunroof Restoration

As I began to dive into collecting OEM restoration items for my S13, I found that the sunroof assembly is much more complicated than I had anticipated. I’ve never really had any leaking issues from the sunroof that many people often talk about with these cars, but I thought it would be a good idea to replace as many components of the sunroof as I could.

I of course began with the obvious items that I mentioned in my previous posts about moldings and weather stripping– the glass panel spacer that runs around the glass itself, and the interior weather strip. When inspecting the sunroof from the outside, I found that the hinge covers and other items on the glass itself were in rough shape, covered with chips and other paint blemishes. I was surprised to find that these items were still available. There are four in total- two hinges at the front, and two rectangular pieces in the center.

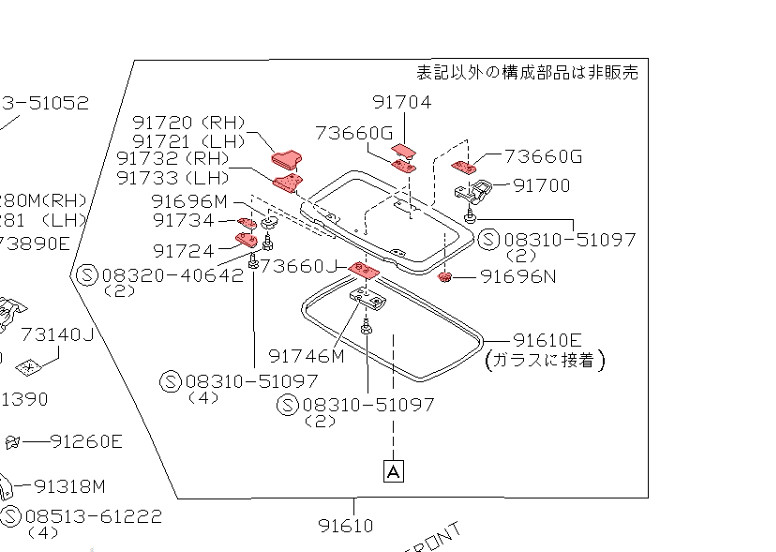
Each of these items also has a gasket associated with it that rests between the piece itself and the glass. There’s a gasket for each item on either side of the glass- both the interior and exterior. The highlighted items below are the ones I purchased:

On the interior side, I picked up some front hinge covers as the plastic on mine was hazy and faded. I also grabbed new circular covers for the rear sunroof holders to tidy things up a bit.

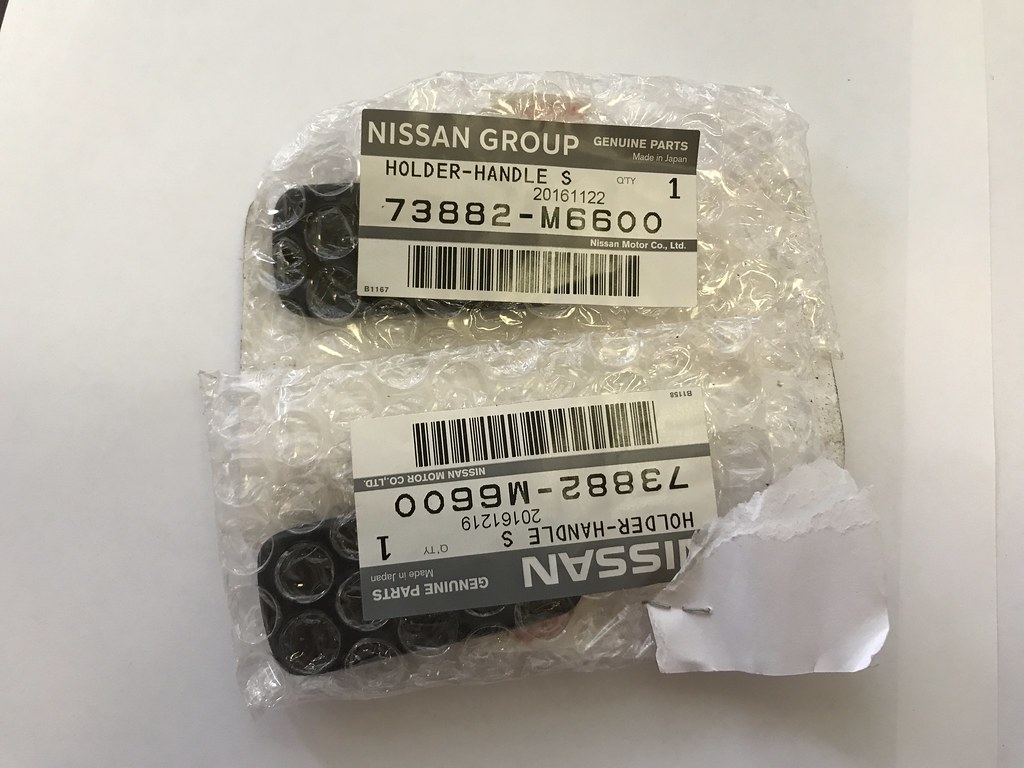
I recently found that my sunroof handle is cracked, so I purchased a replacement unit from Nissan. I was also able to source the plastic bezel that goes around the handle as mine has seen some abuse over the years.

Focusing so much attention on the sunroof made me want to look into sourcing a sunroof shade. From the sounds of it, all S13s with sunroofs came with this cover, as well as a storage bag and a set of straps in the rear hatch area to keep it safe while not in use. I chose to buy one from a 180SX as it looks a bit cleaner without the instruction/warning label on it like the USDM cars had. My friend Jimmy has a spare sunroof cover bag that I am going to grab from him which will be a nice addition. I used the cover on the drive to a friend’s house last Friday and it made a huge impact on keeping the temperature a bit more bearable inside the car. Pretty nice piece to have!

Speaking of last Friday, I got my car buttoned up and made the hour and a half long trek to my friend Tim’s house to help him work on his car. He’s currently in the process of reassembling it after having the whole thing painted. We installed the fuel tank, rear subframe, and front suspension so that we could sit the car on the ground and get a peek at what it will look like when it’s completed. There’s still a lot of work to be done, but I think it was motivating for all of us to see it on the ground for a bit.

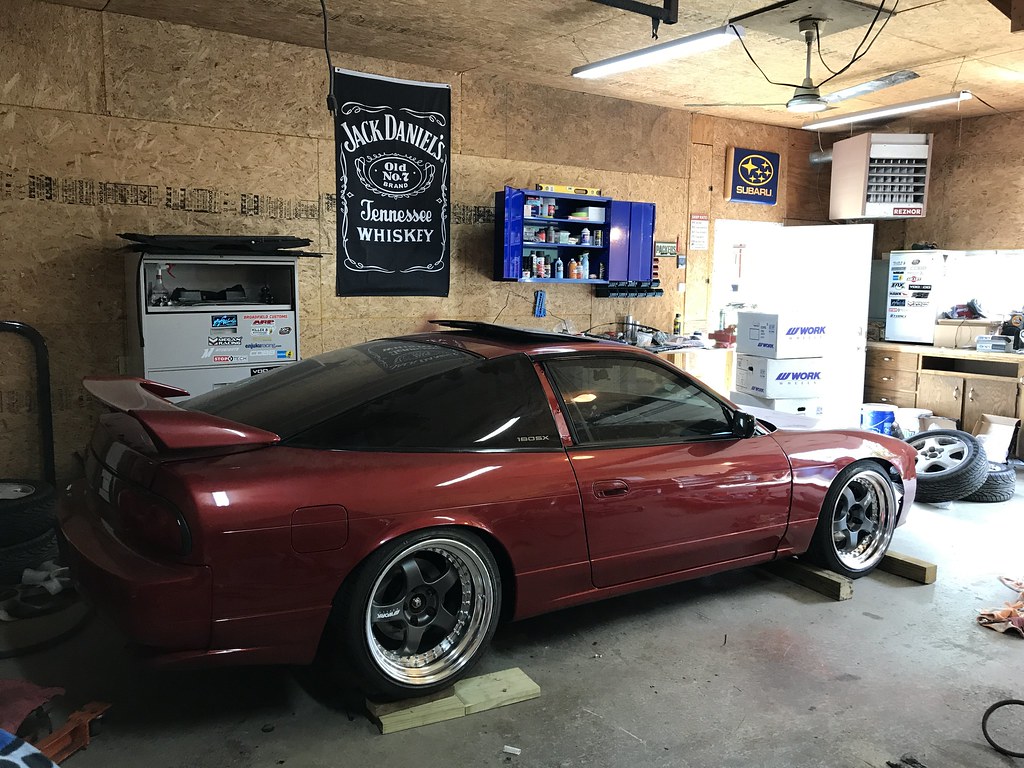
Finally, I had to include a couple shots of the LED garage lighting my wife and daughters got me for Father’s Day. I have been working under two light bulbs for the past eight years, so they’re a welcome addition to my garage. Shoutout to my friend Jimmy for the recommendation- these were purchased from Amazon.

Summer break kickoff celebration with a bunch of our neighbors now that my oldest daughter is officially done with kindergarten:

That’s my update for this week- hope you enjoyed it! Have a great weekend.

Damon


Posted in Uncategorized | 7 Comments

Getting Things Handled

Like I have mentioned previously, my hope was to create a long post for restoring each category/section of the car, but I’m just not sure that is the most effective way to do things as the process is very much ongoing. I’ve decided to cut the size of the posts down a bit to allow me to continue to meet my target of posting some new content every Friday. This will give me time to collect the remaining items needed and take a bit of the pressure off. I’m sure I’ll also continue to post about other topics not necessarily related to restoration, including updates on the car and places I have driven it this season. Anyway, with that quick disclaimer let’s dive in to today’s post.

Can you tell this thing has been sitting for nearly two weeks?

I received a few OEM replacement components from Nissan Japan this week that I am really excited about- the first being exterior door handles. The paint on mine is chipped up and I am sure they have become brittle over the years. When inspecting the door handles a few weeks back, I found that there’s a rubber seal attached to them. Being that I am on a mission to replace everything rubber on this car, I found that it was only included with a complete handle assembly. Thankfully I was able to find them and order a pair. Note that the part number is different depending on the color of your car as these come pre-painted when purchased from Nissan. They’re discontinued in the states, but you might still be able to track them down if you do some digging.

Moving to the inside of the doors, I also picked up fresh trim pieces for the interior door handles. Mine aren’t in the worst shape, but it’s common for these to be faded and pretty banged up. These are also discontinued here in the states.

Finally, I also purchased a replacement driver’s side interior door handle. Again, no issues with mine currently for the most part, but this seemed like a no-brainer knowing its age and how often it is used. I would love to have one for the passenger side as well, but sadly they’ve been discontinued in both the US and Japan.

As for my car itself, it has been off the road for nearly two weeks now. My oil pan seal was leaking, so I removed the GReddy pan to reseal it. While it was off, I began to ponder if I even really needed this piece anymore since I have all but given up my dream of one day drifting the car. Seeing an opportunity to get a little cash back, I replaced it with a new OEM oil pan and bolts from Nissan. I also installed a fresh oil pressure switch now that my gauges have been removed from the car for the time being- the holes in my dashboard being something I still need a solution for.

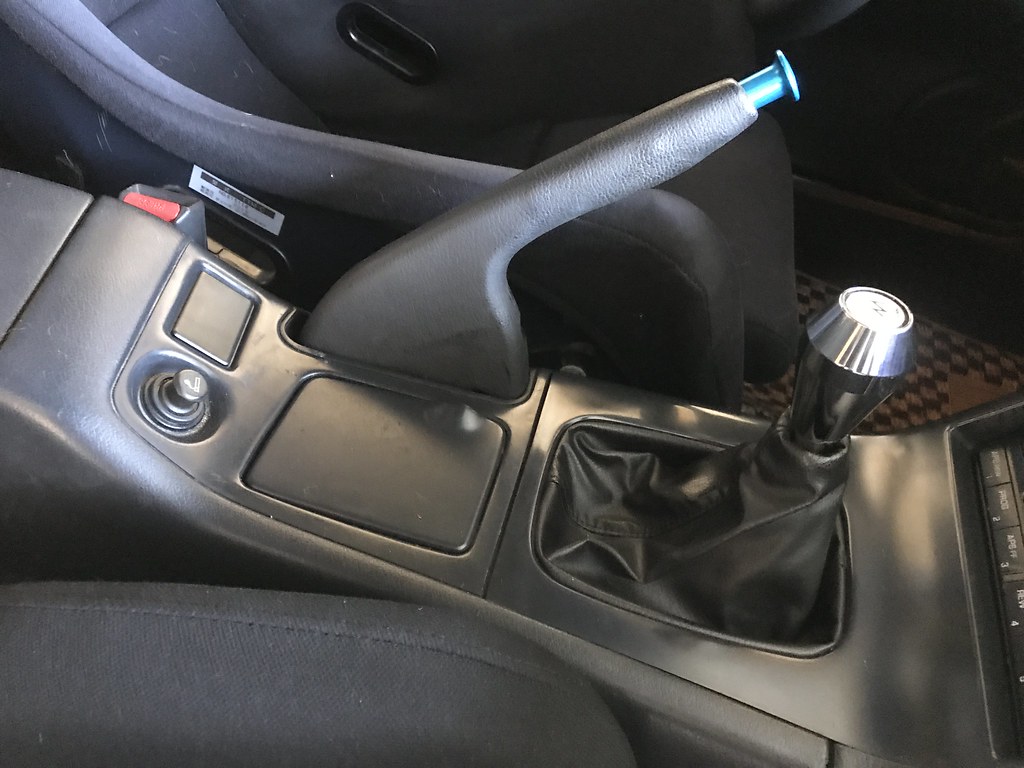
Before getting the car back on the ground last night, I also installed the used emergency brake assembly I picked up locally to remove my spin turn knob. I’m happy to have a more stock appearing interior- just need to source a replacement dash that’s clean enough, but unfortunately I have not been able to find one just yet.

Currently working on a cigarette lighter replacement as well…

I also added some OEM front bearing grease caps to the front hubs since mine have been missing for a while. Looks much cleaner now!

I’ll fill the oil and give the car a quick once over tonight before heading to my friend Tim’s house on Friday morning to lend a hand with his S13 restoration project. I’ll be sure to take plenty of photos and share a few of them here next week of the progress we make.

Happy Father’s Day to all of my fellow dads out there – enjoy your weekend!

Damon

Posted in Exterior, Interior, Restoration, Uncategorized | 2 Comments

Interior Restoration: Part 2

It’s been a little difficult to document and keep track of everything going on with my car lately, but I’m doing my best to post content in a way that makes sense. It’s difficult for me since I’m pretty OCD and this is all happening in real time. I’d like to post about each specific area of the car in one all encompassing post, but I am still waiting on a number of parts for each area- some of which I have not ordered yet- which makes that fairly difficult to accomplish.

To be completely honest, I haven’t really been feeling it this week. As anyone that harbors an obsession for S chassis cars will tell you, the passion tends to come and go in waves. My car is currently taken apart as I address a few things at once that have needed my attention, so that might partially be the source of my frustration. I also injured my tail bone a couple weeks back while riding my bike (wow, am I seriously getting that old?) and that has made driving the S13 less than enjoyable. I’ll do my best to step back from the car for a few days and come back to it when the motivation has returned like it always seems to.

Anyway, I received a fairly large order of miscellaneous parts from Nissan last week that I figured would be good to document. The parts guys weren’t too happy with this order as it contained a ton of little clips and screws, but thankfully they came through and tracked them all down for me.

The first area I started with in this wave of updates was the rear hatch. I’ve been missing the clips for my rear privacy cover for a long time now and was finally able to track them down. There are two hinge clips that attach to the rear speaker covers, and two clips with ball studs on them that attach to the hatch itself. I was only missing one of the four clips but ended up replacing all of them for peace of mind.

So cool to have a fully functioning privacy cover.

Another thing that has bothered me for a long time is the clips I was using on the rear hatch panel. Broadfield gave me some generic automotive clips to hold this piece on many years ago, but I went ahead and ordered the actual Nissan clips to install it. While I had the panel off, I dyed it black with Duplicolor fabric spray to match the other rear hatch panels I dyed in my previous interior post.

Next on the list was the proper tapping screws for the rear B pillar plastic panels. The screws I was using previously were too small and would sometimes fall out of the panels. It’s really nice to have the proper hardware for thing like this- makes such a difference!

The above screws are used in both locations shown here (2 per side)
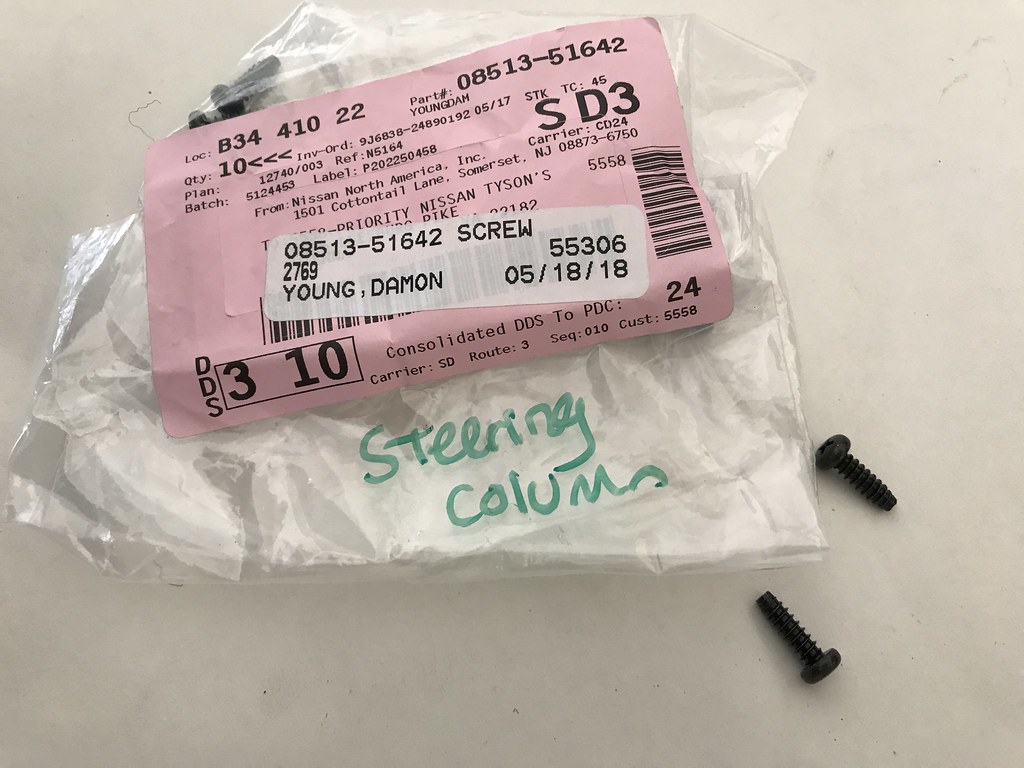
My steering column cover has always been held together purely by the plastic tabs- all six screws have been gone for as long as I can remember. It took me way longer than I would like to admit to install these, but I am happy to report the cover is now mounted securely. This should help to eliminate another source of vibration in the interior.

I noticed that the large plastic panels on either side of the rear seat had holes in them. I was unable to find a part number for the proper plastic plugs to cover these access holes, but fortunately found someone willing to sell these covers on a local Facebook page. I believe these are used to offer some sort of service access to the seat belts on USDM S13s as 180SX panels do not have these. I’d prefer to have the 180SX panels for a cleaner look, but these plugs will work just fine for now. Much better than staring at a strange hole back there.

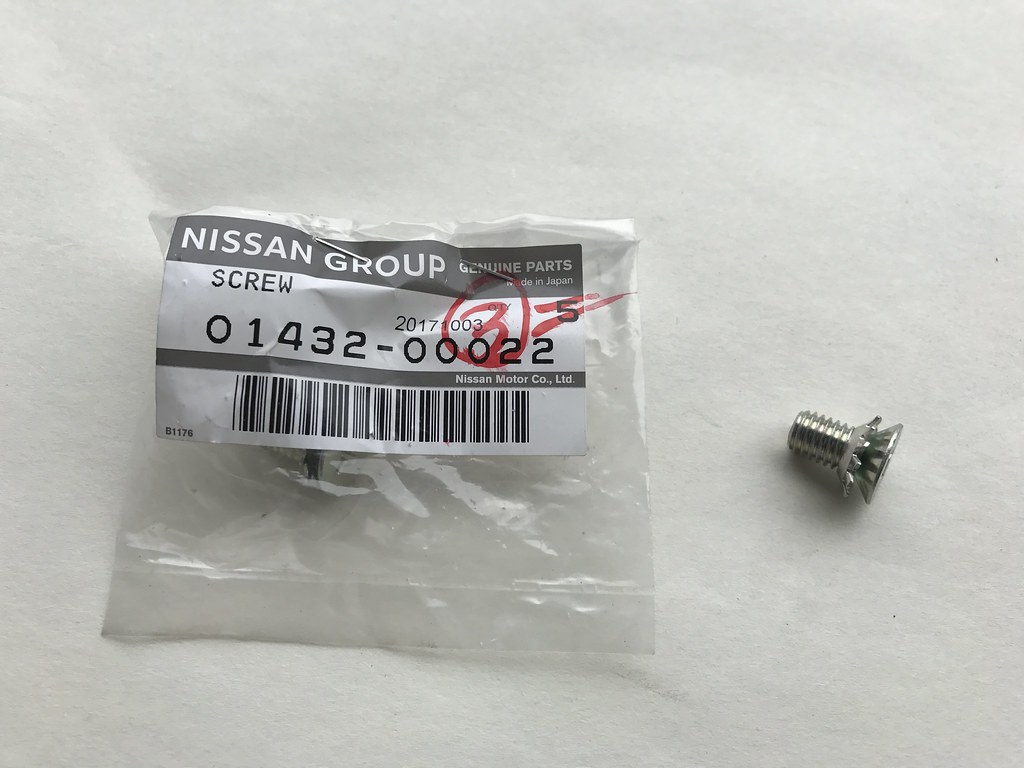
Next on the docket was a pack of screws that really came in handy. Some of the screws I purchased are only sold in bundles of 10 so I was forced to buy extras. These are the correct screws for securing the center console (six to be exact) as well as the two screws located on the gauge cluster bezel. Both of these have been missing on my car for nearly a decade.

I replaced my door strikers last fall and it made a huge difference in how the doors closed. Unfortunately, the phillips head screws took a beating when I removed them as they had likely been in place for decades. I was finally able to track down the part number for some fresh screws to go with them.

I replaced my door pulls/window switch bezels back in part 1, but realized I was missing the screw that attaches these to the door itself- as well as the plastic access covers for the screws. I was able to find a part number for the screws, but the access covers have been discontinued in both the States and Japan. Thankfully my friend Jimmy came to the rescue and sent me his from a car he was parting out.

The pair of LE door panels I had lined up fell through. Still hoping to find a clean pair if I can at some point down the road!

I decided to part ways with my Defi Link Meter II gauges as I felt they were a bit out of place in the now otherwise stock feeling interior. They’ll always be my all-time favorite gauges and I am sure I’ll have another set in the future. I am in the process of sourcing a clean dashboard to replace my factory one at the moment and hope to have a solution in place soon. I’ve considered installing a Coverlay dash cover for now, but I’m not sure I will be happy with that solution- we’ll see what happens. All I know is that I need to address this ASAP before it drives me crazy!

Some days it feels like I am going backwards with this thing.
Here’s how the interior sits at the moment.

The other interior item I am working on currently is swapping out my emergency brake handle with Cusco drift button for a stock unit. The bright blue button has become an eyesore in my current interior so I’d like to swap it out. More on that in a future interior installment.

I’ve got a few other interior items arriving next week, so stay tuned for a follow up post related to interior parts sometime soon. Drop me a comment if you’re enjoying these posts or if you have anything specific you’d like to see and I will do my best to deliver- it’ll help motivate me to continue this posting every Friday thing.

Thanks for stopping by!

Damon

If you missed Part 1 of my interior restoration posts, you can find it here. As always, please feel free to drop me a line at Damon@camryonbronze.com if you have any questions!

Posted in Uncategorized | 4 Comments

What Every Aging S13 Needs: Replacement Weatherstripping

Today’s post focuses on another S13 component that is often overlooked- the weatherstripping. If your experience with these cars has been anything like mine, you’ve probably noticed that water leaks from just about everywhere you can imagine. It has become routine for me to notice water on the inside of all of my windows after washing my car- and heaven forbid I get stuck in a downpour on a road trip (which literally happens every. single. time.)

After dealing with wet carpeting one too many times (which was mostly a result of some other holes in the chassis not related to this, but still), I decided enough was enough. I began to talk to friends that had restored their 240s and do some research to understand why this was happening and found that it is likely a result of the rubber strips running around all of the doors and body panels (otherwise known as weatherstripping) deteriorating and losing their shape over time. As was the case with the moldings, I assumed that none of these items could be purchased from Nissan anymore. Thankfully when I began looking into it I was pleasantly surprised.

I started with the front doors as that was where I often noticed water when washing my car. There are two main pieces of weather stripping here- one that runs along the top of the glass spanning from the A to B pillar, and another one that runs around the outside edge of the door itself. The door one is nice as it wraps around the side view mirrors- an area that has been ripped on my car for a very long time. Fortunately these were pretty easy to track down- and they’re the same for both coupes and fastbacks.

This is the first weather strip that spans the A and B pillars and butts up against the side glass when the door is closed.
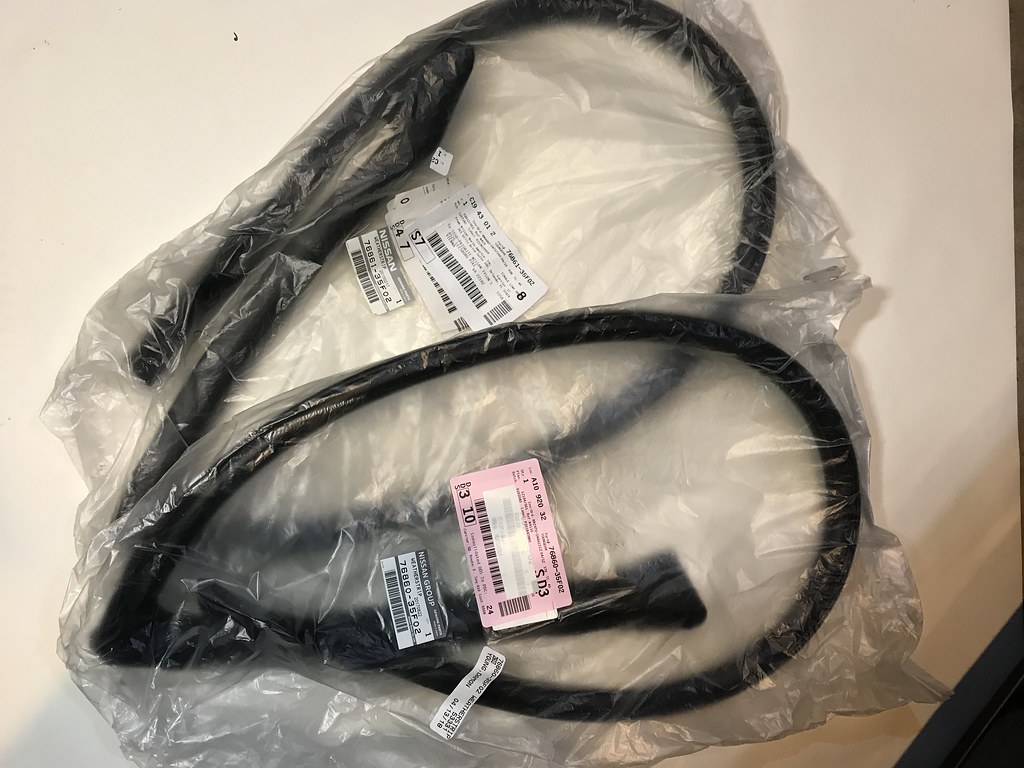
The second one begins at the side view mirrors and wraps around the outside edge of the door, sealing the door against the door jam.

The next piece of weatherstripping I tracked down was for the sunroof. This seal mounts on the interior of the car and includes a portion that should match the color of your headliner. If you have a leaky sunroof, there is a chance this is likely the culprit. This is one piece that could be installed without painting the car, but I’ll likely just wait and do it all at once.

The upper portion of this seal is the weather strip, while the lower portion overlaps and matches your headliner. It is sold as one complete piece.

At the back of the car there is a large rubber weatherstrip that runs around the opening for the rear hatch. I get a decent amount of water back here when it rains, so I am pretty confident that mine is completely shot and should be replaced. While the wait is going to be difficult, it will make all of the leaks and other issues much more bearable knowing that a solution is stored away in my garage when the time comes.

The lower half of the rear hatch weatherstrip can be seen here. It spans the entire rear hatch opening from top to bottom.

The last two pieces I chose to replace are often overlooked. Did you know there are actually two pieces of weatherstripping located under the hood? One is attached to the hood itself and the other is located on the cowl. I replaced the cowl seal back when I got my car in 2008, but decided it would be good to replace it again so everything is in new condition at the same time. The hood seal was missing from my car altogether so this will be a nice addition. Both of these were discontinued stateside so they took a bit of work to track down.

The cowl seal. Plenty of other items to address in this photo in a future cowl/underhood post.

There should be a seal here that runs along the perimeter of the leading edge of the hood and mates with the front core support when the hood is closed. My seal and clips are still on the way, but I’ll provide photos when they arrive.

I was initially stressed out about attempting to restore these items, but with a lot of patience and a bit of luck it really hasn’t been too bad to track all of them down. I’m looking forward to snapping all of these into place on a freshly painted chassis one day in the future.

Damon

Thank you for stopping by! As always, if you have any questions or want to know more about anything mentioned in this post, feel free to leave a comment or shoot me an email at Damon@camryonbronze.com and I’ll do my best to help.

Posted in Uncategorized | Leave a comment

Molding Madness

The condition of the moldings (or trim as it is often referred to) on my S13 is one of those things I have never really noticed or paid much attention to over the years. I guess that way of thinking was helped by the fact that most of mine are in relatively decent shape being that this car has spent the majority of its life in the midwest where sun damage is not really an issue. It wasn’t until I traveled a bit and saw some of these cars residing in Southern states that I began to notice these details and how amazing a 240SX can look when these items have been replaced with brand new ones.

Once I began to pay closer attention to the moldings on my car, I couldn’t get the blemishes out of my head. I knew that if I was ever going to paint this car, I would have to replace the moldings as well- all of them. Fresh paint looks great, but it only makes the flaws with your trim that much more noticeable. With a hunch that most of these items were currently or soon to be discontinued, I decided there was no time like the present to begin my search.

Since my windshield molding is in the worst shape, this is where I started. After some research I ended up ordering the OEM Nissan reveal molding, reveal molding retainer, and glass dam. Based on my understanding of windshield installation, these are the components needed to install a new windshield properly with genuine Nissan components. I learned recently from a friend that most glass shops can install a generic rubber molding strip that is much more cost effective and doesn’t look bad by any means, but I am OCD and let strange things like this bother me for some reason. My windshield has been covered in chips for years so I am looking forward to the day that I can install a brand new one with these moldings.

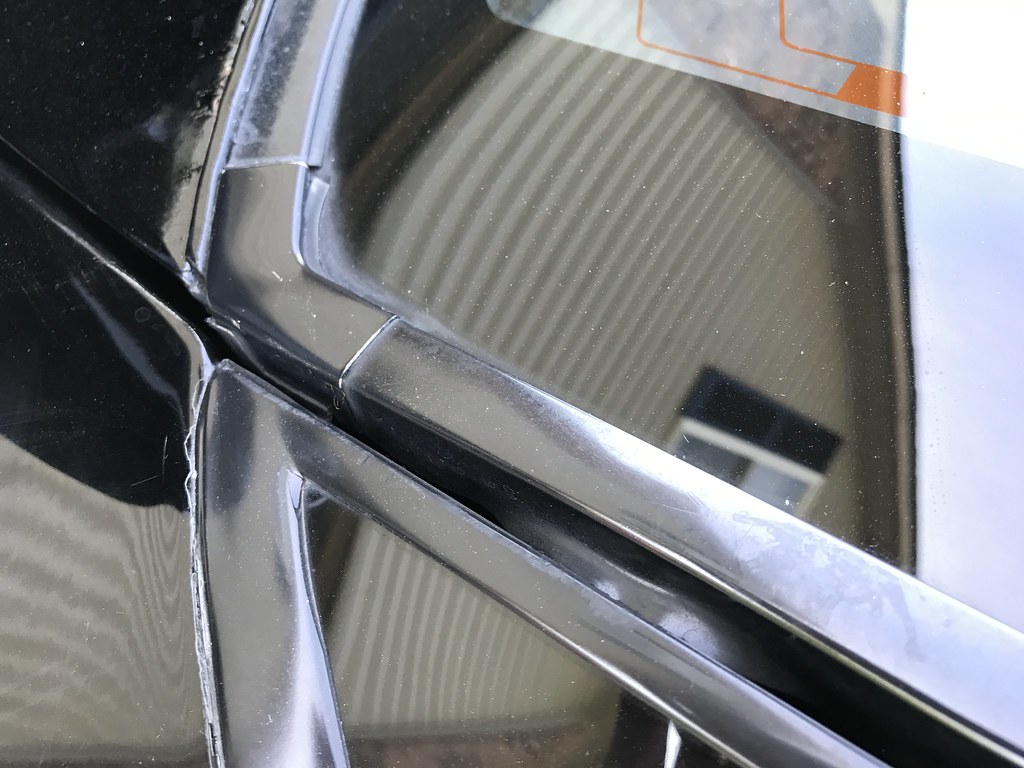
Discolored reveal molding and a brittle molding retainer that’s losing its shape (which has resulted in rust forming along the roof.) This area is what sparked my desire to attempt restoring the car.

I decided to work from the front of the car to the back meaning that the side windows were next. I started by finding the moldings located at the bottom of the windows known as the belt weather strip. You probably know these as the little piece of rubber that has been flapping in the breeze on your door since you bought your S13- I know mine have! Nissan must have revised these at some point down the line to remove that little piece of rubber where it extends past the glass. Hopefully this helps them last longer this time around.

There’s a long piece of metal that runs along the upper portion of the glass on the roof known as the weather strip retainer. These would probably be easy enough to repaint if yours are in good condition, but they do feature a small piece of rubber where they meet the rear quarter glass. Mine have several dings and stone chips in them, so I elected to replace them entirely. You won’t be able to find these anymore stateside unfortunately, but it is still possible to get them if you do your research.

The small rubber portion of the weather strip retainer where it meets the rear quarter glass. There is a similar strip of rubber at the bottom of the A pillar near the fender.

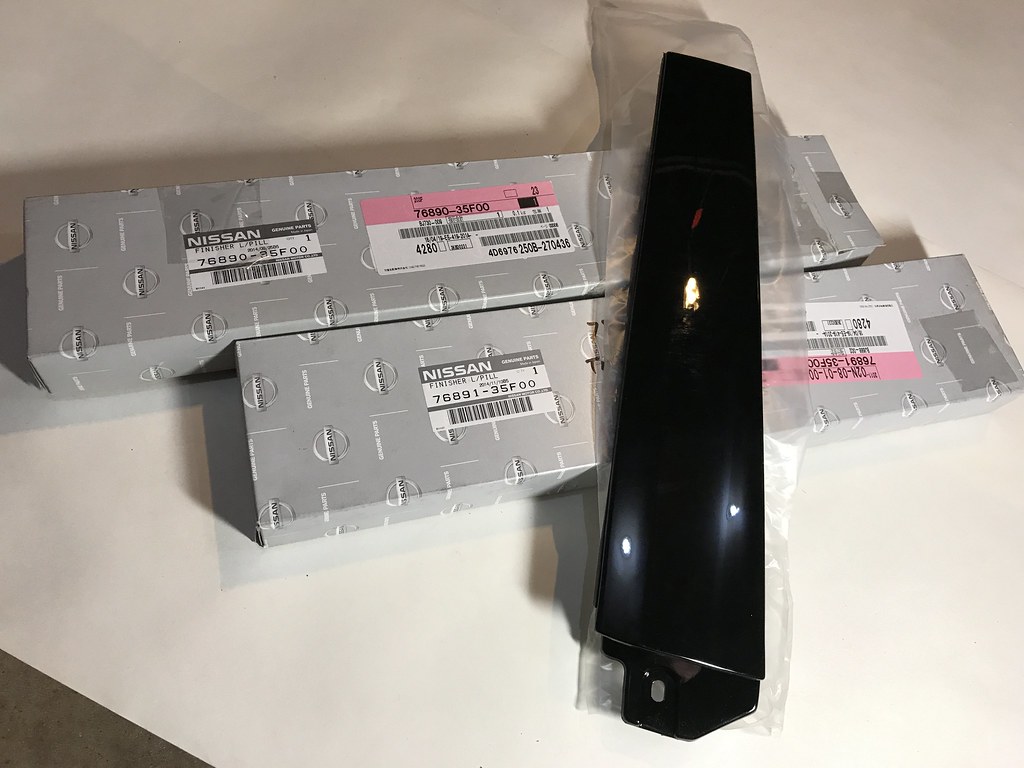
I am really excited about the next item I was able to get my hands on- the B pillar covers. Mine have looked terrible for a long time now and I have always debated painting them, but for whatever reason I have left them alone. Fortunately I was able to source brand new units from Nissan. The contrast between the used ones on my car and the brand new pieces is pretty wild. The only bummer about these is that they scratch incredibly easily- so much so that mine were scratched slightly in transit. Who knows how many times they have been shuffled around from warehouse to warehouse over the years. However, these will still be a huge improvement over my current ones and should really add a lot to the car when it has been repainted.

The B pillar covers have taken lots of abuse over the years.
Another molding of mine that has been cracked and damaged since I bought my car in 2008 is the glass panel spacer surrounding the sunroof. I had always assumed that these could not be purchased new, so I never even bothered to try fixing it until recently. Thankfully this is one of the more affordable moldings out there and it isn’t too hard to track down here in the states. I’m told that replacing this piece is pretty difficult and some sot of adhesive is recommended, so we’ll see how it goes when I attempt it. I have been considering replacing this seal now before the car is painted since the sunroof glass is easily removed for paint, but we’ll see- I might hold off and do everything at the same time. Sidenote- I have sourced lots of other replacement components to restore the sunroof that I will detail in a future post.

This piece has been flapping in the breeze for nearly a decade. Also note the blemishes on the sunroof hinge- more on addressing that and other sunroof components in a future post.

Making our way around to the back of the car, the next molding to address is the one surrounding the quarter glass. Unfortunately this one is virtually impossible to replace as my research has taught me that Nissan never sold the molding on its own- it was only available when purchased with the complete glass. Since the quarter glass is very expensive and discontinued, this does not leave many options. I may need to try some SEM product here to revive them a bit- even though mine are actually in fairly solid condition. I might have a trick up my sleeve for these though- we’ll have to wait and see how things shake out.

Finally, the last molding on the car is the rear hatch glass reveal molding. This one is not for the faint of heart and has been discontinued here in the states. Mine is in pretty rough shape with peeling paint and some areas where it has been bent over the years, so this was another must-have for me. I ended up sourcing the reveal molding as well as the lower molding retainer- a small rubber seal that runs along the bottom of the hatch separating the glass and the metal of the hatch itself. Mine was painted over at some point and has become a source of rust, so it will be great to repair this someday when the car gets painted.

Good from far, far from good.

Close up shot detailing the bottom of the rear hatch molding where it meets the quarter glass. You can see the hatch molding is bent, chipped up, and in rough shape. The clearcoat is peeling where the body meets the quarter glass molding.

The lower molding retainer is a small rubber strip that runs between the reveal molding and the metal hatch area. The body shop painted over mine at one point when my hatch was painted and it’s now beginning to crack in several places. You can also see that it has never been wet sanded…

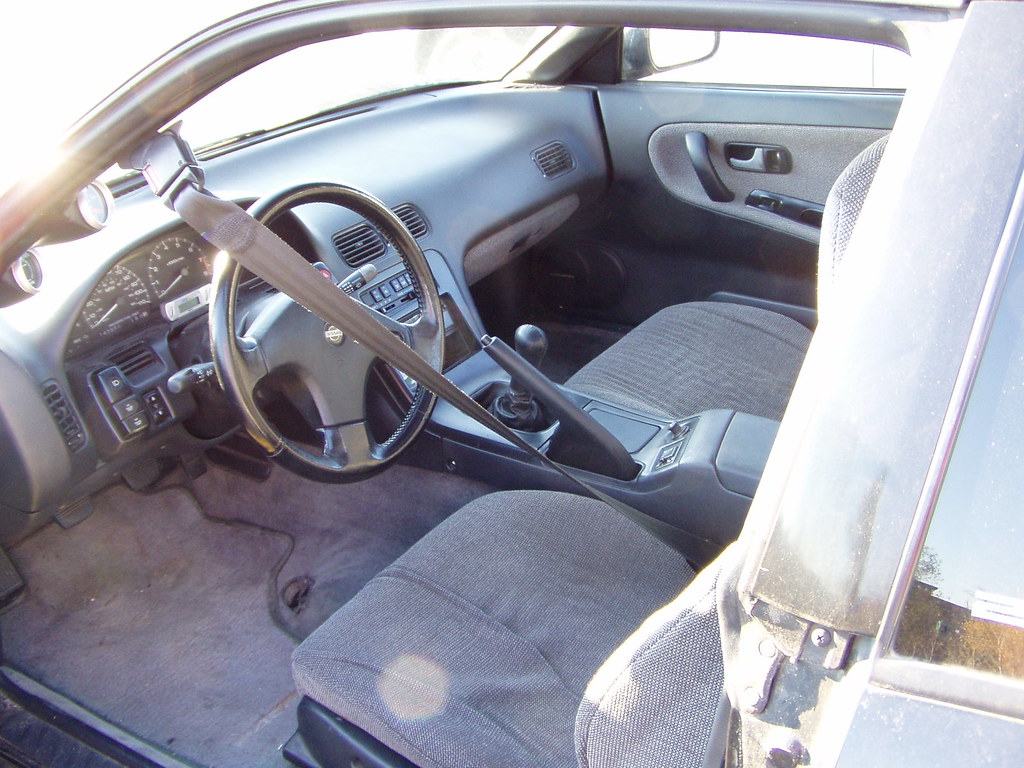
Window moldings are one of those things that are not cheap or easy to replace and will likely not be noticed by most. However, for those of us with a case of major OCD, a proper paint job would not be complete without replacing them. It might be years before I am able to utilize them, but it feels good knowing I have these tucked away for when the day finally arrives. It’s likely that these will continue to slowly disappear as each item continues to be discontinued so I wanted to plan ahead and secure them all now for the future.

Thanks for stopping by!

Damon

Hopefully this information is useful and you’re enjoying these posts. If you have questions or want to know more, feel free to shoot me an email at Damon@camryonbronze.com and I’ll do my best to help.

Posted in Exterior, Moldings and Trim, Restoration | 3 Comments

Interior Restoration – Part 1

I’ve decided to embark on a years long restoration of my S13, as opposed to continuing to make further aftermarket modifications. I will attempt to provide helpful information for other members of the community should they also decide to follow this pursuit. I hope to publish new content every Friday at Noon EST. This is the first of such posts- more to come!

Interior improvements have always been one of my favorite aspects of building my S13. I remember thinking in 2008 when I bought my 240SX that it was going to be pretty tough to save it, but by today’s standards I was actually dealt a pretty good hand.

 My S13’s interior when I bought it circa November 2008.
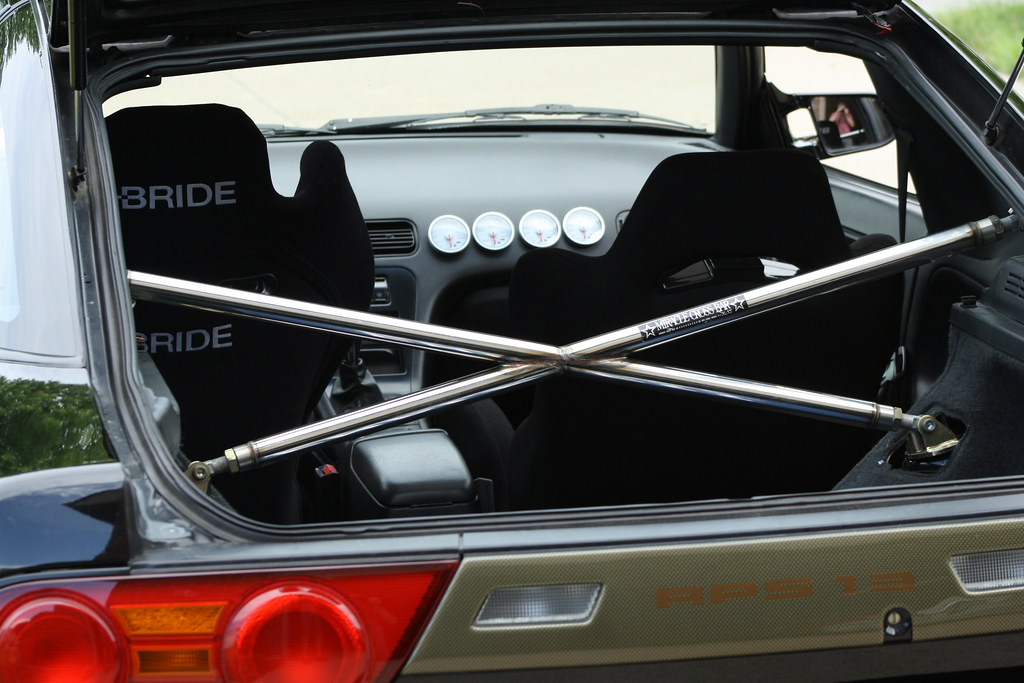
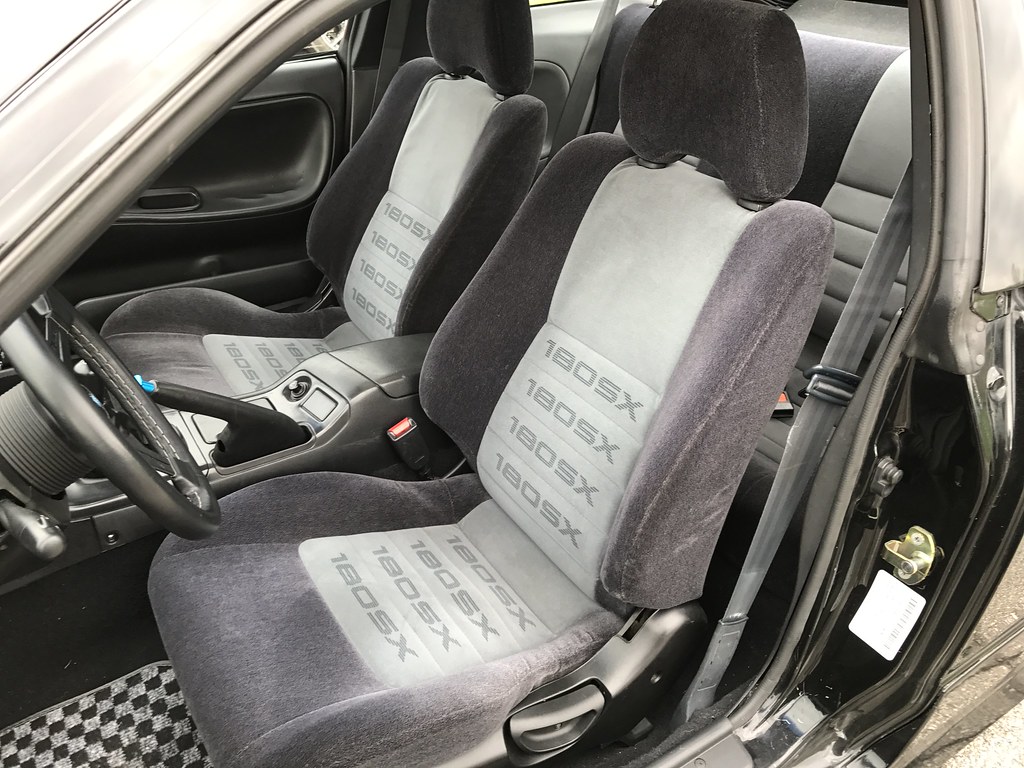
My interior has been through numerous iterations over the years ranging from tame to wild. In 2016 I went back to kouki 180SX seats (after running a set in 2010 and most of 2011) and reinstalled the rear seatbelts I had removed many years prior to allow my two daughters to ride in the car with me. The convenience of a set of factory seats was great, but I ended up returning to a Bride Maxis and Brix combo with a NeXt Miracle Cross Bar for the 2017 season. My daughters were bummed they couldn’t ride in the car anymore, but my wife and I were expecting our third daughter at the time and I figured we wouldn’t really use the car for that purpose much anymore.

Fast forward to this spring and I was itching for a more convenient solution again. My oldest daughter is in kindergarten now and I wanted to be able to drive her to school in my S13. I also wanted to begin restoring the car and needed to free up some funds to do that, so it made sense to sell some of my interior items like the Bride seats to make the switch. My good friend Liam brought over a clean set of 180 seats from a car he was parting out in Canada which was a huge help. After cleaning them up a bit I installed them and have been enjoying them for about a month or so now.


I attempted to source new plastic covers for the rear seat bolts and sliders from Japan as they have been discontinued here in the states, but I found that unfortunately they aren’t available overseas anymore either. Thankfully a couple people from Instagram offered to send me theirs. It’s really cool to have small details like this that have been missing from my car for years.
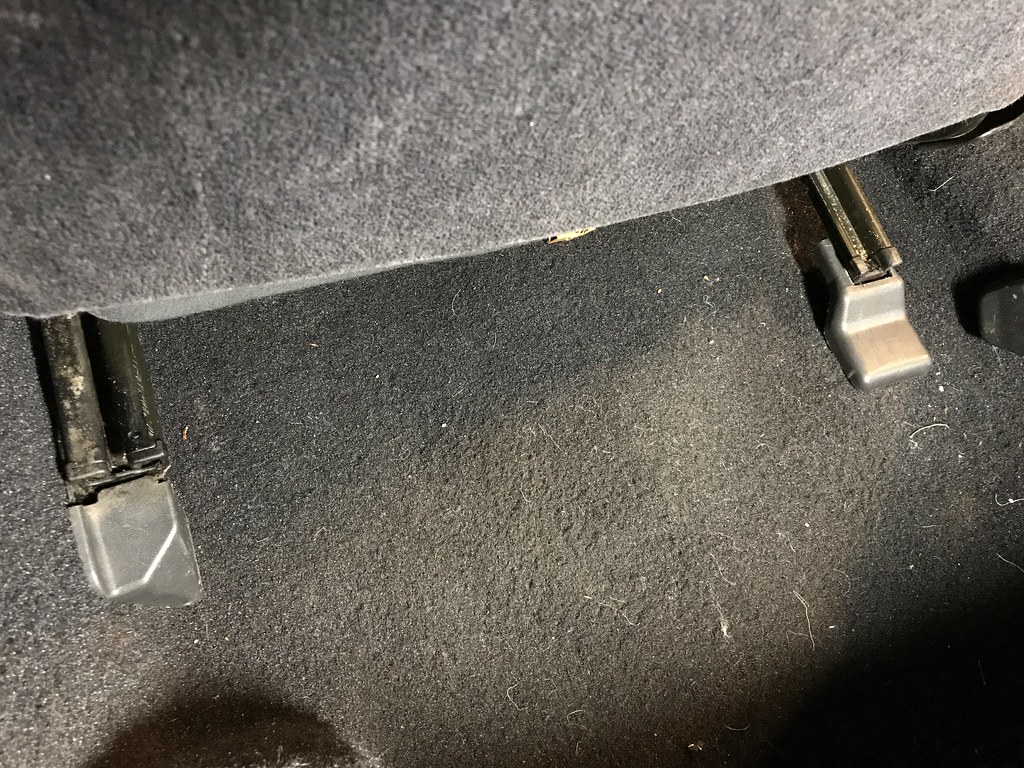
I think my next interior modification should be cleaning it…
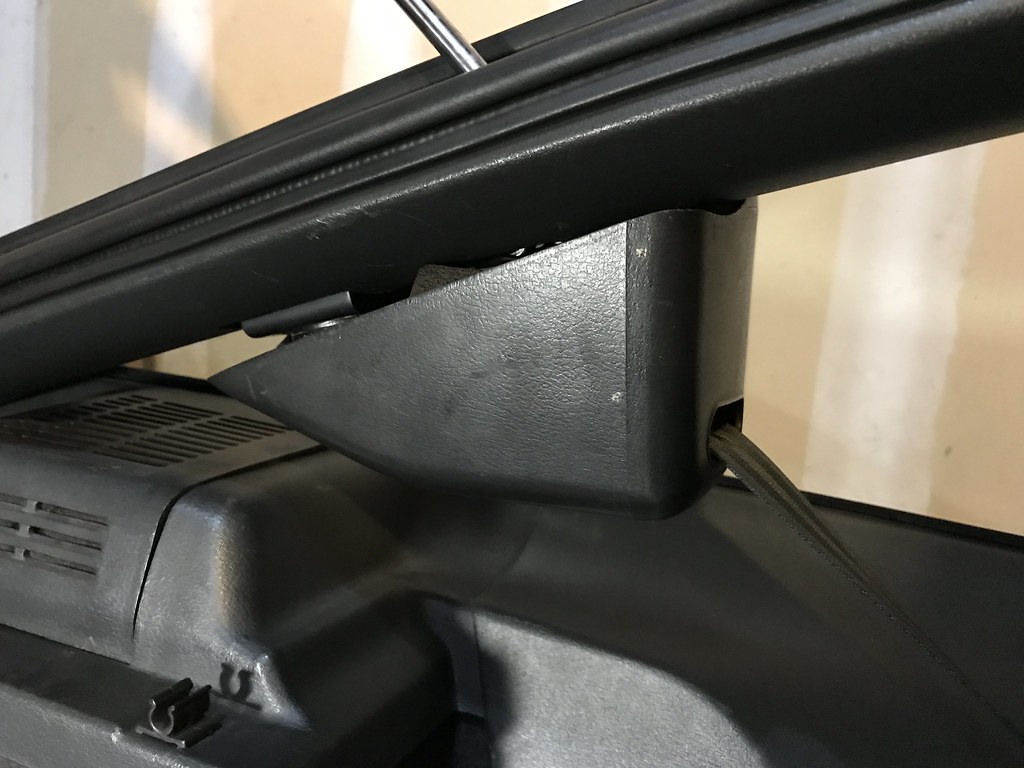
I wasn’t sure how to get the rear seatbelt covers to stay in place. It had been close to a decade since I removed them and I couldn’t remember what they were held in place with. Thankfully I found the part number (84995-75N10, you will need four total) and was able to order replacements. They’re now held securely in place. It has been really fun to take my two older daughters around town in my car again this spring. I’ve said it many times before, but I think this configuration is here to stay. Like they say about kouki 180SX seats- the third time’s the charm, right?

One of the seatbelt covers refusing to stay in place.

Now held firmly in place with the new clips installed.
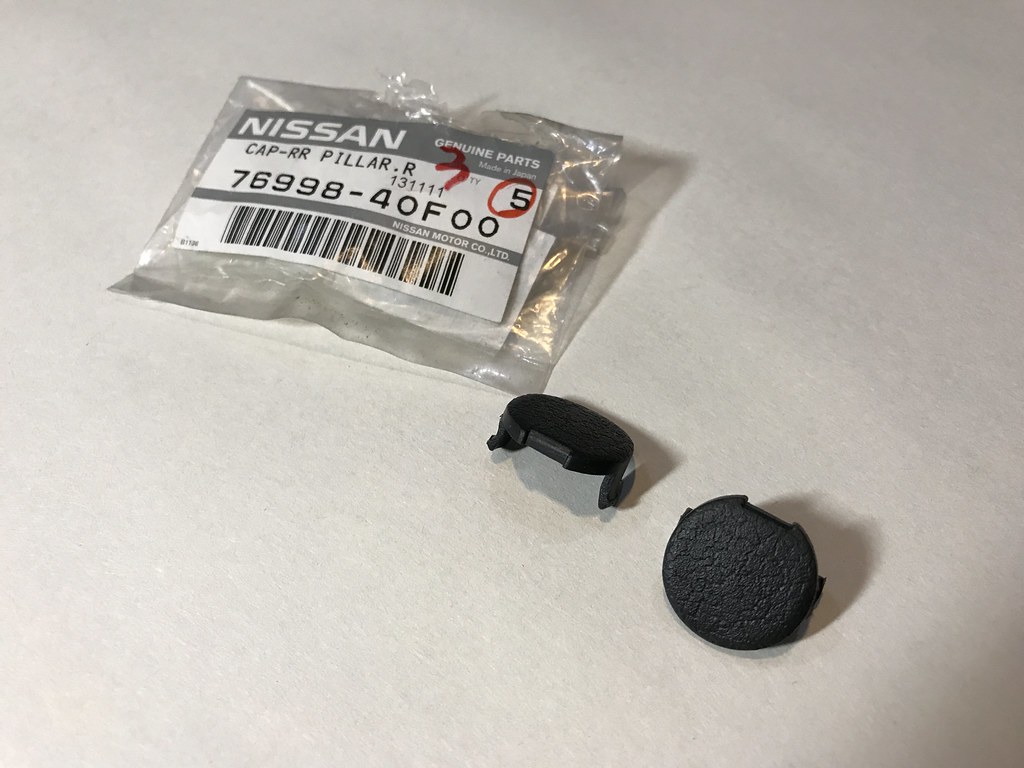
My 180SX seat belt setup was missing some screw covers, so I was able to source two of them from Japan (Nissan part number 76998-40F00). Unfortunately the other two are L/R specific and are discontinued, but I am hoping to get a hold of some from a 180 that a friend is parting out. Another small detail I thought was pretty neat. These seatbelts and headliner are one of the favorite things about my interior- really makes a difference when compared to the USDM auto belts.

The plug on the right is one of the above pictured items installed. The hole to the left is missing its cap but unfortunately these have been discontinued.

Another item I was really excited to get a hold of were the rear strut top hats and carpet covers for the hatch area. My car didn’t have these when I bought it and I found that both were discontinued. Thankfully the Instagram community came to my aid again and someone sent both to me free of charge. The carpet covers were black and didn’t match my rear panels, so I decided to remove my panels and dye them black with DupliColor fabric spray. I’ve been considering this for years and was hesitant, but I am glad I finally went through with it. I’ll miss my Miracle Cross Bar as it is one of my absolute favorite parts for this car, but rear seatbelts are more important to me at this juncture. This also allows me to run my OEM privacy cover which I am in the process of sourcing some new OEM installation hardware for- more on that in a future interior post.


While browsing eBay one day, I stumbled upon a pretty neat part I had not seen before. My S13 is an SE model meaning that it came with power mirrors, but for some reason they haven’t worked for a number of years. I am usually running Ganador or East Bear mirrors anyway, so this hasn’t really been an issue for me since even if the power adjustment worked I wouldn’t be able to see very well out of mirrors designed for a RHD car. I thought the block off plate for base model cars without power mirrors looked pretty clean, so I decided to give it a try. I am actually running non-power OEM mirrors at the moment, so it compliments those nicely.

Still some items to address in this photo- all in due time!

At some point down the road I would like to install OEM power mirrors again and figure out why they aren’t working- I’m even considering installing 180SX power folding mirrors at the same time. But for now, the mirror block off plate is a neat option. It’s still available stateside as it works for numerous applications. The part number is 68493-01F02.

One of my favorite things I managed to track down this winter was the windshield wiper and turn signal stalks. Every S13 owner knows these are notorious for fading and just generally looking gross. I picked up a used pair to replace mine shortly after buying my car, but they still weren’t quite perfect. I decided to do some research and found that both items can still be purchased new. The windshield wiper stalk can be ordered through Nissan. The turn signal stalk is a bit tricker as it has been discontinued by Nissan, but I found the identical unit for sale through Rock Auto. I was skeptical about using what I thought was a non-OEM stalk, but it’s completely identical in every way including the brand name on it and part number- it’s just not purchased directly through Nissan.

Quick Sidenote: If you find replacing the stalks with new units to be a bit too pricey, my good friend Ron at RestoMod Ninja sells replacement water slide decals to allow you to restore your current stalks. He also offers instructions on his website www.restomod.ninja Huge hat tip to Ron and everything he is doing for our community!

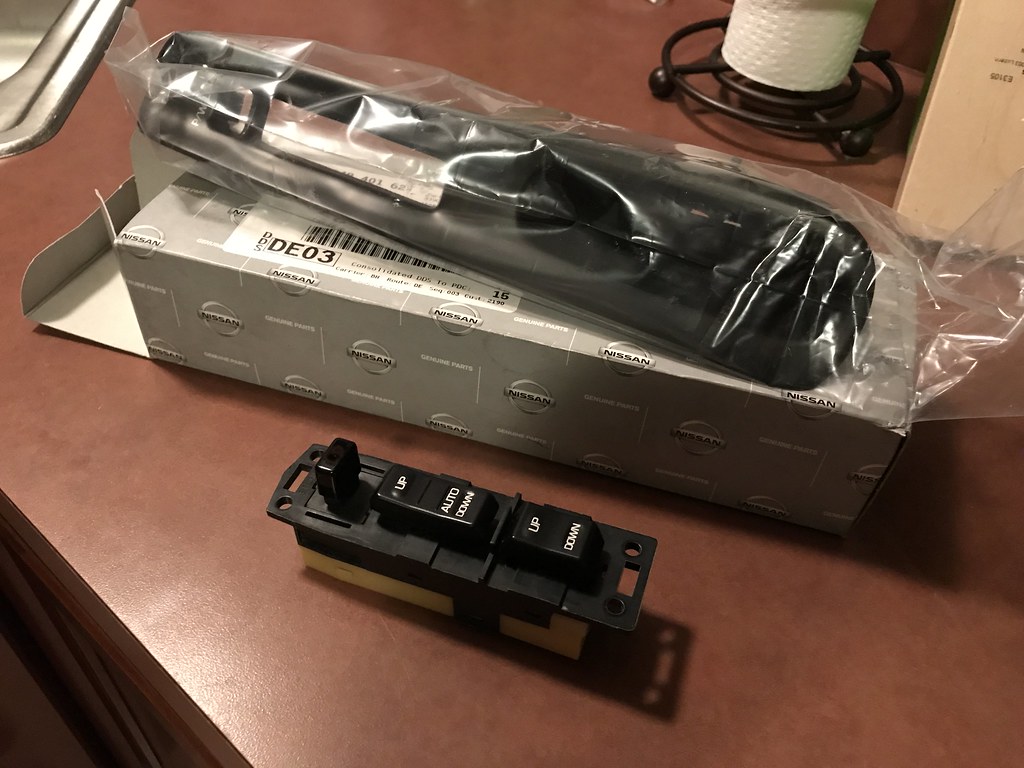
While replacing my window and turn signal stalks, Ron reached out to me and offered to send me a pair of restored window switches with his custom waterslide decals installed in exchange for my old, worn down units that he could use as a core. I highly recommend his decals and refinishing instructions- it’s crazy that these are what the buttons used to look like! And since I believe the window switches are discontinued stateside, this is really the only option at this point (since 180SX window switches are tailored for a RHD configuration and cannot be used without extensive modification.)

I also elected to replace my window switch bezels with new Nissan units. Truth be told, I bought the passenger side back in 2012 and fortunately it came back to me when I bought the chassis back in 2014. Unfortunately, the passenger side bezel has been discontinued, but the driver’s side was still available new. The bezels have a matte textured look, as opposed to the smooth and glossy finish they develop after years of use. If you’re stuck with what you’ve got, SEM Color Coat is a great spray paint solution for aging interior trim that has held up well in my experience.

The door panels will be addressed soon- stay tuned for a future interior post.
The interior item I am asked about the most is my replacement carpet. I think the word is more or less out there at this point, but for those that may not know I sourced my new carpet from Stock Interiors. They offer it in numerous colors and options. I originally replaced my aging factory carpet with this when I bought the car in 2008, but ended up replacing it again last fall as mine had seen a fair amount of abuse including holes cut for a roll cage and other items I no longer have. I nearly went with a gray color this time around to more closely match the factory carpet, but couldn’t stay away from the simplicity of black. I don’t think it was ever offered as an S13 carpet color, but this is one of those deviations that I am more than comfortable with. The carpet comes untrimmed and it takes a while to properly trim it and make all of the holes for your accessories to bolt in, but it is more than worth the cost and effort. The carpet in most S13s has been destroyed at this point. (Pro tip: be sure to keep the plastic retainers from your factory carpet and transfer them over- learn from my mistakes.) They also offer matching floor mats on their website- look for some content about those in a future interior post as I plan to forgo my checkered floor mats in exchange for something more subtle soon.

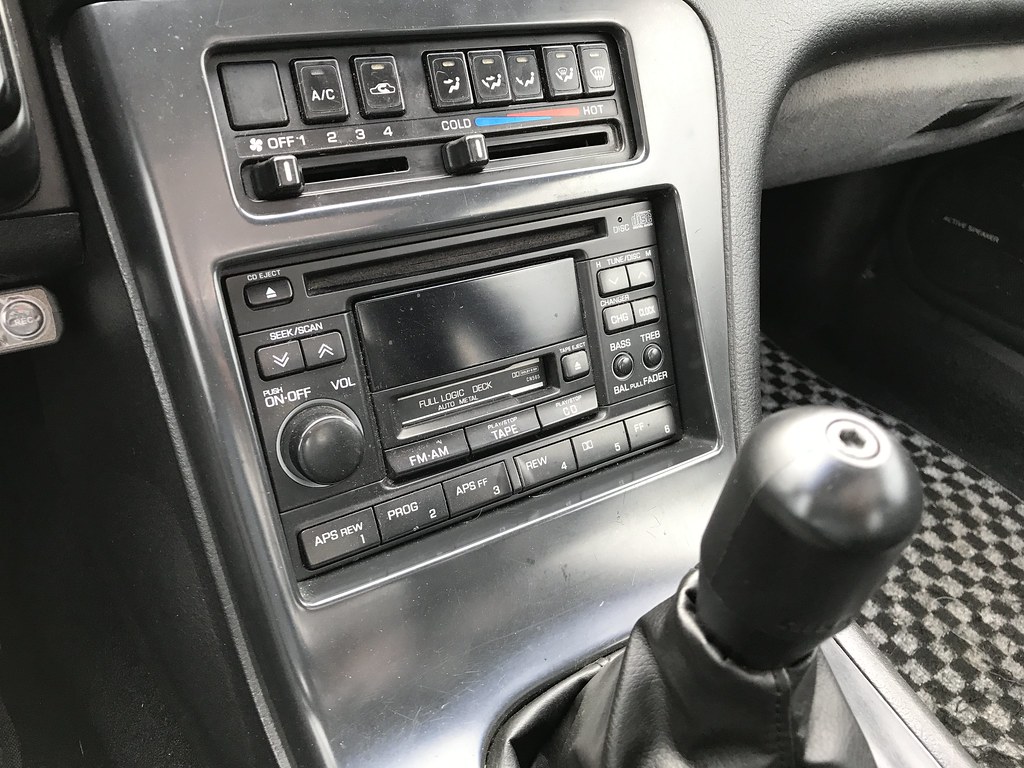
Lastly, I decided that a shift knob change was in order to match the more factory appearing interior look I am going for. I’ve been using a TRUST shift knob lately and really like it, but I thought a duracon NISMO GT knob would be a better fit. This shift knob holds a special place in my heart as it was the first shift knob I purchased when I bought the car in 2008. I’ve owned a couple over the years and was really bummed to see it had been discontinued when I tried to buy one again- even in Japan. Fortunately I found a fellow enthusiast through- you guessed it, Instagram- that was willing to let his brand new one (without packaging unfortunately) go. It’s much lighter than the TRUST knob which took some getting used to, but I really like the look of it.

More details on the kouki 180SX (Maxima head unit) in a future interior post.

The NISMO GT knob adds a subtle upgrade to the interior.

The factory shift boot was sagging a bit with this shift knob compared to the TRUST one, so I ended up wrapping some 3M double sided tape around the shifter below the boot to keep the boot in contact with the shift knob- a trick I learned from a Honda forum. Although the duracon version is discontinued, the titanium version is still in production- albeit it a bit more expensive.

I think that just about covers my most recent interior restoration efforts. I am feeling really good about it at this point, I’ve just got a few more details I would like to address. At this point the white face Defi gauges are sticking out like a sore thumb considering the rest of the interior is more or less factory appearing, so it may be time for those to go. I’ve got a number of missing screws and clips on the way as well to really button things up- some of which have been absent for years. Look for that info and more in a future interior installment.

Feel free to comment and let me know if you find this information useful. My primary goal is to document my build information for my own personal reference, but I also hope that it will assist other members of the community with their own builds. I am always open to questions! Feel free to drop me a line at Damon@camryonbronze.com

Posted in Interior, Restoration | 14 Comments

A Changed Perspective

If the projects I chose to undertake this past winter have taught me anything, it’s that shifting my focus from modifying my S13 to restoring the aging chassis is a shift in the right direction. Lately I’ve found more enjoyment in scouring the ends of the internet looking for the necessary OEM Nissan components to bring my 25 year old S13 back to its former glory than I have trying to think of changes to make or aftermarket components to add. Maybe it’s just a reminder that I am getting a bit older, but preservation has become my top priority.

Since my last update in late January, I have managed to get the car more or less buttoned up and enjoy driving it a bit as the spring weather has finally decided to arrive here in Michigan. After finishing the Dynamat install and HVAC install, I got the car put together and began driving it a bit in mid-March. I would typically not drive the car so early in the season, but having functioning heat has made cruising around much more bearable- as long as there isn’t too much salt on the roads. The Dynamat made a noticeable difference in all of the noise often associated with driving an S13. It’s still far from silent and I still have a lot of noises to track down eventually, but overall it was worth the extra effort and cost to install it.

I’ve mostly been cruising around town locally as I am not away from my family that often and my commute to work is about a mile, but the car seems to be running well. I drove it out to visit my friend Tim about 1.5 hours away last month to check out his current S13 build- the first major drive of the season. On the way home I noticed a strange misfire that had me concerned, but a set of fresh spark plugs cured the issue.

I’ve done a great deal of research over the last four months to begin to understand and track down items to hide away for when the day finally comes that I can repaint my car. Painting my car has been a goal of mine for nearly a decade, and unfortunately it’s not something that will likely happen in the next year or two- but it is going to happen at some point. Repainting this car is something that I would prefer to do only once in this lifetime, so I want to ensure that it happens when the timing is right and with an experienced painter that has a an eye for detail. It’s going to take a long while for all of the cards to fall into place, but it will be very rewarding when it finally does.

In researching all of the components that were still available from Nissan and beginning to understand the scale of this undertaking, I decided to part ways with my Bride Maxis and Brix. I loved both of these seats, but they just didn’t really fit in with my current vision for the car. The market value for older Bride seats has also become pretty favorable to the seller, so it made sense to part ways with them to get the ball rolling on my restoration. I sold both to good homes and began ordering replacement moldings and weather stripping for the car. I’ve since replaced them with another set of complete front and rear kouki 180SX seats from my friend Liam in Canada- more on that in a future post.

I’ve managed to source a good amount of the items I would like to replace after the car is painted but still have more to collect. It has been a painstaking process to hunt down part numbers and stock for so many individual components, but it’s pretty exciting when each new discovery is made. I’ve always been one to enjoy the process (sometimes more than the end result) so it has been a lot of fun for me.

I’ve been documenting the whole process but have been torn on how much information I want to share. It’s a difficult position to be in at times as I truly love these cars and want to ensure that the community around them remains intact, but I also feel that there aren’t many people left with the same passion for the S13. I am growing older and the world around me is evolving, sometimes in a way that makes me feel like an old man. In a sea of YouTube and Instagram hopefuls, it’s easy to feel like a lot of people aren’t in it for the right reasons anymore. While this might not be the case, I am hoping to pull away from the social media aspect of the scene a bit in the months ahead and focus my efforts on what I have enjoyed the most all along- writing and documenting my build progress here, on a blog/build thread hybrid sort of platform. The audience will be much smaller but I think it might be much more rewarding for me on a personal level.

Quick Sidenote: I suppose that I should note that the whole YouTuber thing isn’t necessarily bad- it’s just different than what I grew up around- and different can sometimes be frustrating. There is definitely value in it as well as things like Facebook and Instagram, I’m just feeling a push to distance myself from it right now if I can. There’s no denying that Instagram has been instrumental in helping me find and sell parts, as well as answers to questions I have had for people in the Nissan community. It is definitely a force that can be used for good- I just believe strongly in the written word and putting forth a bit more effort by documenting my car in a build thread as opposed to quick posts on social media that will likely someday be lost.

It’s easy to want to hoard all of the information and part numbers I have gathered. I spent the time and put forth the effort to find all of this information, so why should I spoon feed it to others? This is a dangerous mentality to develop. At the end of the day all of the info I have gathered is available here on the internet, it just takes time and patience to find it all and execute on it. I’ve always tried to help anyone that reaches out to me with questions about these cars over the years as I feel it is the best thing for this community, so why stop now? Sure, it can be tiring to answer the same questions from time to time, but I’m sure I would not know nearly what I do now about this chassis without the people that were willing to help me along the way.

That being said, hopefully there’s interest in the journey I am about to embark on- but at the end of the day, my goal is to do it purely for personal satisfaction. My hope is to update the site every Friday with new information as I find it, I just need to think of the best way to organize the content in a manner that makes sense and ensures it is as organized as possible for future reference. I hope to create something of value for the people out there that love the S13 chassis as much as I do and help to preserve them for future enthusiasts to enjoy and appreciate.

Thanks for sticking around through this rambling post. Looking forward to getting back in the swing of this if I can!

Damon

Posted in Uncategorized | 6 Comments